As an Amazon Associate I earn from qualifying purchases.
In the rich tapestry of Indian cuisine, few desserts hold a place as cherished and revered as kheer. As the sweet notes of cardamom and saffron waft through the air, and the creamy, aromatic concoction simmers on the stove, kheer signifies more than just a sweet treat—it embodies the heart and soul of Indian culinary traditions.
Kheer, also known as Indian rice pudding, is a dish that has graced the tables of families and communities during festivals, celebrations, and everyday meals for generations. Its simplicity in ingredients—rice, milk, sugar, and a medley of nuts and spices—belies the complexity of flavors and the sheer comfort it brings.
In this culinary journey, we delve into the art of making kheer, exploring its history, regional variations, and the subtle nuances that transform it from a basic dessert into a culinary masterpiece. From the choice of rice to the meticulous process of slow-cooking and flavoring, every step in creating kheer is an homage to tradition and a testament to the enduring love for this dessert.
Join us as we uncover the secrets of making the perfect kheer, a dessert that transcends time and borders to evoke the warmth of home and the sweet memories of gatherings with loved ones.
Kheer Recipe
Kheer is a beloved Indian dessert that is essentially a creamy rice pudding. It’s made by simmering rice in milk until it’s cooked to perfection and has absorbed the rich flavors of the milk, sugar, and aromatic spices like cardamom. The addition of saffron and a medley of nuts and raisins lends a delightful depth of flavor and texture to this classic dish. Kheer can be enjoyed warm or chilled, making it a versatile dessert that’s perfect for celebrations, festivals, or simply satisfying your sweet cravings with a taste of India’s culinary heritage.
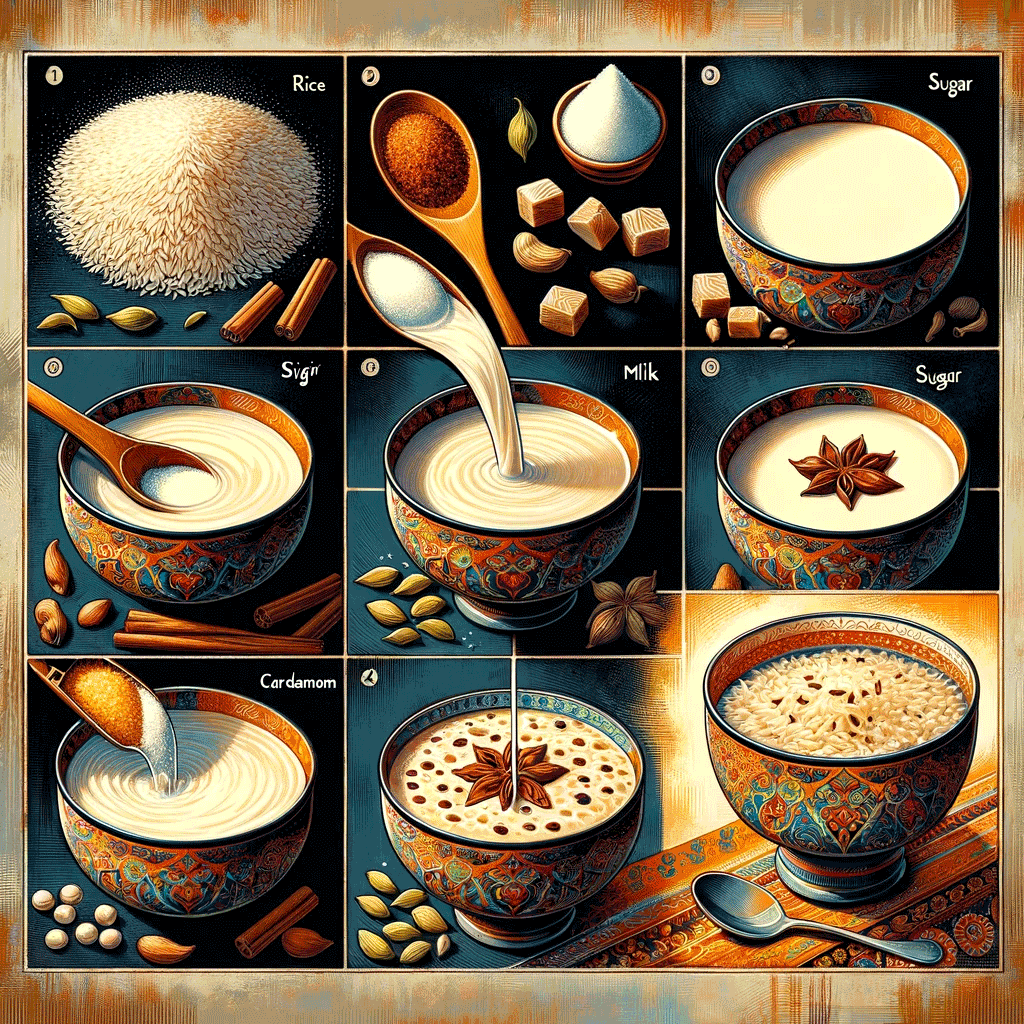
Kheer, a classic Indian dessert, is a type of rice pudding made with milk, rice, sugar, and flavored with cardamom, saffron, and/or dried fruits and nuts. Here’s a simple recipe to make this delicious and comforting sweet dish:
Ingredients:
- 1/4 cup basmati rice
- 1 liter full-fat milk
- 1/2 cup sugar (adjust to taste)
- 1/2 teaspoon cardamom powder
- A pinch of saffron strands (optional)
- 2 tablespoons mixed nuts (almonds, cashews, pistachios), chopped
- 2 tablespoons raisins
- Silver leaf for garnish (optional)
Instructions:
- Rinse the Rice: Wash the basmati rice under cold water until the water runs clear. Soak the rice in water for about 30 minutes, then drain.
- Boil the Milk: In a large, heavy-bottomed pan, bring the milk to a boil. Stir continuously to prevent the milk from scorching at the bottom.
- Add Rice: Add the soaked and drained rice to the boiling milk. Reduce the heat to low and let it simmer. Stir occasionally, scraping the sides of the pan.
- Cook the Mixture: Continue to cook the mixture on low heat until the rice is cooked completely and the milk has thickened. This might take about 45-60 minutes.
- Add Sugar and Spices: Once the rice is soft and the mixture has thickened, add the sugar and cardamom powder. If using saffron, dissolve it in a tablespoon of warm milk and add it to the pan. Stir well.
- Add Nuts and Raisins: Add the chopped nuts and raisins to the kheer. Simmer for another 5-10 minutes.
- Check Consistency: The kheer should have a creamy consistency. It will thicken more as it cools.
- Garnish and Serve: Garnish with more nuts or a silver leaf. Kheer can be served either warm or chilled.
Kheer is a versatile dessert that can be adapted to various tastes. You can adjust the amount of sugar, types of nuts, and the choice of spices according to your preference. Enjoy your homemade kheer!
TIPS:
To make the perfect kheer, follow these tips:
Choose Quality Ingredients:
- Use high-quality basmati rice for the best texture and flavor.
- Opt for full-fat milk to achieve a creamy consistency.
Rinse the Rice Thoroughly:
- Rinse the rice under cold water until the water runs clear to remove excess starch. This helps prevent the kheer from becoming too thick.
Soak the Rice:
- Soak the rice in water for about 30 minutes before cooking. This reduces the cooking time and ensures even cooking.
Keep Stirring:
- Stir the kheer frequently to prevent the rice from sticking to the bottom of the pan and to ensure it cooks evenly.
Control the Sugar:
- Add sugar gradually and adjust it to your taste preferences. Remember that the kheer will become sweeter as it cools.
Use Aromatic Spices:
- Freshly ground cardamom adds a wonderful aroma to the kheer. You can also add a pinch of saffron for an extra layer of flavor.
Nuts and Raisins:
- Toast the nuts lightly in ghee before adding them to the kheer for enhanced flavor.
- Soak the raisins in warm water for a few minutes before adding them to the kheer to plump them up.
Simmer on Low Heat:
- Cooking the kheer on low heat is crucial to achieve a creamy texture. Be patient; it may take some time.
Consistency Check:
- The kheer should have a creamy but pourable consistency. It will thicken as it cools.
Garnish Creatively:
- Garnish the kheer with a variety of nuts, raisins, or even edible silver leaf for an impressive presentation.
Serve Chilled or Warm:
- Kheer can be served warm or chilled, depending on your preference and the occasion.
Storage:
- Store any leftover kheer in the refrigerator in an airtight container. Reheat gently before serving.
By following these tips, you’ll be on your way to preparing a delicious and creamy kheer that captures the essence of this classic Indian dessert.
Why This Recipe Is Just So Good…
Kheer is considered an exquisite dessert for several reasons, making it irresistibly good:
- Creamy Texture: The slow-cooked rice absorbs the creamy, thickened milk, resulting in a luscious and velvety texture that melts in your mouth.
- Rich Flavor Profile: Kheer is infused with the warm and aromatic essence of cardamom, saffron, and toasted nuts. These spices impart layers of flavor that are both comforting and indulgent.
- Versatility: While the basic recipe is delightful, kheer is highly customizable. You can add various ingredients like almonds, cashews, raisins, or even rose water to create your own unique version.
- Cultural Significance: Kheer holds cultural importance in Indian cuisine and is often served during festivals, celebrations, and special occasions, adding to its charm.
- Nostalgia: For many, kheer is a cherished childhood memory, evoking feelings of nostalgia and warmth.
- Simplicity: Despite its luxurious taste, kheer is made from simple and readily available ingredients, making it accessible to prepare at home.
- Comfort Food: The combination of creamy rice, sweet milk, and aromatic spices creates a comforting and soothing dessert, perfect for ending a meal on a satisfying note.
- Satisfying Sweetness: The sweetness in kheer can be adjusted to suit different preferences, allowing for a perfect balance of sweet without being overwhelming.
- Garnish Appeal: The garnishing of kheer with toasted nuts and edible silver leaf adds a visual appeal that makes it not just delicious but also visually enticing.
- Versatile Serving: Kheer can be enjoyed both warm and chilled, making it suitable for various seasons and occasions.
- Culinary Tradition: Kheer is part of a long culinary tradition in South Asia, passed down through generations, and each bowl carries the heritage of the past.
- Shared Joy: Sharing a bowl of kheer with family and friends fosters a sense of togetherness and shared joy, making it even more special.
In essence, the combination of its creamy texture, rich flavor, cultural significance, and adaptability makes kheer a dessert that is not just good but truly exceptional. Whether enjoyed as a comforting treat at home or served as a grand finale at celebrations, kheer never fails to delight the senses and leave a lasting impression.
Storage Instructions
To store kheer and maintain its quality, follow these storage instructions:
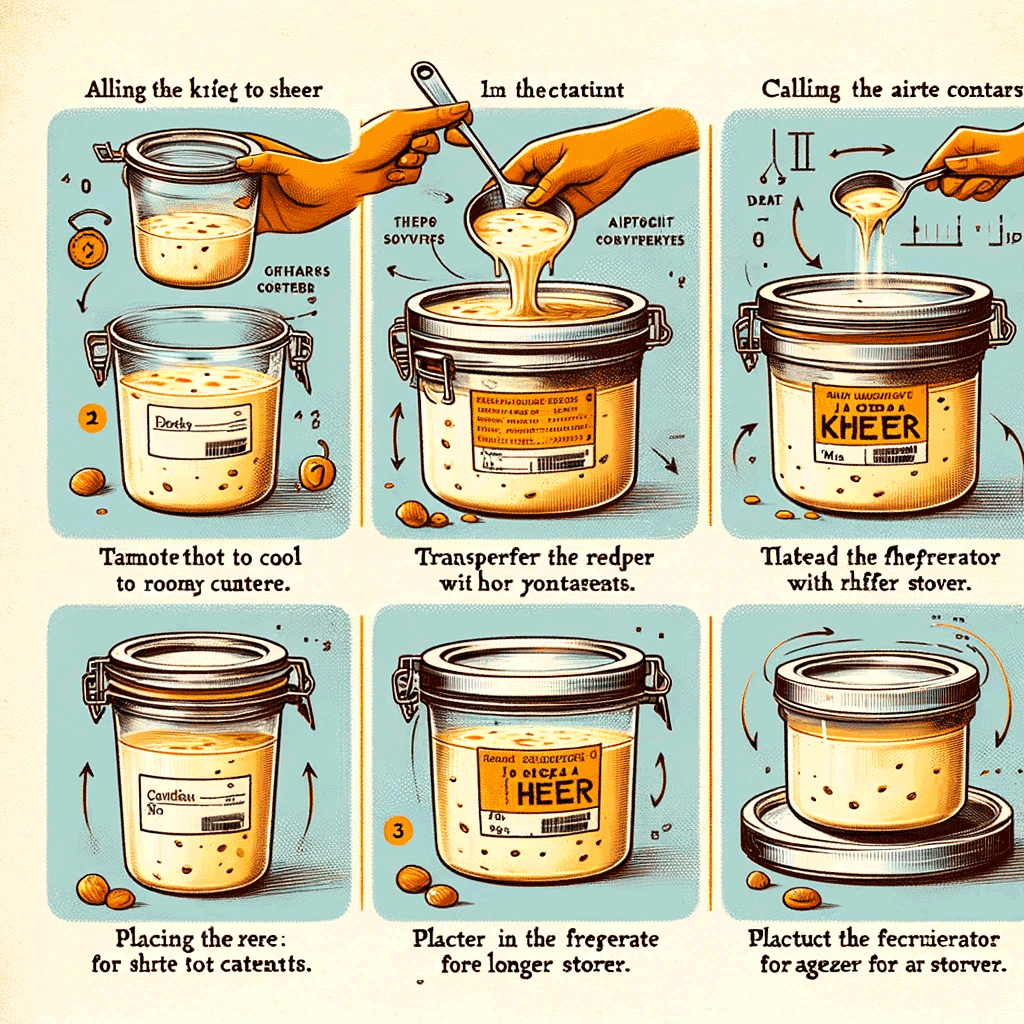
- Cooling Down: Allow the kheer to cool to room temperature after cooking. Storing it while it’s still hot can cause condensation in the container, which might affect the texture and flavor.
- Refrigerator Storage: Once cooled, transfer the kheer to an airtight container. This is important to prevent it from absorbing other flavors from the refrigerator and to maintain its freshness.
- Shelf Life in the Fridge: Properly stored in the refrigerator, kheer can last for up to 3-4 days. Ensure that it’s tightly sealed to retain its flavors and prevent it from drying out.
- Freezing (Optional): Kheer can be frozen for longer storage. Place it in a freezer-safe airtight container. It can be stored in the freezer for up to 1-2 months. To serve, thaw it in the refrigerator and then gently reheat.
- Reheating: If you prefer to enjoy kheer warm, you can reheat it in the microwave or on the stovetop. Add a little bit of milk to adjust the consistency if it has become too thick during storage.
- Serving After Storage: Before serving, stir the kheer well as separation of ingredients may occur during storage. If necessary, add a little fresh garnish to refresh its appearance and flavor.
- Check Before Consuming: Always check for any signs of spoilage, such as an off-smell or mold, before consuming, especially if the kheer has been stored for several days.
By following these storage guidelines, you can enjoy your kheer safely and deliciously over the days following its preparation.
Frequently Asked Questions (FAQ’s)
Here are some expertise-level questions and answers about making kheer, the traditional Indian rice pudding dessert:
Q: What type of rice is best for making kheer?
A: Basmati rice is the most commonly used rice for making kheer due to its fragrance and ability to absorb flavors, but you can also use other varieties like long-grain rice.
Q: Can I use pre-cooked rice for making kheer to save time?
A: While it’s possible to use pre-cooked rice, it’s not recommended as the cooking process helps the rice absorb the flavors of the milk and spices. Freshly cooked rice yields the best results.
Q: How can I prevent the kheer from curdling or splitting?
A: To prevent curdling, stir the kheer continuously while cooking and avoid adding cold milk directly to hot ingredients. Gradually add room temperature or warm milk to the mixture.
Q: Is it necessary to soak the rice before making kheer?
A: Soaking the rice helps reduce cooking time and ensures even cooking. It’s a recommended step, but you can skip it if you’re short on time.
Q: Can I make kheer without using nuts or dried fruits?
A: Yes, you can make a simpler version of kheer without nuts or dried fruits if you prefer a smoother texture.
Q: How long does it take to cook kheer?
A: Cooking time can vary, but it typically takes around 45-60 minutes to cook kheer until the rice is soft, and the milk has thickened.
Q: Can I make kheer in advance for a party or special occasion?
A: Yes, you can make kheer in advance and store it in the refrigerator. It can be served chilled, and the flavors often intensify after resting.
Q: Is it necessary to use saffron in kheer for the yellow color?
A: Saffron is used to enhance both the color and flavor of kheer, but it’s optional. You can use food coloring as an alternative if desired.
Q: Can I make kheer with condensed milk instead of sugar?
A: Yes, condensed milk can be used to sweeten kheer. Adjust the quantity to your preferred level of sweetness.
Q: Can I freeze leftover kheer for future use?
A: Yes, you can freeze kheer in an airtight container for up to 1-2 months. Thaw it in the refrigerator before reheating.
Q: How do I prevent the milk from scorching while making kheer?
A: To prevent scorching, use a heavy-bottomed pan, stir the kheer continuously, and maintain low to medium heat. If you notice milk sticking to the bottom, lower the heat further.
Q: Can I make a vegan version of kheer?
A: Yes, you can make vegan kheer by substituting dairy milk with almond milk, coconut milk, or any other plant-based milk. Use vegan butter or oil instead of ghee, and choose a sweetener like agave syrup or maple syrup.
Q: How do I achieve the perfect rice texture in kheer?
A: Achieving the right rice texture involves cooking the rice until it’s soft but not mushy. Be patient and simmer the kheer on low heat, adding milk as needed until the rice reaches the desired consistency.
Q: Can I use jaggery as a sweetener in kheer?
A: Yes, jaggery can be used as a sweetener in kheer. It imparts a unique flavor and color to the dessert. Dissolve jaggery in a little water before adding it to the kheer.
Q: How do I enhance the saffron flavor in kheer?
A: To enhance the saffron flavor, soak saffron strands in warm milk for at least 15-20 minutes before adding them to the kheer. This releases the saffron’s full aroma and color.
Q: What is the secret to achieving the perfect balance of sweetness in kheer?
A: Achieving the right sweetness in kheer is a matter of personal preference. Start with a moderate amount of sugar and adjust to your taste. Remember that the sweetness intensifies as the kheer cools.
Q: How can I make kheer for a large gathering without compromising quality?
A: To make kheer for a large group, scale up the recipe while ensuring you have a sufficiently large and sturdy cooking vessel. Maintain a low flame and stir attentively to avoid scorching.
Q: Can I make flavored variations of kheer?
A: Yes, you can create flavored variations by adding ingredients like rose water, kewra water, or even fruits like mango or strawberry to infuse unique tastes into your kheer.
Q: What are some creative garnishing ideas for kheer?
A: Get creative with garnishes by using edible silver leaf (varq), rose petals, or even a pinch of edible gold dust to make your kheer visually stunning for special occasions.
Q: How can I adapt the kheer recipe for dietary restrictions, such as gluten-free or lactose-free diets?
A: For a gluten-free kheer, ensure that the rice is uncontaminated and use a lactose-free milk alternative for those with lactose intolerance. Adjust the recipe to accommodate dietary needs while maintaining the traditional flavors.
These expert-level questions and answers provide valuable insights for mastering the art of making kheer and tailoring it to various preferences and dietary requirements.
Conclusion
As we conclude our journey into the world of kheer, we find ourselves immersed in the sweet symphony of tradition and flavor that this timeless Indian dessert represents. It is more than just a dish; it is a cultural heritage, a culinary art, and a celebration of the senses.
Kheer’s allure lies in its ability to transport us to a different era, where family recipes were passed down through generations, and every spoonful was a taste of nostalgia. It’s a reminder that in the fast-paced world of today, there are still moments worth savoring, and kheer provides just that.
The rich, creamy texture of kheer, the fragrance of cardamom and saffron, the crunch of toasted nuts, and the occasional burst of sweetness from raisins—all of these elements come together to create a dessert that is as comforting as it is indulgent.
In every bowl of kheer, there’s a story of tradition, love, and celebration. Whether it’s prepared for a festival, a special occasion, or simply to satisfy a sweet craving, kheer is a dish that brings people together, creating moments that become cherished memories.
So, as you embark on your own kheer-making journey, remember that it’s not just a dessert you’re creating; it’s a piece of history, a connection to your roots, and a taste of India’s culinary heritage. May your kheer always be creamy, fragrant, and filled with the warmth of tradition.
Enjoy the sweetness of kheer, and let it be a reminder that sometimes the simplest pleasures are the most profound.