

Unlock the full potential of your appliance with our guide on how to use a Aroma rice cooker. Simple steps for perfect rice!
As an Amazon Associate I earn from qualifying purchases.
Embarking on a culinary journey with an Aroma rice cooker can transform the simple task of cooking rice into a delightful experience. This versatile kitchen appliance not only ensures flawlessly cooked rice but also enhances your ability to whip up an array of dishes effortlessly. Whether you’re a cooking novice or a seasoned chef, learning how to use a Aroma rice cooker effectively can streamline your meal prep and expand your home dining options. In this guide, we’ll walk you through the essential steps and provide tips to maximize the potential of your Aroma rice cooker, making every meal a delicious success.
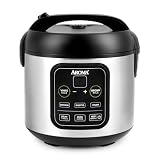
Most Recommended Aroma Rice Cooker
———
Table of Contents
———
…
Overview of The Aroma Rice Cooker And Its Popularity
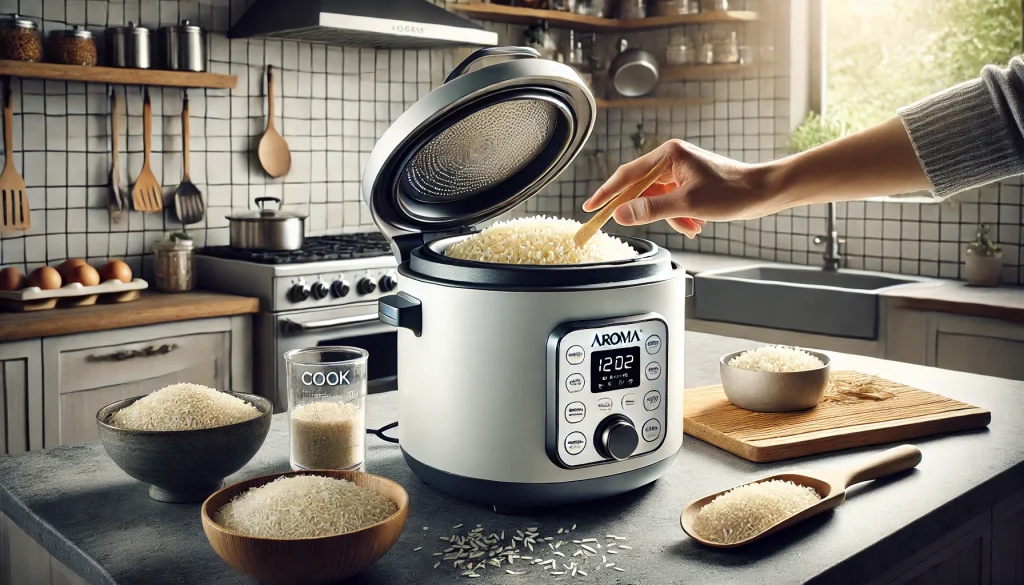
The Aroma rice cooker is a popular kitchen appliance known for its convenience, versatility, and consistent results. This electric cooker simplifies the process of cooking rice, which can be notoriously tricky to perfect using traditional stovetop methods. With its user-friendly design, the Aroma rice cooker allows users to measure the rice and water, set the cooking mode, and let the device handle the rest. It automatically adjusts temperatures and cooking times, and switches to a “keep warm” mode once cooking is complete, ensuring that the rice stays at an ideal serving temperature without overcooking.
Aroma rice cookers come in various models and sizes, catering to different needs, from small households to large families. They often feature options for cooking different types of rice, such as white, brown, or sushi rice, and some models include functions for steaming vegetables or cooking other grains like quinoa or oatmeal. This multi-functionality adds to their appeal, making them a staple in many kitchens around the world.
The popularity of Aroma rice cookers can be attributed to their affordability and the excellent value they offer. They are widely recommended for their ease of use and the quality of rice they produce, appealing to both rice connoisseurs and those who appreciate the convenience of a reliable appliance that makes meal preparation easier.
Benefits Of Using A Rice Cooker For Meal Preparation
Using a rice cooker for meal preparation offers several notable benefits that can enhance your cooking experience and simplify your daily routine. Here are some of the key advantages:
- Consistency: Rice cookers are designed to produce perfectly cooked rice every time. They automatically adjust cooking times and temperatures based on the type and amount of rice, ensuring consistent results without the guesswork or constant monitoring required when cooking rice on a stovetop.
- Convenience: With a rice cooker, the process is as simple as adding rice and water and pressing a button. This ease of use is a major advantage for those with busy schedules or for anyone looking to streamline their cooking process.
- Versatility: Modern rice cookers are multifunctional and can be used to cook a variety of grains like quinoa, barley, and oatmeal, in addition to rice. Many models also feature steaming baskets for vegetables, fish, or poultry, making it possible to prepare a complete meal using a single appliance.
- Energy Efficiency: Rice cookers are generally more energy-efficient than ovens or stovetops because they use less electricity and cook food faster. This can help reduce energy bills and minimize heat production in the kitchen, which is particularly beneficial during warm weather.
- Space Saving: Particularly in small kitchens, having a multifunctional appliance like a rice cooker can save space. Instead of needing multiple pots and pans for different dishes, a rice cooker can handle multiple cooking tasks, freeing up storage and counter space.
- Improved Nutrition: Cooking with a rice cooker can help retain more nutrients in your food. The enclosed cooking environment minimizes nutrient loss, and the steaming process for vegetables preserves vitamins and minerals better than boiling.
- Safety: Rice cookers are safer to use than cooking on a stovetop, especially for novice cooks. They have built-in timers and automatic shut-off features, reducing the risk of fires and the danger of leaving a hot appliance unattended.
- Keep Warm Feature: Most rice cookers have a “keep warm” function that keeps rice at an optimal temperature for hours without overcooking it. This feature is especially useful for families with varying meal times or for those hosting gatherings.
Overall, a rice cooker is a worthwhile investment for anyone looking to enhance their cooking efficiency and quality, particularly for those who enjoy rice and grain-based dishes regularly.
Understanding Your Aroma Rice Cooker
Understanding how to use your Aroma rice cooker effectively can elevate your cooking experience by making meal preparation simpler and more consistent. Here’s a comprehensive guide to getting the most out of your Aroma rice cooker:
1. Components and Setup
- Inner Pot: This is where you place the rice and water. It’s usually non-stick for easy cleaning.
- Heating Element: Located beneath the inner pot, it heats the contents evenly.
- Lid: Helps retain steam and heat. Some models have a see-through lid to monitor cooking.
- Control Panel: Includes settings for different types of rice, steaming, and sometimes a delay timer for scheduled cooking.
2. Using the Rice Cooker
- Measure the Rice: Use the cup provided with your cooker to measure the rice. This ensures accuracy as these cups are slightly smaller than a standard measuring cup.
- Rinse the Rice: Rinse rice under cold water until the water runs clear to remove excess starch and prevent clumping.
- Add Water: Fill with water to the corresponding water level line inside the pot or follow specific water-to-rice ratios recommended for different rice types.
- Select the Correct Setting: Choose the setting that corresponds to the type of rice you’re cooking. The cooker adjusts the cooking time and temperature accordingly.
- Press Start: Start the cooking process. The cooker will beep or switch to warm mode once the rice is cooked.
3. Advanced Features
- Steam Function: Many models come with a steam tray for vegetables or proteins, which you can use while cooking rice.
- Slow Cook and Sauté: Some advanced models offer additional features like slow cooking and sautéing, allowing for more diverse meal preparation.
4. Maintenance and Care
- Cleaning: Allow the cooker to cool before cleaning. The pot and any accessories should be washed with warm, soapy water.
- Storage: Store the cooker in a dry place and avoid placing any objects on top of it when not in use.
5. Tips for Best Results
- Let it Rest: After cooking, let the rice sit in the cooker on ‘keep warm’ for 10-15 minutes to finish absorbing any remaining moisture.
- Fluff the Rice: Fluff with a fork or the paddle that came with your cooker to separate grains and release steam before serving.
By familiarizing yourself with the components and functions of your Aroma rice cooker, and following these tips, you can ensure perfectly cooked rice and more with minimal effort. Whether you’re preparing a simple side dish or an entire meal, your Aroma rice cooker can be a dependable and versatile tool in your kitchen arsenal.
Initial Setup
Setting up your Aroma rice cooker for the first time is a straightforward process. Here’s a step-by-step guide to ensure you get started on the right foot:
1. Unboxing and Inspection
- Remove Packaging: Open the box and carefully remove the rice cooker and all parts.
- Check Contents: Ensure you have all components, including the inner cooking pot, measuring cup, rice paddle, and steaming tray if applicable.
- Inspect for Damage: Check for any visible damage or defects from shipping or handling.
2. Cleaning Before Use
- Wash the Inner Pot: Wash the removable inner cooking pot with warm soapy water to remove any residues from manufacturing. Rinse and dry thoroughly.
- Clean Other Accessories: Wash the measuring cup, rice paddle, and steaming tray (if included) in similar fashion.
- Wipe Down the Cooker: Use a damp cloth to wipe the exterior and the lid of the cooker. Avoid submerging the cooker’s body or heating element in water.
3. Initial Setup
- Place the Inner Pot: Insert the cleaned and dried inner cooking pot back into the rice cooker.
- Connect to Power: Place the rice cooker on a stable, level surface and plug it into an appropriate outlet. Make sure the area is dry and not near any water source.
4. Familiarize Yourself with the Controls
- Review the Manual: Take a moment to read through the user manual. Pay special attention to the cooking settings, safety features, and any specific instructions unique to your model.
- Understand the Buttons: Familiarize yourself with the different settings such as “Cook”, “Warm”, “Delay Timer”, and any other preset options for different types of rice or food.
5. Testing the Rice Cooker
- Perform a Water Test: Before cooking your first batch of rice, you might want to run a simple water test. Fill the pot with a couple of cups of water, close the lid, and set it to cook. This test ensures everything is functioning correctly and helps remove any manufacturing odors.
6. Ready to Cook
- First Batch of Rice: Now that your cooker is set up and tested, it’s ready to cook rice. Measure the rice with the cup provided, rinse it, and add the corresponding amount of water. Select the appropriate cooking setting for your rice type and start the cooker.
By following these steps, your Aroma rice cooker will be perfectly set up to start preparing delicious meals. This initial setup not only ensures that your appliance works correctly but also extends its longevity and performance.
Basic Operations
Operating an Aroma rice cooker is designed to be user-friendly, even for those who may not be very familiar with kitchen gadgets. Here are the basic operations you’ll need to know to start cooking with your Aroma rice cooker:
1. Measuring and Adding Rice
- Measuring Rice: Use the measuring cup that came with your rice cooker. This cup typically holds about 6 ounces, or about 3/4 of a standard U.S. cup.
- Rinsing Rice: It’s a good practice to rinse your rice to remove excess starch. Place the rice in a separate bowl, cover it with water, gently agitate the grains, and drain. Repeat this process until the water runs clear.
- Adding Rice to Cooker: Place the rinsed rice into the inner cooking pot of your rice cooker.
2. Adding Water
- Water Ratios: Add water to the pot using the recommended ratio for the type of rice you are cooking. The general guideline for white rice is a 1:1 ratio of rice to water. For brown rice, it’s typically 1:1.5.
- Water Lines: Some models of Aroma rice cookers have water line markings inside the cooking pot that correspond to the number of cups of rice added. Simply fill water up to the line that matches the amount of rice you’ve put in.
3. Setting the Cooker
- Select the Function: Aroma rice cookers usually have multiple cooking options. Select the appropriate function for the type of rice you are cooking. Most cookers have at least a “White Rice” and a “Brown Rice” setting, which adjust cooking times and temperatures accordingly.
- Start Cooking: Press the cook button to start the cooking process. The cooker will automatically switch to “Keep Warm” once the rice is cooked, ensuring your rice is ready to serve anytime.
4. Using Advanced Functions
- Delay Timer: If your model has a delay timer, you can set the rice cooker to start cooking at a later time. This is useful for having rice ready right when you want it.
- Steam Function: If your cooker includes a steam tray, you can steam vegetables or proteins while the rice cooks. Just place the tray above the rice, add your vegetables or protein, and close the lid. Make sure you select a cooking mode that corresponds with the use of the steam tray if necessary.
5. After Cooking
- Letting it Sit: After the rice cooker switches to “Keep Warm”, let the rice sit for about 10-15 minutes. This helps to stabilize the moisture levels in the rice, making it fluffier.
- Fluffing the Rice: Use the rice paddle that came with your cooker to fluff the rice before serving. This helps separate the grains and release excess steam, improving the texture.
6. Cleaning and Maintenance
- Cleaning the Pot: Always allow the cooker and the inner pot to cool down before cleaning. Wash the inner pot with warm, soapy water. Most inner pots are non-stick, so a soft sponge is recommended to avoid scratches.
- Wiping the Cooker: Clean the outer surface of the rice cooker and the lid with a damp cloth.
Understanding these basic operations will help you make the most out of your Aroma rice cooker, enabling you to cook perfect rice with minimal effort and explore other cooking functions that your model may offer.
Advanced Cooking Features
Aroma rice cookers are equipped with several advanced features that go beyond basic rice cooking, allowing users to harness the appliance for a variety of culinary tasks. Here’s a breakdown of some of these advanced cooking features and how to use them effectively:
1. Multigrain Cooking
- Function: This setting is ideal for cooking grains other than standard white or brown rice, such as wild rice, quinoa, barley, and more. The cooking times and temperatures are adjusted to suit the specific needs of different grains.
- How to Use: Measure and rinse your grains as needed, add the appropriate amount of water, select the ‘Multigrain’ or similar setting, and start the cooker.
2. Slow Cooking
- Function: Some Aroma rice cookers function as slow cookers. This feature allows you to prepare stews, soups, and other slow-cooked dishes.
- How to Use: Place your ingredients in the cooker, add liquid as necessary, select the ‘Slow Cook’ setting, and set the time according to your recipe.
3. Sauté-Then-Simmer (STS)™ Technology
- Function: This feature allows you to sauté foods at a high heat and then automatically switches to a simmer once liquid is added. It’s perfect for dishes where you need to brown ingredients before simmering, like risotto or Spanish rice.
- How to Use: Activate the STS function, add your ingredients to sauté, and once you add your liquids, the cooker will switch to simmer mode.
4. Steam Function
- Function: This utilizes a steaming tray that sits above the rice or other contents in the pot, allowing you to steam vegetables, fish, or poultry while cooking something else below.
- How to Use: Fill the main pot with water or place another dish to cook simultaneously, arrange your items to be steamed in the tray, cover, and select the steam function for the desired time.
5. Cake Function
- Function: Some models come with a setting specifically for baking cakes or other batter-based dishes directly in the cooker.
- How to Use: Prepare your batter as per your recipe, pour it into the greased inner pot, select the ‘Cake’ function, and let the rice cooker bake your dessert.
6. Delay Timer
- Function: This feature allows you to program the start time of your cooking up to several hours in advance, ensuring that your meal is ready exactly when you need it.
- How to Use: Prepare your rice or dish in the pot, set the delay timer to start cooking at your desired future time, and press start.
7. Keep Warm
- Function: Automatically activates after cooking is completed, keeping your food at an optimal serving temperature without overcooking.
- How to Use: Once your food is cooked, the cooker will switch to this mode. Food can be kept warm until you’re ready to serve.
8. Digital Controls and Display
- Function: Provides a user-friendly interface for selecting functions, setting times, and monitoring the cooking process.
- How to Use: Use the digital buttons to select your cooking function and adjust time settings as indicated by your specific model’s instructions.
These features enhance the versatility of the Aroma rice cooker, making it a multi-functional tool in your kitchen that can handle a wide range of cooking tasks beyond just rice. Whether you’re making a simple side dish or a complete meal, these advanced features can help streamline the process and expand your culinary possibilities.
Specialty Cooking
Using an Aroma rice cooker for specialty cooking can elevate your kitchen repertoire significantly. Beyond just cooking perfect rice, this versatile appliance can handle a variety of dishes from breakfasts to desserts. Here’s how to use your Aroma rice cooker for some specialty cooking:
1. Cooking Porridge or Oatmeal
- Setup: Use the ‘Porridge’ or ‘Oatmeal’ setting if your model has it. This ensures a softer, more even cooking suitable for grains like oats.
- Ingredients: Combine water or milk with oats in the rice cooker pot. The general ratio is 1 part oats to 2-3 parts liquid, depending on how thick you like your porridge.
- Process: Add ingredients to the cooker, stir, close the lid, select the appropriate setting, and start the cooker. Stir once midway to prevent sticking.
2. Steaming Vegetables
- Setup: Use the steamer insert that comes with your cooker.
- Ingredients: Prepare fresh vegetables, cutting them into uniform sizes for even cooking.
- Process: Add water to the bottom of the cooker, place the vegetables in the steamer tray, and set the cooker to the ‘Steam’ mode for the time required based on the type of vegetables.
3. Making Soups and Stews
- Setup: Use the ‘Slow Cook’ or ‘Soup’ setting if available.
- Ingredients: Add your broth, vegetables, meat, and seasonings directly into the rice cooker pot.
- Process: Stir to combine, close the lid, select the setting, and let the cooker do the rest. Cooking times will vary depending on the ingredients and the desired consistency.
4. Cooking Beans and Legumes
- Setup: This requires a longer cooking time, so plan accordingly.
- Ingredients: Soak beans overnight if necessary, then drain and rinse.
- Process: Add beans and fresh water to the cooker using about 3 cups of water for every cup of dried beans. Select the ‘Bean’ or ‘Slow Cook’ setting and start the process.
5. Baking Cakes
- Setup: Use the ‘Cake’ function if your model has one.
- Ingredients: Prepare your cake batter as usual.
- Process: Pour the batter into a greased inner pot. Select the ‘Cake’ function, close the lid, and let the cooker bake your cake. Check doneness with a toothpick.
6. Cooking Whole Grains
- Setup: Ideal for grains like quinoa, millet, or farro.
- Ingredients: Rinse grains thoroughly.
- Process: Use about 2 cups of water for every cup of grains. Add to the cooker, select the ‘Brown Rice’ or specific grain setting if available, and start cooking.
7. Making Yogurt
- Setup: Some advanced models have a ‘Yogurt’ setting.
- Ingredients: You’ll need a starter culture and milk.
- Process: Heat the milk in the rice cooker until it reaches about 180°F, then cool to about 110°F. Stir in the starter culture, set the cooker to ‘Yogurt’ mode, and let it incubate for 8-12 hours.
Tips for Specialty Cooking
- Check Fluid Levels: Ensure there’s enough liquid to prevent burning, especially for long cooking times.
- Stir Occasionally: This helps to distribute heat evenly and prevent sticking or burning.
- Experiment: Don’t be afraid to experiment with times and settings to find what works best for the dishes you are making.
Using these methods, your Aroma rice cooker can serve as much more than just a tool for making rice, expanding its utility to a wide range of cooking tasks.
Maintenance And Cleaning
Proper maintenance and cleaning are essential for extending the lifespan of your Aroma rice cooker and ensuring it continues to perform at its best. Here’s a guide on how to maintain and clean your Aroma rice cooker:
Regular Cleaning After Use
- Allow to Cool: Always let the rice cooker cool completely before cleaning to prevent any accidental burns or damage to the components.
- Remove and Wash the Inner Pot: Take out the inner cooking pot and wash it with warm, soapy water using a soft sponge or cloth. Avoid using abrasive cleaners or metal scrubbers that can scratch the non-stick surface. Rinse thoroughly and dry.
- Clean the Lid and Accessories: Wipe the lid with a damp cloth. If your cooker comes with a removable lid or steam vent, detach these parts and wash them under running water. Also, clean any other accessories such as the rice paddle and measuring cup.
- Wipe the Heating Element: Use a damp cloth to gently wipe the main body of the cooker and the heating plate. Ensure no water drips into the electrical components. Any food residues on the heating plate should be cleaned off to ensure efficient heating.
Periodic Deep Cleaning
- Dealing with Stubborn Stains: If there are stubborn stains or built-up residue in the cooking pot or on the heating plate, soak the areas in warm soapy water for a few hours, then gently scrub to remove the residue.
- Check and Clean the Steam Vent: The steam vent can collect condensation and food particles over time. It should be checked regularly and cleaned to prevent clogs. If your model allows, dismantle the vent to clean it thoroughly.
- Inspect and Wipe the Outer Surfaces: Use a slightly damp cloth to wipe down the exterior of the cooker. Make sure to keep all vents clear of dust and debris to maintain proper functioning.
Special Considerations
- Descale for Hard Water: If you live in an area with hard water, descaling the pot might be necessary to remove calcium buildup. Fill the pot with a mixture of water and vinegar (or a descaling solution recommended by the manufacturer), let it sit for a few hours, then rinse thoroughly and dry.
- Odor Removal: To remove odors from previous cooks, fill the pot with a mixture of water and a few slices of lemon or a couple of tablespoons of baking soda. Cook on the “Steam” setting for a few minutes, then leave the mixture to sit in the cooker until it cools. Wash the pot as usual afterward.
Storing Your Rice Cooker
- Store Properly: When not in use, ensure the rice cooker is clean and completely dry. Store the cooker in a dry place, and avoid placing heavy items on top of it.
- Keep It Covered: To prevent dust from collecting inside the pot and on the appliance, cover it with a cloth or store it in a cupboard.
Following these maintenance and cleaning tips will help keep your Aroma rice cooker functioning effectively and ready for your next cooking task. Regular care prevents the buildup of residues and odors, ensuring that your food tastes as good as it should every time.
Troubleshooting
Troubleshooting common issues with an Aroma rice cooker can help you solve problems without needing to seek professional repair. Here are some typical problems and solutions to try if your Aroma rice cooker isn’t performing as expected:
1. Rice Cooker Not Starting
- Check the Power Supply: Ensure the rice cooker is plugged in securely and the outlet is functioning. Test the outlet with another device to confirm.
- Inspect the Cord: Look for any damage or frays in the power cord. If damaged, it may need to be replaced.
- Examine the Heating Plate: Make sure there are no food residues or debris on the heating plate. A clean contact point is crucial for proper functioning.
2. Rice Is Overcooked or Undercooked
- Check Water Ratios: Ensure you’re using the correct water-to-rice ratio. Adjust the amount of water considering the type of rice.
- Rinse Rice Thoroughly: Properly rinsing rice can remove excess starch and help prevent mushy or sticky results.
- Altitude Adjustments: Be aware that cooking at high altitudes may require more water and extended cooking times.
3. Rice Sticking to the Pot
- Non-stick Coating Wear: If the non-stick coating is scratched or worn out, rice may start sticking. Consider replacing the inner pot if it shows signs of deterioration.
- Increase Water: Sometimes, slightly increasing the water ratio can prevent sticking, especially for starchier rice types.
4. Cooker Switches to “Warm” Too Soon
- Inspect the Lid: Make sure the lid is closed tightly. Steam escaping from a loose lid can cause the cooker to misjudge the cooking status.
- Sensor Issues: If the thermal sensor is faulty, it might incorrectly read the temperature, switching the mode prematurely. In this case, professional service might be required.
5. Steam Leaking from the Lid
- Check Seal and Vent: Ensure the lid’s seal is clean and intact, and the vent is clear of any blockages. Accumulated food or debris can prevent the lid from sealing properly.
6. Unusual Noises or Smells
- First-Time Use: It’s normal to notice a slight odor or some smoke during the first use as manufacturing residues burn off.
- Clean Regularly: Regular cleaning can prevent food buildup that might burn and cause smells or smoke during cooking.
7. Display Errors or Malfunction
- Error Codes: Refer to your user manual for specific error codes and their meanings. Some may indicate issues like overheating or sensor problems.
- Reset the Cooker: Unplug the cooker and wait a few minutes before plugging it back in to reset the system.
General Maintenance Tips
- Regular cleaning and maintenance can prevent many common issues. Keep the inner cooking pot, lid, and steam vent clean and free from oil or rice residue.
- Ensure the rice cooker is stored in a dry place and handled gently to avoid damaging the internal components.
If troubleshooting doesn’t resolve the issues, consult the user manual or contact Aroma customer support for further assistance. Sometimes, professional repairs or replacements may be necessary, especially if the problem relates to internal electrical components.
Accessories And Enhancements
Enhancing your Aroma rice cooker with the right accessories can improve its functionality and expand its versatility. Here are some recommended accessories and enhancements that are compatible with most Aroma rice cooker models:
1. Additional Inner Cooking Pots
- Non-Stick Inner Pot: Having an extra non-stick inner pot on hand can be useful, especially when cooking multiple dishes or for easy rotation during cleaning.
- Stainless Steel Inner Pot: If you prefer a non-coated option, a stainless steel pot is a great alternative. It’s durable and free of chemicals associated with non-stick coatings.
Rice Washing Bowl
- Rice Washer: A rice washing bowl with side and bottom drainers can make rinsing rice much easier and more efficient. This helps to remove excess starch and impurities, improving the texture and taste of your rice.
3. Steamer Baskets
- Bamboo Steamer: A bamboo steamer can be placed inside the cooker on top of the rice to steam vegetables or dumplings, adding more layers of flavor and allowing for healthier meal options.
Plastic or Stainless Steel Steam Tray: These are designed to fit perfectly inside the cooker, making it easy to steam foods while rice cooks underneath.
4. Rice Paddle and Spatula
- Non-Stick Rice Paddle: A non-stick rice paddle is essential for serving and fluffing rice without sticking. Some paddles are specially designed to stand at the rim of the bowl or pot for convenience.
- Silicone Spatula: Useful for mixing ingredients in the cooker, especially when using it for cakes or other batters.
- Measuring Cups
- Replacement Measuring Cups: Since the cup that comes with the Aroma rice cooker is typically smaller than a standard U.S. measuring cup, having a replacement or extra can be handy for accurate measurement.
Cooking Guides and Recipe Books
- Recipe Books: A cookbook specifically designed for rice cookers can inspire you with creative and unexpected ways to use your Aroma rice cooker, from main dishes to desserts.
7. Rice Storage Containers
- Airtight Rice Container: Keeping rice in an airtight container not only preserves its freshness but also helps in measuring the rice more accurately with your Aroma cup.
8. Cleaning Supplies
- Microfiber Cleaning Cloths: For wiping down the exterior and the lid, microfiber cloths are gentle and effective.
- Non-Abrasive Cleaners: Ensure the longevity of your pot’s coating by using mild detergents and avoiding harsh scrubbers.
9. Protective Covers
- Appliance Cover: A cover can protect your rice cooker when not in use, especially if you store it on your countertop. It helps keep the cooker clean and dust-free.
Adding these accessories to your Aroma rice cooker setup can greatly enhance your cooking experience, making it easier to prepare a wide variety of dishes and maintain your appliance in top condition.
User Tips And Hacks
1. Perfect Rice Every Time
- Rinse Your Rice: Always rinse your rice until the water runs clear to remove excess starch, which helps prevent clumpy or sticky rice.
- Water Ratios: Experiment with water ratios to find what works best for the specific types of rice you use. A general rule is 1:1 for white rice and 1:1.5 for brown rice, but adjustments may be needed based on the rice and your preferences.
2. Using It for More Than Rice
- Quinoa and Other Grains: Your rice cooker can perfectly cook quinoa, barley, and other grains. Just adjust the water ratios and experiment with cooking times.
- Steam Vegetables and Fish: Utilize the steam tray to cook vegetables or fish atop your rice. This not only saves energy but also allows for a complete meal to be prepared in one go.
3. Slow Cooking and Soups
- Make Soups and Stews: Use the slow cook function if your model has it, to make delicious soups and stews. Simply add all ingredients, set the cooker, and let it do the work.
- Oatmeal for Breakfast: Set up steel-cut oats and water in the rice cooker the night before, and use the timer function to have it ready by morning.
4. Baking in Your Rice Cooker
- Cakes and Bread: Yes, you can bake in a rice cooker! Mix your batter, pour it into the greased inner pot, and set it on a standard cook cycle. Check for doneness by using a toothpick.
5. Layered Cooking
- Layer Meals: Place a layer of vegetables or protein on top of the rice. As the rice cooks, so will your toppings, absorbing flavors from the rice below.
Cleaning Hacks
- Clean Pot Hack: If your pot has burnt rice stuck to it, fill it with warm water and a drop of dish soap, then run it on a standard cycle for a few minutes before scrubbing.
- Odor Removal: To remove lingering smells, clean the inner pot with a mixture of warm water and vinegar, or cook a lemon peel with water on the steam setting.
7. Timer Functions
- Pre-set Cooking: Use the delay timer to set up cooking in advance. This is perfect for having meals ready right when you get home or for fresh hot rice when you wake up.
8. Keeping Rice Warm
- Avoid Drying Out: To keep rice moist during the ‘keep warm’ phase, place a clean kitchen towel under the lid to absorb excess moisture and prevent condensation from dripping back onto the rice.
9. Energy Efficient Cooking
- Multi-purpose Use: Since the rice cooker uses less energy compared to an oven or stovetop, use it to its full potential for cooking multiple types of dishes, which can save on your energy bills.
These tips and hacks not only demonstrate the versatility of your Aroma rice cooker but also can make your daily cooking routine more efficient and enjoyable. Whether you’re a novice or a seasoned cook, these insights can help you explore new culinary possibilities with your appliance.
More Rice Cookers We Put to the Test


Frequently Asked Questions (FAQ’s)
Here are some expert questions and answers on how to use an Aroma rice cooker effectively, covering various aspects from basic operations to advanced features:
Q: How do I cook perfect white rice in an Aroma rice cooker?
A: To cook perfect white rice, follow these steps:
Measure the rice with the cup provided and rinse it under cold water until the water runs clear.
Add the rinsed rice to the cooker’s pot.
Fill with water to the line that matches the number of cups of rice you’ve added. For white rice, a 1:1 ratio of rice to water is usually sufficient.
Close the lid, select the “White Rice” setting, and start the cooker. Once it switches to “Keep Warm,” let the rice sit for an additional 10-15 minutes before fluffing with a fork.
Q: Can I use my Aroma rice cooker to make brown rice, and how does it differ from cooking white rice?
A: Yes, you can cook brown rice in your Aroma rice cooker. The main difference is the water ratio and cooking time. Brown rice requires more water and a longer cooking time to achieve its characteristic chewy texture. Use a 1:1.5 ratio of rice to water and select the “Brown Rice” setting if your model includes it. This setting adjusts the cooking time and temperature accordingly.
Q: Is it possible to cook other grains like quinoa or barley in my Aroma rice cooker? How?
A: Absolutely! To cook quinoa, rinse it well and use a ratio of about 1 part quinoa to 2 parts water. Use the “White Rice” setting as quinoa cooks similarly to white rice. For barley, use a 1:2.5 ratio of barley to water and select the “Brown Rice” setting since barley takes longer to cook.
Q: How can I steam vegetables using my Aroma rice cooker?
A: Use the steam tray that comes with your cooker:
Add water to the main pot (about 1-2 cups, depending on the amount of vegetables).
Place the vegetables in the steam tray and insert it into the cooker.
Close the lid and select the “Steam” setting. The time will depend on the type of vegetables but typically ranges from 5 to 15 minutes.
Q: What are some tips for using the slow cook function on my Aroma rice cooker?
A: When using the slow cook function:
Make sure to add enough liquid to the pot, as the slow cook setting simmers at a lower temperature and requires sufficient moisture.
Use it for recipes like soups, stews, or braises. Layer ingredients with those taking longer to cook (like meat) at the bottom and more delicate items (like vegetables) on top.
Check your dish towards the end of cooking to adjust seasoning and texture.
Q: Can I bake in my Aroma rice cooker? If so, how do I adjust traditional baking recipes?
A: Yes, you can bake cakes, breads, and even pies in your Aroma rice cooker. To adjust traditional recipes:
Reduce the recipe size to fit the size of your cooker’s pot.
Use the “Cake” setting if available. If not, the standard cook setting can work, but you may need to run multiple cycles depending on the cake’s thickness and moisture.
Grease the pot well to prevent sticking and to facilitate easier removal of the cake or bread.
Q: How much water do I need to use for cooking rice in my Aroma rice cooker?
A: The amount of water needed depends on the type of rice you are cooking. For white rice, a good starting point is a 1:1 ratio of rice to water. For brown rice, use a 1:1.5 ratio of rice to water. Check the manual for specific instructions as some models might have different recommendations.
Q: Can I leave the rice in the cooker on ‘Keep Warm’ after it’s cooked? How long is too long?
A: Yes, you can leave the rice in the cooker on the ‘Keep Warm’ setting after it’s cooked. This setting will keep the rice warm without overcooking it for a few hours, typically up to 12 hours, depending on the model. However, for best texture and flavor, it’s advisable to serve the rice within a few hours after cooking.
Q: How do I clean my Aroma rice cooker?
A: After each use, unplug the cooker and allow it to cool. Remove the inner cooking pot and wash it with warm, soapy water. Rinse and dry thoroughly before replacing it in the cooker. Wipe the outer surface and the lid with a damp cloth. Do not immerse the cooker in water or any other liquid.
Q: Is it necessary to rinse rice before cooking in the Aroma rice cooker?
A: Yes, it is generally recommended to rinse rice before cooking to remove excess starch, which helps prevent clumping and makes the rice fluffier. Simply put the rice in a bowl, cover with water, swirl around, and carefully drain. Repeat this process until the water runs clear.
Q: Can I cook other things besides rice in my Aroma rice cooker?
A: Absolutely! Besides various types of rice, you can also cook grains like quinoa and barley, steam vegetables or fish, and even prepare soups and stews depending on the model of your cooker. Some advanced models also offer functions for baking cakes or making yogurt.
Q: What should I do if my rice is undercooked or overcooked?
A: If your rice is undercooked, you can add a small amount of water and restart the cooking cycle. If it’s overcooked, using less water next time is advisable. Experiment with water ratios to find what works best for your preferred rice texture.
Q: Why does my rice cooker spit water or steam from the vent during cooking?
A: This can happen if there’s too much water in the cooker, if the rice hasn’t been rinsed properly, or if the vent or lid is dirty or blocked. Make sure to use the correct water-to-rice ratio, ensure the rice is well-rinsed, and keep the lid and vent clean.
Q: How can I make my rice more flavorful in the rice cooker?
A: To enhance the flavor of your rice, consider cooking it in broth instead of water. You can also add seasonings like salt, garlic powder, or herbs before starting the cooker. For an aromatic touch, add a bay leaf, a few cardamom pods, or a cinnamon stick during cooking.
These expert tips and answers cover a broad range of functionalities provided by Aroma rice cookers, helping users maximize the potential of their appliance for a variety of dishes beyond just rice.
Conclusion
As you’ve discovered, mastering how to use an Aroma rice cooker can significantly streamline your kitchen duties, enabling you to effortlessly prepare a wide range of dishes—from perfectly fluffy rice and hearty stews to nutritious steamed vegetables and even delightful cakes. This versatile appliance not only enhances your culinary repertoire but also simplifies meal preparation, making it a valuable addition to any kitchen. Whether you’re a busy professional seeking quick, nutritious meals or a home chef experimenting with diverse recipes, the Aroma rice cooker is your reliable partner in the quest for hassle-free cooking. Embrace the convenience and explore the countless possibilities with your Aroma rice cooker, where every meal becomes an opportunity for creativity and culinary achievement.


