

As an Amazon Associate I earn from qualifying purchases.
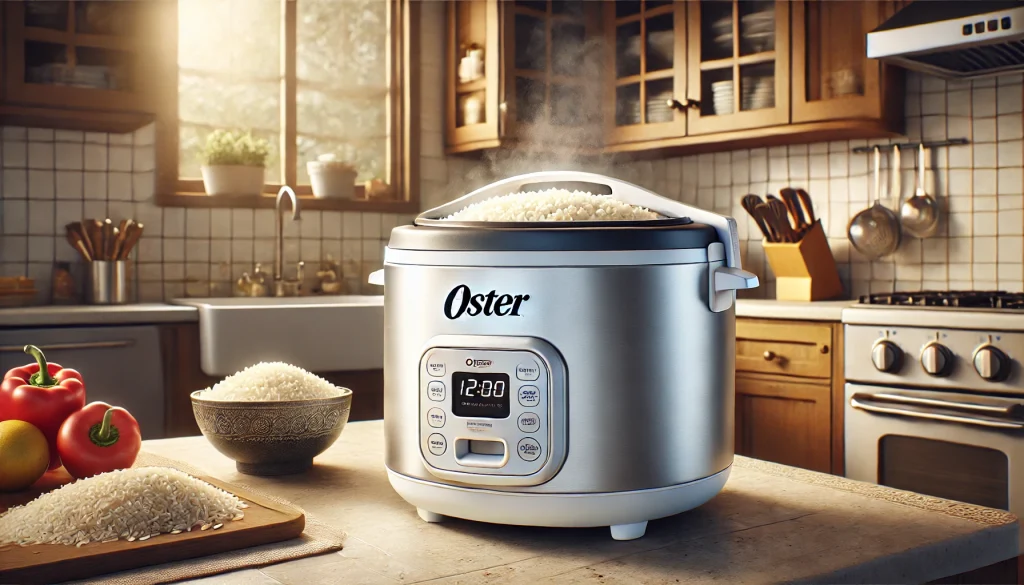
Cooking rice perfectly can be a challenge, but with an Oster rice cooker, it’s easier than ever. In this guide, you’ll learn how to cook rice in an Oster rice cooker, transforming simple grains into fluffy, delicious perfection every time. Whether you’re a kitchen novice or a seasoned chef, these easy steps will make your rice-cooking experience hassle-free and enjoyable. Say goodbye to soggy or undercooked rice and hello to perfectly cooked rice, ready to complement any meal.
Benefits Of Using An Oster Rice Cooker
Using an Oster rice cooker offers several benefits that make it a valuable addition to your kitchen:
- Consistent Results: Oster rice cookers are designed to cook rice perfectly every time, eliminating the guesswork and inconsistency often associated with stovetop methods.
- Ease of Use: With straightforward controls and clear instructions, even beginners can cook rice with confidence. Simply measure the rice and water, set the cooker, and let it do the rest.
- Time-Saving: Once you set up the rice cooker, you can walk away and focus on other tasks. The automatic shut-off feature ensures your rice won’t overcook, freeing up your time for other cooking or household activities.
- Versatility: Oster rice cookers often come with additional features, such as steaming trays for vegetables or fish, allowing you to prepare a complete meal with minimal effort.
- Keep Warm Function: After cooking, the rice cooker automatically switches to a keep-warm mode, maintaining the ideal temperature until you’re ready to serve.
- Energy Efficient: Using a rice cooker consumes less energy compared to boiling rice on the stove, making it an environmentally friendly option.
- Minimal Clean-Up: Many Oster rice cookers feature non-stick inner pots, which make cleaning up quick and easy. Some parts may also be dishwasher safe.
- Compact and Portable: Oster rice cookers are generally compact, making them suitable for small kitchens, dorm rooms, or even for taking on trips.
- Affordability: Oster rice cookers offer a cost-effective solution for perfect rice cooking, providing excellent value for money with their reliability and durability.
- Healthy Cooking: The precise cooking method ensures that the nutrients in the rice are preserved, and the option to steam vegetables or proteins adds a health-conscious element to your meals.
General overview of its functions and features
Oster rice cookers are designed with a variety of functions and features to simplify the process of cooking rice and enhance your overall cooking experience. Here’s a general overview of what you can expect from an Oster rice cooker:
Key Functions:
- Automatic Cooking: Simply add rice and water, press the cook button, and the rice cooker automatically manages the cooking process, adjusting heat and cooking time for perfect results.
- Keep Warm Function: Once the rice is cooked, the cooker automatically switches to a keep-warm mode, maintaining the rice at the ideal serving temperature until you’re ready to eat.
- Steaming Function: Many models come with a steaming tray that allows you to steam vegetables, fish, or other foods simultaneously while the rice cooks below.
- Quick Cook Function: Some models offer a quick cook setting for those times when you need your rice ready in a shorter amount of time.
- Delay Timer: This feature allows you to set the cooker to start at a later time, so your rice is ready exactly when you need it.
Key Features:
- Non-Stick Inner Pot: The inner pot typically features a non-stick coating, making it easy to clean and preventing rice from sticking and burning.
- Measurement Marks: Clear measurement marks inside the pot help you add the right amount of water for the type of rice you are cooking.
- Lid Design: Many Oster rice cookers feature a tempered glass lid with a steam vent, allowing you to monitor the cooking process without lifting the lid and losing heat.
- Capacity Options: Oster rice cookers come in various sizes, ranging from small models suitable for one or two people to larger models that can cook enough rice for a family or a gathering.
- Multi-Cooker Functionality: Some models double as multi-cookers, offering settings for cooking grains, soups, stews, and even baking cakes.
- Easy-to-Use Controls: User-friendly interfaces with clearly labeled buttons make it simple to select the desired function and start cooking with minimal hassle.
- Cool-Touch Handles: Designed for safety, these handles allow you to handle the cooker and its parts without the risk of burns.
- Dishwasher Safe Parts: Certain components, such as the inner pot and steaming tray, are often dishwasher safe, adding convenience to your clean-up routine.
- Compact Design: The space-saving design ensures the rice cooker fits comfortably on your countertop or in your storage area, even in smaller kitchens.
- Durability and Warranty: Oster rice cookers are built to last, often coming with a warranty that provides peace of mind and assurance of quality.
These functions and features combine to make Oster rice cookers a practical, efficient, and versatile appliance in any kitchen, streamlining meal preparation and ensuring consistently delicious results.
Getting To Know Your Oster Rice Cooker
Different Models of Oster Rice Cookers
Oster offers a variety of rice cookers, each designed to meet different cooking needs and preferences. Here are some popular models:
- Oster 6-Cup Rice Cooker:
- Capacity: 6 cups of cooked rice.
- Features: Simple one-touch operation, automatic keep-warm function, non-stick inner pot.
- Oster 20-Cup Digital Rice Cooker:
- Capacity: 20 cups of cooked rice.
- Features: Digital display, multiple cooking functions (rice, steam, slow cook), delay timer, keep-warm function, non-stick inner pot.
- Oster Titanium Infused DuraCeramic Rice & Grain Cooker:
- Capacity: Varies by model (typically 6-10 cups).
- Features: Titanium-infused DuraCeramic non-stick coating, faster cooking times, steaming tray, keep-warm function, easy-to-clean surface.
- Oster 6-Cup Rice Cooker with Steaming Tray:
- Capacity: 6 cups of cooked rice.
- Features: Includes steaming tray for simultaneous cooking of rice and steaming vegetables or fish, one-touch operation, keep-warm function, non-stick inner pot.
- Oster 14-Cup Rice Cooker with Auto Shut-Off:
- Capacity: 14 cups of cooked rice.
- Features: Automatic shut-off, keep-warm function, non-stick inner pot, simple controls.
Key Components and Their Functions
Understanding the key components of your Oster rice cooker and their functions can help you use it more effectively:
- Lid:
- Function: Covers the cooking pot to retain heat and moisture.
- Variations: May be a tempered glass lid with a steam vent or a hinged, locking lid for better heat retention.
- Inner Pot:
- Function: The main cooking vessel where rice and water are placed.
- Features: Typically non-stick for easy cleaning and to prevent rice from sticking. Some models have a DuraCeramic coating for enhanced durability.
- Heating Plate:
- Function: Heats the inner pot to cook the rice evenly.
- Location: Found at the bottom of the rice cooker base.
- Steam Vent:
- Function: Allows excess steam to escape, preventing pressure build-up inside the cooker.
- Location: Usually found on the lid.
- Control Panel:
- Function: Allows you to select cooking modes and settings.
- Types: Can be simple one-touch buttons or digital displays with multiple settings (e.g., white rice, brown rice, steam, keep warm).
- Steaming Tray:
- Function: Used to steam vegetables, fish, or other foods while rice cooks below.
- Placement: Sits above the inner pot.
- Measuring Cup and Rice Paddle:
- Function: The measuring cup ensures the correct rice-to-water ratio, and the rice paddle is used to stir and serve the rice.
- Material: Often made of plastic to prevent scratching the non-stick inner pot.
- Keep Warm Function:
- Function: Automatically activates after cooking to keep rice warm until ready to serve.
- Operation: Maintains a low temperature to preserve the quality of the rice.
- Power Cord:
- Function: Supplies electricity to the rice cooker.
- Features: Some models have detachable cords for easy storage.
- Handles:
- Function: Provide safe and easy handling of the cooker.
- Features: Often cool-touch to prevent burns.
By familiarizing yourself with the different models and key components of your Oster rice cooker, you can make the most of its features and enjoy perfectly cooked rice with minimal effort.
Types Of Rice And Their Preparation
Types of Rice and Their Preparation: How to Cook Rice in an Oster Rice Cooker
Cooking rice in an Oster rice cooker is straightforward, but different types of rice may require slight adjustments in water ratios and cooking times. Here’s a guide to preparing various types of rice:
1. White Rice
Common Varieties: Long-grain (e.g., Basmati, Jasmine), short-grain, medium-grain.
Preparation:
- Rinse: Rinse the rice under cold water until the water runs clear to remove excess starch.
- Water Ratio: Use 1.5 cups of water for every 1 cup of rice.
- Cooking Time: Typically around 20 minutes.
Steps:
- Measure the desired amount of rice using the measuring cup provided with your rice cooker.
- Rinse the rice thoroughly.
- Place the rinsed rice into the inner pot of the rice cooker.
- Add the appropriate amount of water.
- Close the lid and select the “White Rice” or equivalent setting.
- Press the start button and let the rice cooker do the rest.
- Once cooked, the rice cooker will switch to the keep-warm mode. Let the rice sit for about 5 minutes before serving.
2. Brown Rice
Common Varieties: Long-grain, short-grain.
Preparation:
- Rinse: Rinse the rice under cold water.
- Water Ratio: Use 2.5 cups of water for every 1 cup of rice.
- Cooking Time: Typically around 40-50 minutes.
Steps:
- Measure and rinse the rice.
- Place the rice in the inner pot.
- Add the appropriate amount of water.
- Close the lid and select the “Brown Rice” setting.
- Press the start button and allow the rice cooker to cook the rice.
- Once cooked, let the rice sit in the keep-warm mode for about 10 minutes before serving.
3. Jasmine Rice
Preparation:
- Rinse: Rinse until the water runs clear.
- Water Ratio: Use 1.5 cups of water for every 1 cup of rice.
- Cooking Time: Typically around 25 minutes.
Steps:
- Measure and rinse the rice.
- Place the rice in the inner pot.
- Add the appropriate amount of water.
- Close the lid and select the “White Rice” setting.
- Press the start button and let the cooker complete the process.
- Allow the rice to rest for a few minutes in keep-warm mode before serving.
4. Basmati Rice
Preparation:
- Rinse: Rinse thoroughly and soak for 20-30 minutes if possible.
- Water Ratio: Use 1.5 cups of water for every 1 cup of rice.
- Cooking Time: Typically around 20-25 minutes.
Steps:
- Measure, rinse, and optionally soak the rice.
- Place the rice in the inner pot.
- Add the appropriate amount of water.
- Close the lid and select the “White Rice” setting.
- Press the start button and let the cooker complete the process.
- Let the rice sit for a few minutes in keep-warm mode before serving.
5. Sushi Rice
Preparation:
- Rinse: Rinse thoroughly until the water is clear.
- Water Ratio: Use 1.25 cups of water for every 1 cup of rice.
- Cooking Time: Typically around 25 minutes.
Steps:
- Measure and rinse the rice.
- Place the rice in the inner pot.
- Add the appropriate amount of water.
- Close the lid and select the “White Rice” or “Sushi Rice” setting.
- Press the start button and let the cooker complete the process.
- Let the rice rest for a few minutes in keep-warm mode before seasoning with vinegar, sugar, and salt for sushi.
6. Wild Rice
Preparation:
- Rinse: Rinse thoroughly.
- Water Ratio: Use 3 cups of water for every 1 cup of rice.
- Cooking Time: Typically around 45-60 minutes.
Steps:
- Measure and rinse the rice.
- Place the rice in the inner pot.
- Add the appropriate amount of water.
- Close the lid and select the “Brown Rice” setting (if available).
- Press the start button and let the cooker complete the process.
- Allow the rice to sit for a few minutes in keep-warm mode before serving.
By following these guidelines, you can cook various types of rice perfectly in your Oster rice cooker, ensuring a delicious and satisfying meal every time.
Water-To-Rice Ratios
Water-to-Rice Ratios for Different Types of Rice
Getting the water-to-rice ratio right is crucial for cooking perfect rice in your Oster rice cooker. Here are the recommended ratios for various types of rice:
1. White Rice (Long-Grain, Medium-Grain, Short-Grain)
- Water Ratio: 1.5 cups of water for every 1 cup of rice
- Cooking Time: Approximately 20 minutes
2. Brown Rice (Long-Grain, Short-Grain)
- Water Ratio: 2.5 cups of water for every 1 cup of rice
- Cooking Time: Approximately 40-50 minutes
3. Jasmine Rice
- Water Ratio: 1.5 cups of water for every 1 cup of rice
- Cooking Time: Approximately 25 minutes
4. Basmati Rice
- Water Ratio: 1.5 cups of water for every 1 cup of rice
- Cooking Time: Approximately 20-25 minutes
5. Sushi Rice
- Water Ratio: 1.25 cups of water for every 1 cup of rice
- Cooking Time: Approximately 25 minutes
6. Wild Rice
- Water Ratio: 3 cups of water for every 1 cup of rice
- Cooking Time: Approximately 45-60 minutes
7. Arborio Rice (for Risotto)
- Water Ratio: 4 cups of water for every 1 cup of rice (broth is commonly used instead of water for flavor)
- Cooking Time: Approximately 18-20 minutes
Cooking Steps for All Rice Types
- Measure: Use the measuring cup provided with your rice cooker to measure the desired amount of rice.
- Rinse: Rinse the rice under cold water until the water runs clear to remove excess starch.
- Add Water: Place the rinsed rice into the inner pot of the rice cooker. Add the appropriate amount of water based on the type of rice.
- Close Lid: Close the lid securely.
- Select Setting: Choose the appropriate setting on your rice cooker (e.g., White Rice, Brown Rice).
- Start Cooking: Press the start button and allow the rice cooker to complete the cooking process.
- Rest: Once cooked, let the rice sit in the keep-warm mode for a few minutes before serving to allow any excess moisture to be absorbed.
By following these water-to-rice ratios and cooking steps, you can achieve perfectly cooked rice every time with your Oster rice cooker.
Step-By-Step Instructions For Setting Up The Rice Cooker
Step 1: Unpacking and Cleaning
- Unpack the Rice Cooker: Carefully remove the rice cooker and its components from the packaging.
- Inspect Components: Ensure all components are included (inner pot, lid, steaming tray, measuring cup, rice paddle, and power cord).
- Clean: Wash the inner pot, lid, steaming tray, measuring cup, and rice paddle with warm, soapy water. Rinse thoroughly and dry with a clean cloth.
Step 2: Preparing the Rice
- Measure the Rice: Use the provided measuring cup to measure the desired amount of rice. A standard serving is typically 1 cup of uncooked rice per person.
- Rinse the Rice: Place the rice in a fine-mesh strainer and rinse under cold running water until the water runs clear. This removes excess starch and prevents the rice from becoming too sticky.
Step 3: Adding Rice and Water
- Place the Rice in the Inner Pot: Transfer the rinsed rice to the inner pot of the rice cooker.
- Add Water: Add the appropriate amount of water based on the type of rice and the water-to-rice ratio. For example, use 1.5 cups of water for every 1 cup of white rice.
Step 4: Setting Up the Cooker
- Insert the Inner Pot: Place the inner pot with the rice and water into the rice cooker base, ensuring it sits evenly.
- Close the Lid: Close the lid securely. If your model has a hinged lid, ensure it locks in place. If it has a separate lid, place it firmly on top.
Step 5: Selecting the Cooking Mode
- Plug in the Rice Cooker: Connect the power cord to the rice cooker and plug it into an electrical outlet.
- Select the Cooking Mode: Choose the appropriate cooking mode for the type of rice you are cooking. For example, select the “White Rice” or “Brown Rice” setting. Some models have a simple one-touch operation, while others may have digital controls.
Step 6: Starting the Cooking Process
- Start Cooking: Press the start button to begin the cooking process. The rice cooker will automatically cook the rice and switch to the keep-warm mode once it’s done.
Step 7: Finishing Up
- Let the Rice Rest: Allow the rice to sit in the keep-warm mode for a few minutes to let any excess moisture be absorbed and the rice to settle.
- Fluff the Rice: Use the provided rice paddle to fluff the rice before serving. This helps to separate the grains and enhance the texture.
Step 8: Cleaning and Storage
- Unplug the Rice Cooker: Once you have finished cooking and serving the rice, unplug the rice cooker from the electrical outlet.
- Clean the Components: Allow the rice cooker to cool down. Remove the inner pot, lid, steaming tray, and other accessories. Wash them with warm, soapy water, rinse thoroughly, and dry.
- Store: Store the rice cooker and its components in a dry, cool place until the next use.
By following these step-by-step instructions, you can easily set up your Oster rice cooker and enjoy perfectly cooked rice with minimal effort.
Advanced Cooking Techniques
Advanced Cooking Techniques with Your Oster Rice Cooker
Your Oster rice cooker is not just for cooking plain rice; it can be used for a variety of advanced cooking techniques to create delicious and diverse dishes. Here are some advanced techniques you can try:
1. Steaming Vegetables and Proteins
Using the Steaming Tray:
- Preparation: Prepare your vegetables or proteins (e.g., chicken, fish) by cutting them into appropriate sizes.
- Setup: Add water to the inner pot according to the rice cooker’s steaming guidelines. Place the steaming tray above the water level.
- Cooking: Arrange the vegetables or proteins in the steaming tray. Close the lid and select the steaming function. Set the timer if your model allows it. Steam until the food is cooked through.
2. One-Pot Meals
Rice and Protein Combo:
- Ingredients: Combine rice with chicken, beef, tofu, or seafood and add vegetables like peas, carrots, and bell peppers.
- Preparation: Season the ingredients with your favorite spices and sauces (e.g., soy sauce, garlic, ginger).
- Setup: Add the rinsed rice and water to the inner pot. Place the seasoned proteins and vegetables on top of the rice.
- Cooking: Close the lid, select the appropriate rice cooking setting, and let the rice cooker do the rest. The steam will cook the proteins and vegetables along with the rice.
3. Making Quinoa or Other Grains
Cooking Quinoa:
- Water Ratio: Use 2 cups of water for every 1 cup of quinoa.
- Preparation: Rinse the quinoa thoroughly under cold water.
- Setup: Add the quinoa and water to the inner pot. You can also add a pinch of salt or a small amount of oil for flavor.
- Cooking: Close the lid and select the “White Rice” setting. Once cooked, fluff the quinoa with a fork.
4. Preparing Porridge or Oatmeal
Cooking Oatmeal:
- Ingredients: Combine rolled oats or steel-cut oats with water or milk. Add sweeteners, fruits, nuts, or spices as desired.
- Water Ratio: Use 3 cups of water or milk for every 1 cup of rolled oats (adjust for steel-cut oats).
- Setup: Add the oats and liquid to the inner pot. Stir in any additional ingredients like cinnamon or vanilla.
- Cooking: Close the lid and select the “Porridge” or “Slow Cook” setting if available. Cook until the oats are soft and creamy.
5. Making Soups and Stews
Hearty Soup:
- Ingredients: Combine your choice of vegetables, proteins, and broth. Add seasonings like salt, pepper, herbs, and spices.
- Preparation: Chop all ingredients into bite-sized pieces.
- Setup: Add all ingredients to the inner pot. Ensure there is enough liquid to cover the ingredients.
- Cooking: Close the lid and select the “Slow Cook” or “Soup” setting. Cook until all ingredients are tender and flavors are well-blended.
6. Cooking Desserts
Rice Pudding:
- Ingredients: Combine cooked rice with milk, sugar, and flavorings like vanilla or cinnamon. Add raisins or other dried fruits if desired.
- Setup: Add the cooked rice, milk, and sugar to the inner pot. Stir in the flavorings and fruits.
- Cooking: Close the lid and select the “Porridge” or “Slow Cook” setting. Cook until the mixture thickens and becomes creamy.
7. Making Risotto
Creamy Risotto:
- Ingredients: Combine Arborio rice with broth, white wine, butter, and Parmesan cheese. Add vegetables or proteins if desired.
- Preparation: Sauté onions and garlic in the rice cooker using the sauté setting if available.
- Setup: Add Arborio rice and toast it lightly. Gradually add broth and wine, stirring frequently.
- Cooking: Use the “Porridge” or “Slow Cook” setting. Stir occasionally until the rice is tender and the risotto is creamy.
By exploring these advanced cooking techniques, you can maximize the versatility of your Oster rice cooker and create a wide range of delicious meals with ease.
Troubleshooting Common Cooking Issues
Even with a reliable rice cooker like Oster, you might occasionally encounter some issues. Here’s a guide to troubleshoot common cooking problems to ensure perfect rice every time.
1. Rice is Too Dry or Hard
Possible Causes:
- Not enough water added.
- Cooking cycle interrupted.
Solutions:
- Add More Water: If the rice is too dry or hard, add a small amount of water (about 1/4 cup) and restart the cooking process or switch to the keep-warm setting for a few minutes.
- Check Measurement: Ensure you are using the correct water-to-rice ratio. For most white rice, it’s 1.5 cups of water to 1 cup of rice. For brown rice, it’s 2.5 cups of water to 1 cup of rice.
2. Rice is Too Mushy or Overcooked
Possible Causes:
- Too much water added.
- Overcooking due to improper settings.
Solutions:
- Reduce Water: Use less water next time. For white rice, use 1.5 cups of water per cup of rice, and for brown rice, use 2.5 cups of water per cup of rice.
- Check Settings: Make sure you are using the appropriate setting for the type of rice you are cooking.
3. Rice Cooker is Not Turning On
Possible Causes:
- Power issue.
- Faulty rice cooker.
Solutions:
- Check Power Connection: Ensure the power cord is securely plugged into both the rice cooker and the power outlet.
- Test Outlet: Test the power outlet with another appliance to ensure it’s working.
- Check for Damage: Inspect the power cord and rice cooker for any visible damage. If damaged, contact Oster customer service for repair or replacement.
4. Rice Sticking to the Pot
Possible Causes:
- Non-stick coating worn out.
- Insufficient rinsing of rice.
Solutions:
- Rinse Rice Thoroughly: Rinse the rice under cold water until the water runs clear to remove excess starch.
- Use Non-Stick Spray: Lightly spray the inner pot with non-stick cooking spray before adding rice and water.
- Replace Inner Pot: If the non-stick coating is worn out, consider replacing the inner pot.
5. Rice Cooker Stops Mid-Cycle
Possible Causes:
- Overheating.
- Electrical issues.
Solutions:
- Check Ventilation: Ensure the rice cooker is placed on a flat, heat-resistant surface with adequate ventilation around it.
- Restart Cooking: Unplug the rice cooker, let it cool down for a few minutes, and then plug it back in and restart the cooking process.
- Consult Manual: Refer to the user manual for any specific troubleshooting tips for your model.
6. Rice Cooker Lid Won’t Close Properly
Possible Causes:
- Misalignment.
- Obstructions.
Solutions:
- Realign Lid: Ensure the lid is properly aligned with the cooker base.
- Remove Obstructions: Check for any food particles or debris that might be obstructing the lid. Clean the lid and cooker rim thoroughly.
7. Rice Cooker Keeps Switching to Keep-Warm Mode Too Early
Possible Causes:
- Sensor malfunction.
- Incorrect settings.
Solutions:
- Check Sensor: Ensure the temperature sensor is clean and free of obstructions.
- Reset Cooker: Unplug the rice cooker, wait a few minutes, and then plug it back in to reset the system.
- Correct Setting: Ensure you have selected the appropriate cooking setting for the type of rice.
By following these troubleshooting tips, you can address common issues and ensure your Oster rice cooker consistently produces perfectly cooked rice.
Cleaning And Maintenance
Cleaning and Maintenance: How to Clean Your Oster Rice Cooker After Use
Proper cleaning and maintenance of your Oster rice cooker are essential to ensure its longevity and optimal performance. Here’s a step-by-step guide on how to clean your rice cooker after use, along with regular maintenance tips.
How to Clean Your Oster Rice Cooker After Use
Step 1: Unplug the Rice Cooker
- Ensure the rice cooker is turned off and unplugged from the electrical outlet before you begin cleaning.
Step 2: Allow the Cooker to Cool Down
- Let the rice cooker cool down completely before disassembling it to avoid burns or damage.
Step 3: Remove and Clean the Inner Pot
- Remove the Inner Pot: Take out the inner pot from the rice cooker base.
- Wash the Inner Pot: Wash the inner pot with warm, soapy water using a soft sponge or cloth. Avoid using abrasive cleaners or scouring pads, as they can damage the non-stick coating.
- Rinse and Dry: Rinse the inner pot thoroughly with clean water and dry it with a soft cloth or let it air dry.
Step 4: Clean the Lid
- Removable Lid: If the lid is removable, wash it in warm, soapy water, rinse thoroughly, and dry.
- Attached Lid: If the lid is attached, wipe it down with a damp cloth. Be sure to clean the steam vent area to remove any trapped food particles.
Step 5: Wipe Down the Exterior
- Damp Cloth: Wipe the exterior of the rice cooker with a damp cloth. Avoid getting water into the electrical components or the heating element.
- Dry: Use a dry cloth to wipe the exterior again to ensure no moisture remains.
Step 6: Clean the Heating Element
- Soft Cloth: Wipe the heating element and the surrounding area with a soft, damp cloth. Ensure the area is dry before reassembling the cooker.
Step 7: Clean Accessories
- Wash Accessories: Wash the measuring cup, rice paddle, and steaming tray (if used) with warm, soapy water. Rinse thoroughly and dry.
Step 8: Reassemble and Store
- Reassemble: Once all parts are dry, reassemble the rice cooker.
- Store: Store the rice cooker in a dry, cool place when not in use.
Regular Maintenance Tips to Prolong the Life of Your Rice Cooker
- Regular Cleaning: Clean your rice cooker after every use to prevent buildup of food residue and ensure hygienic cooking conditions.
- Check for Damage: Regularly inspect the power cord, plug, and rice cooker components for any signs of damage. Replace any damaged parts immediately to avoid electrical hazards.
- Use the Correct Tools: Use the provided rice paddle or a wooden or plastic utensil to serve rice to avoid scratching the non-stick coating of the inner pot.
- Avoid Abrasive Cleaners: Do not use abrasive sponges, scouring pads, or harsh chemicals to clean the inner pot or other components. These can damage the non-stick surface and other parts.
- Proper Storage: Store the rice cooker with the lid slightly open if possible. This helps to prevent any residual moisture from becoming trapped inside, which can lead to mold or unpleasant odors.
- Descale Regularly: If you live in an area with hard water, descale the rice cooker periodically by running a cooking cycle with a mixture of water and vinegar. This helps to remove any mineral buildup on the heating element.
- Follow Manufacturer’s Instructions: Always refer to the user manual for specific cleaning and maintenance instructions for your rice cooker model. This ensures you are following the recommended guidelines to keep your appliance in good condition.
- Use Proper Water Ratios: Using the correct water-to-rice ratios not only ensures perfectly cooked rice but also helps to prevent overflow and spillage, which can lead to additional cleaning and maintenance issues.
By following these cleaning and maintenance tips, you can keep your Oster rice cooker in excellent condition, ensuring it provides reliable performance for years to come.
Recipes And Creative Ideas
Here are some simple and delicious recipes that you can easily prepare using your Oster rice cooker. These recipes are perfect for beginners and require minimal ingredients and effort.
1. Basic White Rice
Ingredients:
- 1 cup white rice
- 1.5 cups water
- Salt to taste (optional)
Instructions:
- Rinse: Rinse the rice under cold water until the water runs clear.
- Add to Cooker: Place the rinsed rice in the inner pot and add water.
- Season: Add a pinch of salt if desired.
- Cook: Close the lid, select the “White Rice” setting, and press start.
- Fluff: Once the rice is cooked, let it sit for a few minutes, then fluff with the rice paddle and serve.
2. Vegetable Rice Pilaf
Ingredients:
- 1 cup white rice
- 1.5 cups vegetable broth
- 1 small onion, finely chopped
- 1 carrot, diced
- 1 bell pepper, diced
- 1 tbsp olive oil
- Salt and pepper to taste
Instructions:
- Sauté Vegetables: Using the sauté setting (if available), heat the olive oil in the inner pot and cook the onion, carrot, and bell pepper until soft.
- Add Rice and Broth: Add the rice and vegetable broth to the inner pot.
- Season: Add salt and pepper to taste.
- Cook: Close the lid, select the “White Rice” setting, and press start.
- Fluff and Serve: Once cooked, fluff the rice with a fork and serve.
3. Chicken and Rice
Ingredients:
- 1 cup white rice
- 1.5 cups chicken broth
- 1 cup cooked chicken, shredded
- 1 cup frozen peas and carrots
- 1 tbsp soy sauce
- Salt and pepper to taste
Instructions:
- Add Ingredients: Place the rice, chicken broth, cooked chicken, frozen peas and carrots, and soy sauce in the inner pot.
- Season: Add salt and pepper to taste.
- Cook: Close the lid, select the “White Rice” setting, and press start.
- Fluff and Serve: Once cooked, fluff the rice with a fork and serve.
4. Rice Pudding
Ingredients:
- 1 cup white rice
- 2 cups milk
- 1/4 cup sugar
- 1 tsp vanilla extract
- 1/4 cup raisins (optional)
- Ground cinnamon (optional)
Instructions:
- Rinse Rice: Rinse the rice under cold water until the water runs clear.
- Add Ingredients: Place the rice, milk, sugar, and vanilla extract in the inner pot. Add raisins if using.
- Cook: Close the lid, select the “Porridge” or “Slow Cook” setting, and press start.
- Stir and Serve: Once the rice pudding is creamy and the rice is tender, stir well. Sprinkle with ground cinnamon if desired and serve warm.
5. Quinoa Salad
Ingredients:
- 1 cup quinoa
- 2 cups water
- 1 cup cherry tomatoes, halved
- 1 cucumber, diced
- 1/4 cup red onion, finely chopped
- 1/4 cup feta cheese, crumbled
- 2 tbsp olive oil
- 1 tbsp lemon juice
- Salt and pepper to taste
Instructions:
- Rinse Quinoa: Rinse the quinoa under cold water until the water runs clear.
- Cook Quinoa: Place the quinoa and water in the inner pot. Close the lid, select the “White Rice” setting, and press start.
- Prepare Salad: While the quinoa is cooking, prepare the cherry tomatoes, cucumber, red onion, and feta cheese.
- Combine: Once the quinoa is cooked, let it cool slightly. Transfer to a large bowl and add the vegetables and feta cheese.
- Dress: Drizzle with olive oil and lemon juice. Season with salt and pepper to taste. Toss to combine and serve.
By trying these simple recipes, you can make the most of your Oster rice cooker and enjoy a variety of delicious meals with minimal effort.
Frequently Asked Questions (FAQ’s)
Here are some expertise-based questions and answers that can help you get the best results when using an Oster rice cooker to prepare rice:
Q: How do I prevent rice from sticking to the bottom of the Oster rice cooker?
A: To prevent rice from sticking:
Rinse the Rice: Always rinse your rice thoroughly before cooking to remove excess starch.
Non-Stick Spray: Use a light spray of non-stick cooking oil in the inner pot before adding the rice and water.
Appropriate Water Ratio: Ensure you’re using the correct water-to-rice ratio. Adjust if necessary depending on your specific type of rice.
Q: What is the best water-to-rice ratio for cooking brown rice in an Oster rice cooker?
A: For brown rice, the best ratio typically is about 2.5 cups of water for every 1 cup of brown rice. This ratio may slightly vary depending on the specific type of brown rice (like short or long grain), so adjusting a bit might be necessary after your first cook if the texture isn’t to your liking.
Q: Can I use chicken broth instead of water to cook rice in my Oster rice cooker?
A: Absolutely! You can replace water with chicken broth to cook rice in your Oster rice cooker. This will add additional flavor to the rice, making it a tasty side dish. Use the same amount of broth as you would water according to your rice type’s recommended ratio.
Q: How long does it typically take to cook white rice in an Oster rice cooker?
A: Cooking white rice in an Oster rice cooker typically takes about 20 to 30 minutes. This includes both cooking and resting time, during which the rice cooker automatically switches to ‘keep warm’ mode after cooking to allow the rice to settle and finish absorbing any residual moisture.
Q: Can I cook other grains like quinoa or barley in my Oster rice cooker?
A: Yes, you can cook a variety of grains in an Oster rice cooker, not just rice. For quinoa, use a water-to-quinoa ratio of about 2:1 and cook for about 15 minutes. For barley, the ratio is around 3:1 water to barley, and it typically takes about 30 to 40 minutes to cook.
Q: What’s the best way to clean the inner pot of my Oster rice cooker?
A: Clean the inner pot by:
Letting it Cool: Always let the pot cool before cleaning.
Rinsing: Rinse with warm water to remove any loose rice grains.
Washing: Wash with mild, soapy water using a soft sponge or cloth. Avoid using abrasive scrubbers that can scratch the non-stick surface.
Drying: Dry thoroughly before reinserting into the cooker.
Q: Can I steam vegetables at the same time I am cooking rice in my Oster rice cooker?
A: Yes, if your Oster rice cooker comes with a steaming tray, you can easily steam vegetables (or proteins like fish) at the same time as cooking rice. Simply add the vegetables to the steaming tray after you’ve put the rice and water in the pot. Ensure there’s enough water to produce steam for the entire cooking duration.
Q: How do I make sushi rice in an Oster rice cooker?
A: To make sushi rice:
Ratio: Use a water-to-rice ratio of about 1.2:1.
Rinse the Rice: Rinse the rice until the water runs clear.
Cook: Use the settings as per usual for white rice.
Season: Once cooked and slightly cooled, season with sushi vinegar mix (a combination of vinegar, sugar, and salt) while fluffing gently.
Q: How much water do I need to use for cooking rice in an Oster rice cooker?
A: The water-to-rice ratio depends on the type of rice:
White Rice: Typically, 1.5 cups of water for every 1 cup of rice.
Brown Rice: Generally, 2.5 cups of water for every 1 cup of rice.
Sushi Rice: About 1.25 cups of water for every 1 cup of rice.
Q: Do I need to rinse my rice before cooking it in the Oster rice cooker?
A: Yes, it’s advisable to rinse rice to remove excess starch, which helps prevent the rice from becoming too sticky and clumpy. Rinse under cold water until the water runs clear.
Q: How long does it take to cook rice in an Oster rice cooker?
A: Cooking time can vary based on the type of rice and the specific model of your Oster rice cooker:
White Rice: About 20-30 minutes.
Brown Rice: About 40-50 minutes.
Q: Can I leave the rice in the rice cooker after it’s done cooking?
A: Yes, most Oster rice cookers automatically switch to a “Keep Warm” mode after cooking, which can keep the rice warm and moist for several hours without overcooking it.
Q: How do I prevent rice from sticking to the bottom of the rice cooker?
A: To prevent sticking:
Non-Stick Spray: Lightly coat the inner pot with a non-stick cooking spray or a bit of oil before adding the rice and water.
Proper Water Ratio: Ensure you’re using the correct amount of water for the type of rice you’re cooking.
Q: Can I cook other types of grains in my Oster rice cooker?
A: Absolutely! Your Oster rice cooker can cook a variety of grains such as quinoa, barley, and more. The key is to adjust the water ratio and cooking time accordingly:
Quinoa: Use a 2:1 water-to-quinoa ratio and cook for about 15 minutes.
Barley: Use a 3:1 water-to-barley ratio and cook for about 40 minutes.
Q: How do I clean my Oster rice cooker?
A: After each use, ensure the cooker is unplugged and completely cool. Wash the removable inner pot and any accessories (like the steaming tray) with warm, soapy water. Wipe down the exterior and the lid with a damp cloth. Avoid using abrasive cleaners or pads on the non-stick surfaces.
Q: Is it possible to steam vegetables or meat in the Oster rice cooker while cooking rice?
A: Yes, if your model includes a steaming tray, you can easily steam vegetables, fish, or chicken above the rice as it cooks. Just arrange the items in the steaming tray, ensuring they will cook in the estimated time the rice will take to cook.
Q: What should I do if my rice is too dry or too wet?
A: If your rice is too dry, add a small amount of water (about 1/4 cup), stir, and use the “Keep Warm” setting to let it steam a bit longer. If it’s too wet, let it cook without the lid for a few extra minutes to allow more water to evaporate.
These answers should guide new and experienced users alike in making the most out of their Oster rice cooker, ensuring delicious and perfectly cooked rice with every use.
Conclusion
Cooking rice to perfection might seem daunting, but with an Oster rice cooker, it becomes an effortless, almost foolproof process. Whether you’re preparing a simple side dish of fluffy white rice, a robust brown rice base, or experimenting with grains like quinoa and barley, the Oster rice cooker simplifies the task, delivering consistent results every time. Remember to adjust water ratios and settings according to the type of rice, and don’t forget to take advantage of the versatility of your device to steam vegetables and proteins simultaneously. By following the steps outlined in this guide on how to cook rice in an Oster rice cooker, you’re well on your way to enjoying perfectly cooked rice with minimal fuss, making every meal a delightful experience. Happy cooking!


