

As an Amazon Associate I earn from qualifying purchases.
If you’re new to using an Aroma rice cooker or just need a quick refresher, cooking the perfect batch of rice can sometimes seem daunting. However, with the right know-how, it can be straightforward and hassle-free. In this guide, we’ll delve into the specifics of how long to cook 2 cups of rice in aroma rice cooker, ensuring that every grain is flawlessly fluffy and ready to accompany any dish. Whether you’re preparing a side for a family dinner or a base for a gourmet meal, mastering this simple skill will make meal prep a breeze. Let’s get started on this culinary journey to perfect rice!
Importance of precise cooking times for perfect rice
Achieving perfect rice consistently requires precise cooking times, which are crucial for several reasons:
1. Texture and Consistency
- Precise cooking times ensure that rice cooks evenly and achieves the desired texture. Whether you prefer your rice fluffy, soft, or firm, controlling the cooking time is essential. Overcooked rice can become mushy and sticky, while undercooked rice may remain hard and grainy.
2. Taste
- The cooking time affects not only the texture but also the taste of the rice. Properly cooked rice has a pleasant, subtle flavor that can complement a variety of dishes. Overcooking or undercooking can lead to a less desirable taste, either by making the rice bland from excessive water absorption or gritty if it’s undercooked.
3. Nutrient Retention
- Cooking rice for the correct duration helps preserve its nutritional value. Rice is a good source of energy, vitamins, and minerals. Overcooking can lead to a significant loss of nutrients through leaching into cooking water, which is often discarded.
4. Digestibility
- Properly cooked rice is easier to digest. Undercooked rice can be hard to digest and may cause gastrointestinal discomfort for some people.
5. Aesthetic Appeal
- The appearance of rice can greatly affect the overall presentation of a meal. Rice that is perfectly cooked looks appealing and can elevate the dining experience. It should be separate and grainy, not clumped together, which is more likely to happen if the cooking time is not optimized.
6. Versatility
- Different dishes require different types of rice textures. For instance, sushi rice needs to be sticky and moist, whereas rice for a pilaf should be fluffy and separate. Knowing how to adjust cooking times based on the type of dish you are preparing allows for greater culinary versatility.
In conclusion, precise cooking times are fundamental for preparing rice that is not only enjoyable to eat but also optimally contributes to the nutritional quality and aesthetic of meals. Especially when using an Aroma rice cooker, which automates many aspects of cooking, understanding and setting the correct cooking times ensures that the rice turns out perfectly every time.
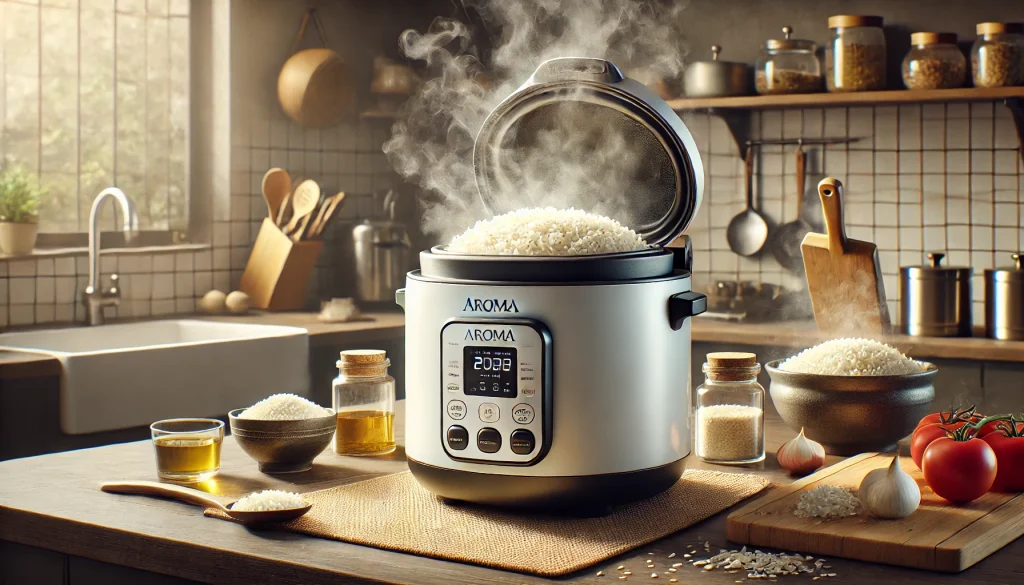
Overview of the Aroma rice cooker capabilities
The Aroma rice cooker is a versatile and user-friendly appliance that’s popular in many households for its efficiency and convenience in cooking a variety of dishes, not just rice. Here’s an overview of its key capabilities and features:
1. Multi-Functional Cooking
- Rice Cooking: It can cook all types of rice including white, brown, jasmine, basmati, and more, adjusting the cooking times and temperatures to suit different varieties.
- Steam Function: Many models come with a steaming tray that allows you to steam vegetables, fish, and other proteins simultaneously while cooking rice, making it a complete meal preparation tool.
- Slow Cooking: Some models also function as slow cookers, perfect for making soups, stews, and other slow-cooked dishes.
- Saute-Then-Simmer (STS): This feature enables the rice cooker to sauté ingredients at a high heat and then automatically switch to simmer once liquid is added. It’s great for dishes that require initial frying like Spanish rice or risotto.
2. Programmable Settings
- Digital Controls: Offer easy touch operation with settings for specific functions like White Rice, Brown Rice, Steam, and Keep Warm.
- Delay Timer: Allows you to plan meals by setting the cooker to start at a later time.
- Automatic Keep Warm: Automatically switches to the ‘Keep Warm’ mode after cooking is complete, ensuring rice stays warm until it’s time to serve.
3. Capacity and Size
- Varied Capacities: Available in multiple sizes, from small units suitable for individuals or couples to larger ones ideal for families.
- Compact Design: Despite its multi-functionality, it is designed to be compact enough to fit conveniently in any kitchen.
4. Easy Maintenance
- Non-stick Inner Pot: Makes for easy cleaning as food doesn’t stick to the surface.
- Removable Parts: Components like the inner pot and steam tray are removable and usually dishwasher safe.
5. Accessories
- Measuring Cup: Ensures you use the correct amount of rice and water.
- Rice Spatula: Designed to scoop and serve rice without damaging the non-stick surface.
- Steaming Tray: Allows you to steam foods above while rice cooks below.
6. Energy Efficiency
- Energy Saving: Designed to cook quickly and efficiently, using less energy than traditional stovetop methods.
The Aroma rice cooker is essentially a smart kitchen appliance designed to simplify meal preparation, offering numerous cooking methods in one device. It’s a great tool for anyone looking to save time and kitchen space while expanding their culinary repertoire.
Understanding Your Aroma Rice Cooker
Understanding how to use your Aroma rice cooker effectively begins with familiarizing yourself with its specific features designed for rice cooking, as well as preparing the appliance for its initial use. Here’s a detailed guide on both aspects:
Features and Functions Specific to Rice Cooking
- Multiple Rice Settings: Most Aroma rice cookers come with preset programs tailored to cook different types of rice, such as white, brown, and sushi rice. These settings adjust the cooking temperature and duration to suit the specific needs of each rice variety, ensuring optimal results.
- Fuzzy Logic Technology: Advanced models are equipped with fuzzy logic, an intelligent cooking algorithm that adjusts the cooking cycle based on the quantity of rice and water. This technology ensures consistent and perfect rice by compensating for any variations.
- Texture Settings: Some models allow you to choose your preferred rice texture, whether you like it softer or firmer. This feature fine-tunes the cooking process to meet personal preferences.
- Quick Rice Function: For those in a hurry, the Quick Rice setting speeds up the cooking process by reducing cooking times compared to the standard settings. It’s ideal for when you need a quick meal but don’t want to compromise on quality.
- Delayed Timer: This feature is perfect for planning meals ahead. You can add rice and water, set the timer for when you want the rice cooker to start cooking, and come home to freshly cooked rice.
Preparing Your Rice Cooker for Use
- Unpack and Inspect: Remove all packaging materials and inspect the rice cooker for any damages. Ensure you have all the accessories, including the inner cooking pot, rice measuring cup, and rice paddle.
- Read the Manual: Before using your Aroma rice cooker for the first time, read the user manual thoroughly. It provides essential information on the functions, safety precautions, and tips for best results.
- Clean Before Use: Wash the removable parts like the inner cooking pot and the rice paddle with warm soapy water. Rinse and dry thoroughly. Wipe the outer surface and the lid with a damp cloth. This ensures the removal of any residues from manufacturing or packaging.
- Initial Test Run: It’s a good practice to do a test run with just water. Fill the inner pot with a cup of water, place it in the cooker, and run a standard cycle. This helps ensure everything is working correctly and also helps to remove any odors or residues from the manufacturing process.
- Positioning: Place your rice cooker on a stable, level, heat-resistant surface away from walls and cabinets. Ensure it’s in a spot where the steam vent is not blocked to avoid moisture damage to surrounding areas.
By understanding these specific features and properly preparing your rice cooker for use, you can maximize the performance of your Aroma rice cooker and enjoy perfectly cooked rice every time. Whether you’re cooking a simple side dish or an elaborate meal, your Aroma rice cooker is designed to make the process as easy and efficient as possible.
Ingredients and Measurements
Using your Aroma rice cooker efficiently involves choosing the right types of rice and knowing the correct water-to-rice ratios. Here’s a guide to help you get the best results:
Types of Rice Suitable for the Aroma Rice Cooker
The Aroma rice cooker is versatile and suitable for cooking a wide range of rice types. Here are some common varieties you can cook:
- White Rice: The most common type, including long-grain, short-grain, and medium-grain.
- Brown Rice: Richer in fiber, it requires a slightly longer cooking time.
- Basmati Rice: Aromatic long-grain rice ideal for Indian dishes.
- Jasmine Rice: A fragrant long-grain rice commonly used in Southeast Asian cuisine.
- Sushi Rice: Short-grain rice that becomes sticky when cooked, perfect for making sushi.
- Wild Rice: Actually a grass, wild rice takes longer to cook and usually requires more water.
Water to Rice Ratio for 2 Cups of Rice
The water-to-rice ratio can vary slightly depending on the type of rice you are using, as well as your personal preference for firmness. Here are general guidelines to start with:
White Rice (Long-Grain, Medium-Grain, and Short-Grain):
- Ratio: About 1½ to 1¾ cups of water for every 1 cup of rice.
- Total for 2 Cups Rice: Use 3 to 3½ cups of water.
Brown Rice:
- Ratio: Typically, you need more water, about 2¼ to 2½ cups of water per 1 cup of rice.
- Total for 2 Cups Rice: Use 4½ to 5 cups of water.
Basmati and Jasmine Rice:
- Ratio: Slightly less water than standard white rice, generally 1½ cups of water per 1 cup of rice.
- Total for 2 Cups Rice: Use 3 cups of water.
Sushi Rice:
- Ratio: About 1¼ cups of water per 1 cup of rice because it’s desired to be stickier.
- Total for 2 Cups Rice: Use 2½ cups of water.
Wild Rice:
- Ratio: Requires significantly more water, generally 3 to 4 cups of water per 1 cup of rice.
- Total for 2 Cups Rice: Use 6 to 8 cups of water.
Additional Tips
- Rinsing Rice: Always rinse rice before cooking to remove excess starch, which can cause rice to be too sticky or gummy. This is particularly important for white and sushi rices.
- Soaking: For grains like basmati, soaking the rice for about 30 minutes before cooking can lead to fluffier rice.
- Adjusting for Texture: If you prefer softer rice, add a little more water. For firmer rice, slightly reduce the water amount.
By understanding the right types of rice and water ratios for your Aroma rice cooker, you can achieve perfectly cooked rice tailored to any dish or preference.
Step-by-Step Cooking Guide
Cooking rice in an Aroma rice cooker can be simplified into a few straightforward steps. Here’s a detailed step-by-step guide to ensure you get perfectly cooked rice every time:
Step 1: Washing and Preparing the Rice
- Measure the Rice: Use the measuring cup that came with your rice cooker to measure out the desired amount of rice. For this guide, we’ll use 2 cups of rice.
- Rinse the Rice: Place the rice in a fine-mesh sieve and rinse under cold running water until the water runs clear. This removes excess starch from the rice, preventing it from becoming gummy or overly sticky after cooking.
- Soak if Necessary: Depending on the type of rice (like Basmati), you might want to soak it for 20-30 minutes to ensure the grains expand to their full length and cook evenly. Drain the rice after soaking.
Step 2: Setting Up the Rice Cooker
- Add the Rice to the Cooker: Transfer the rinsed (and optionally soaked) rice to the cooking pot of your Aroma rice cooker.
- Add Water: Pour the correct amount of water over the rice. For 2 cups of white rice, use about 3 to 3½ cups of water (adjust based on the type of rice and desired texture).
- Add Seasonings (Optional): If desired, you can add salt or a bit of oil or butter for extra flavor.
Step 3: Cooking the Rice
- Close the Lid: Ensure the lid is securely closed.
- Select the Appropriate Setting: Use the control panel to select the setting that corresponds to the type of rice you are cooking (e.g., white rice, brown rice). If there’s a specific ‘Cook’ button, press it to start the cooking process.
- Let It Cook: The rice cooker will automatically adjust the temperature and timing. For most white rice, the cooking process will take about 18-30 minutes. Brown rice will take longer, typically 30-45 minutes.
- Wait for the Switch to ‘Warm’: Once the rice is cooked, the Aroma rice cooker will automatically switch to the ‘Keep Warm’ mode, indicating that the cooking is complete. Allow the rice to sit in this mode for about 10-15 minutes to finish steaming; this helps improve the texture.
Step 4: Serving the Rice
- Fluff the Rice: Open the lid and use a rice paddle or fork to fluff the rice gently. This separates the grains and prevents them from becoming too dense or clumped together.
- Serve: Serve the rice hot as a side dish or base for other recipes.
Additional Tips
- Cleaning: After each use, clean the inner pot, lid, and any utensils with warm soapy water. Make sure the outer surface of the cooker is wiped down to keep the appliance in good working order.
- Water Adjustments: Depending on your texture preference and the specific type of rice, you may need to adjust the water ratio slightly through trial and error.
- Keep Lid Closed: Keep the lid closed throughout the cooking and resting stages to ensure even cooking and optimal steam retention.
By following these detailed steps, you’ll be able to use your Aroma rice cooker to its fullest potential, enjoying perfect rice with minimal effort every time.
Troubleshooting Common Issues
Troubleshooting common issues with rice cooking in your Aroma rice cooker involves understanding the factors that can lead to undercooked or overcooked rice and making the necessary adjustments. Here are some solutions and tips to help you get perfect results every time:
Undercooked Rice
- Symptoms: Rice is too hard, crunchy, or not fully expanded.
Solutions:
- Increase Water: Add more water to ensure that the rice has enough moisture to absorb. A general rule is to add ¼ to ½ cup extra water and try cooking again.
- Check Seal: Ensure that the rice cooker’s lid is sealing properly. A loose lid can let steam escape, reducing the pressure and moisture needed to cook the rice.
- Soaking: For grains like basmati or brown rice, soaking the rice for 20-30 minutes before cooking can help achieve a softer texture.
- Restart the Cooking Cycle: If the rice is significantly undercooked, it may need more cooking time. Stir the rice, add a little extra water if it looks dry, and start the cooking cycle again.
Overcooked Rice
- Symptoms: Rice is mushy, too sticky, or burnt at the bottom.
Solutions:
- Reduce Water: Next time, reduce the water by ¼ cup to prevent overcooking. Adjust according to how the rice turned out.
- Reduce Cooking Time: If your rice cooker has a manual timer or settings for different types of rice, adjust these to reduce the cooking time.
- Avoid Extra Stirring: Stirring rice too much during cooking can break the grains and release more starch, making the rice mushy. Stir once at the beginning if needed, then leave it to cook undisturbed.
- Natural Release: Allow the rice to sit in the ‘keep warm’ setting for 10-15 minutes after cooking to absorb any excess moisture evenly.
Adjustments for Different Rice Varieties
Different types of rice require specific water ratios and cooking times. Here’s how to adjust for common varieties:
- White Rice (long-grain, short-grain, medium-grain): Generally requires about 1¾ cups of water per cup of rice. Cook time is about 18-30 minutes depending on the quantity.
- Brown Rice: Needs more water, about 2¼ to 2½ cups per cup of rice, and longer cooking times, typically 30-45 minutes.
- Basmati Rice: Requires slightly less water than standard white rice, about 1½ cups of water per cup of rice. Soaking before cooking can improve texture.
- Jasmine Rice: Similar to basmati, it often requires less water, around 1½ cups per cup of rice, with a fluffy texture that’s slightly sticky.
- Sushi Rice: Needs about 1¼ cups of water per cup of rice. It should be slightly stickier, so careful water measurement is crucial.
- Wild Rice: Requires a lot more water, approximately 3 to 4 cups of water per cup of rice, and a longer cooking time, usually 45-50 minutes.
By tailoring your approach based on the specific rice type and adjusting for any issues you encounter, you can ensure perfectly cooked rice with your Aroma rice cooker every time. This understanding allows for greater flexibility and precision in your cooking, making the most of your appliance’s capabilities.
Additional Tips for Perfect Rice
Achieving perfect rice in your Aroma rice cooker can be enhanced with the right techniques and a touch of culinary creativity. Here are additional tips for enhancing the flavor and texture of your rice:
Enhancing Flavor with Seasonings and Broths
- Use Broth Instead of Water: Swap out the water for chicken, beef, or vegetable broth to add a rich flavor to your rice. This is especially effective for savory dishes where the rice acts as a base.
- Add Aromatics: Before cooking, add aromatics such as a bay leaf, a stick of cinnamon, cloves, or star anise. These can impart subtle flavors that elevate the rice without overwhelming it.
- Cook with Coconut Milk: For a tropical flair, use coconut milk in place of some of the water. This works well with jasmine and basmati rice and is excellent for dishes that pair with curries.
- Stir in Herbs and Spices: After the rice is cooked, stir in fresh herbs like chopped cilantro, parsley, or basil for freshness. Dry spices such as turmeric, paprika, or cumin powder can be added before cooking to infuse the rice with these flavors.
- Sauté Onions and Garlic: Before adding the rice and water to the cooker, sauté onions and garlic until golden in a separate pan (or use the sauté function if your cooker has one). This adds a deep, savory flavor base that enriches plain rice.
Best Practices for Fluffy and Non-Sticky Rice
- Rinse the Rice: Always rinse your rice thoroughly until the water runs clear to remove excess starch. This is crucial for preventing the rice from becoming too sticky.
- Ratio Matters: Use the correct water-to-rice ratio for the type of rice you’re cooking. Too much water can make the rice mushy, and too little can make it too firm.
- Let It Rest: After the rice has finished cooking, let it sit in the cooker with the lid on for 10-15 minutes before fluffing. This allows the moisture to redistribute throughout the rice, making it fluffier.
- Fluff with a Fork: Use a fork to fluff the rice gently. This helps to separate the grains without crushing them, preserving the integrity of each grain.
- Avoid Stirring While Cooking: Minimize stirring the rice once it’s started cooking. Stirring can break the grains and release more starch, leading to stickier rice.
- Use a Salad Spinner: For exceptionally fluffy rice, after rinsing, place the rice in a salad spinner to remove excess water. This reduces the external moisture, allowing for more controlled cooking.
- Consider the Cooking Method: For varieties like sushi rice or sticky rice, adjusting your method (less rinsing, precise water measurements) is crucial since these types require a stickier texture.
Implementing these tips and practices when using your Aroma rice cooker will help you master the art of cooking rice, ensuring delicious, fluffy, and flavorful grains every time. Whether you’re preparing a simple side dish or a complex meal, these strategies will enhance both the taste and presentation of your rice.
Serving and Storage
Properly serving and storing your rice is just as important as cooking it well. Here are some creative serving ideas and tips for storing leftover rice to ensure it remains tasty and safe to consume.
Serving Ideas for Rice
- Rice Bowls: Top your freshly cooked rice with a variety of ingredients such as grilled vegetables, lean proteins like chicken or fish, and a flavorful sauce for a complete meal in a bowl.
- Side Dish: Serve it as a simple side dish with herbs like parsley or cilantro sprinkled on top. For added flavor, mix in a pat of butter or drizzle with olive oil before serving.
- Fried Rice: Use your rice as the base for a fried rice dish. Combine it with mixed vegetables, eggs, and soy sauce for a quick and delicious meal.
- Stuffed Peppers or Tomatoes: Fill bell peppers or tomatoes with a mixture of rice, spices, and other fillings like cheese and meat, then bake until the vegetables are tender.
- Rice Salad: Cool the rice and mix it with a medley of chopped vegetables, a vinaigrette, and herbs to create a refreshing rice salad.
Storing Leftover Rice
- Cool Quickly: Spread the rice out on a large, shallow dish to cool it quickly. This minimizes the time the rice spends in the temperature danger zone (between 40°F and 140°F) where bacteria can grow rapidly.
- Refrigerate Promptly: Once cooled, transfer the rice to an airtight container and refrigerate it within two hours of cooking. Properly stored, cooked rice can last in the refrigerator for 3 to 5 days.
- Freezing: For longer storage, freeze the rice in airtight containers or heavy-duty freezer bags. Frozen rice can last up to 6 months. Label the bags with the date so you can keep track of storage time.
- Reheating: When ready to eat, reheat the rice until it is steaming hot all the way through (at least 165°F). If the rice is frozen, thaw it in the refrigerator before reheating. Add a little water when reheating dry rice to bring back moisture.
Safety Tips
- Bacillus cereus Caution: Rice can contain spores of a bacterium called Bacillus cereus, which can survive cooking and multiply if the rice is left at room temperature. Always store rice properly and reheat to the correct temperature to prevent food poisoning.
- Avoid Repeated Reheating: Only reheat the amount of rice you plan to eat. Repeatedly cooling and reheating rice can increase the risk of foodborne illness.
By following these serving and storage tips, you can enjoy your rice in a variety of delicious ways while ensuring it remains safe and tasty for future meals. Whether you’re creating a complex dish or simply using up leftovers, these strategies will help enhance your rice dishes.
Frequently Asked Questions (FAQ’s)
If you’re looking to understand the nuances of cooking 2 cups of rice in an Aroma rice cooker, here are some commonly asked questions along with expert answers to ensure you achieve perfect results every time:
Question: How long does it take to cook 2 cups of white rice in an Aroma rice cooker?
Answer: Cooking 2 cups of white rice in an Aroma rice cooker typically takes about 25-30 minutes. This includes both cooking and a brief steaming period at the end during the ‘keep warm’ phase to allow the rice to settle and absorb any remaining steam.
Question: Does the cooking time vary based on the type of rice?
Answer: Yes, different types of rice require different cooking times. For example, brown rice usually takes longer to cook than white rice due to its tougher bran layer. Expect brown rice to take about 45-50 minutes to cook in an Aroma rice cooker.
Question: Should I adjust the water ratio if I am cooking a different type of rice like basmati or jasmine?
Answer: Yes, different rice types typically require different water ratios. For basmati rice, use about 1¾ cups of water per cup of rice. For jasmine rice, the ratio is similar to white rice, typically around 1¾ cups of water per cup of rice. Adjustments may be needed based on your personal texture preference.
Question: How can I ensure my rice comes out fluffy and not soggy or too dry?
Answer: To ensure fluffy rice, use the correct water-to-rice ratio, rinse your rice thoroughly to remove excess starch, and allow the rice to steam in the ‘keep warm’ mode for 10-15 minutes after cooking. This additional steaming time helps to fluff up the rice by allowing grains to absorb any residual moisture evenly.
Question: Is there a difference in the cooking time when the rice cooker is full versus when it’s not?
Answer: Generally, the cooking time does not drastically change whether you are cooking a small or large batch of rice. The Aroma rice cooker adjusts its cooking cycle based on the weight and type of rice. However, larger quantities may require slightly longer steaming times post-cooking to ensure even heat distribution throughout the rice.
Question: What settings should I use for cooking 2 cups of rice in my Aroma rice cooker?
Answer: Most Aroma rice cookers have specific settings for different types of rice. Use the ‘white rice’ setting for regular white rice, which automatically adjusts cooking time and temperature. For brown rice, use the ‘brown rice’ setting which extends cooking times to handle the tougher grains.
Question: Can I use my Aroma rice cooker to keep the rice warm after cooking, and if so, for how long?
Answer: Yes, Aroma rice cookers automatically switch to a ‘keep warm’ mode after cooking. You can keep the rice in this mode for several hours without drying it out too much. However, it’s best to consume or refrigerate the rice within 1-2 hours to maintain the best quality and safety.
These expert insights will help you utilize your Aroma rice cooker to its fullest potential, ensuring consistently well-cooked rice every time you use it.
Conclusion
Mastering the art of cooking rice in your Aroma rice cooker can simplify your kitchen routine and guarantee perfectly cooked rice every time. By understanding how long to cook 2 cups of rice in your Aroma rice cooker, you’re not only saving time but also ensuring that your rice is consistently delicious and ready to complement any meal. Whether you’re preparing a quick side dish, crafting a hearty rice bowl, or setting the stage for an elaborate meal, your Aroma rice cooker is an indispensable tool. Remember to adjust water ratios and settings based on the type of rice you are using, and embrace the convenience and reliability of this smart kitchen appliance. Happy cooking, and enjoy the fluffy perfection that your Aroma rice cooker delivers with just the push of a button!


