

Learn how do i use aroma professional plus rice cooker with this step-by-step guide. Perfect rice every time with easy settings and tips.
As an Amazon Associate I earn from qualifying purchases.
Are you eager to simplify your cooking routine and whip up delicious meals with ease? If you’ve recently acquired an Aroma Professional Plus Rice Cooker, you’re in for a treat. This versatile kitchen appliance is designed to handle a variety of cooking tasks beyond just making rice. But how do i use aroma professional plus rice cooker to its full potential? In this guide, we’ll walk you through the step-by-step process, from initial setup to cooking your first meal, ensuring you make the most out of this fantastic culinary tool. Get ready to transform your kitchen experience and enjoy perfectly cooked meals every time!
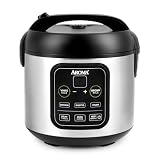
Most Recommended Aroma Rice Cooker
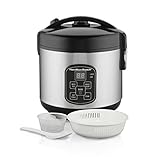
More Rice Cookers We Put to the Test


———
Table of Contents
———
…
Overview of the Aroma Professional Plus Rice Cooker
The Aroma Professional Plus Rice Cooker is a versatile and advanced kitchen appliance designed to simplify meal preparation and expand your cooking repertoire. Here’s an overview of its key features, benefits, and functionalities that make it a valuable addition to any kitchen.
Key Features
Multiple Cooking Functions:
- The Aroma Professional Plus offers a variety of cooking modes including white rice, brown rice, quick rice, steam, slow cook, sauté-then-simmer (STS), and even cake. This flexibility allows you to prepare a wide range of dishes beyond just rice.
Digital Controls and Display:
- Equipped with an easy-to-use digital control panel, the rice cooker allows you to select and customize cooking modes with the touch of a button. The clear display shows the selected function, cooking time, and countdown timer.
Large Capacity:
- With options to cook up to 20 cups of cooked rice, this rice cooker is ideal for both small families and large gatherings. Its generous capacity makes it perfect for meal prepping or entertaining guests.
Delay Timer:
- The 15-hour delay timer feature allows you to plan your meals in advance. You can set the cooker to start at a specific time, ensuring that your food is ready exactly when you need it.
Automatic Keep-Warm and Extended Keep-Warm:
- After the cooking cycle is complete, the rice cooker automatically switches to a keep-warm mode to maintain your food at an optimal serving temperature without overcooking it. The extended keep-warm function keeps the food warm for longer periods without drying it out.
Sauté-Then-Simmer (STS) Function:
- This unique feature allows you to sauté ingredients at high heat and then automatically switch to a simmer mode once liquid is added. It’s perfect for dishes that require initial browning followed by slow cooking.
Steam Tray:
- The included steam tray enables you to steam vegetables, fish, and other ingredients while cooking rice below, saving time and making meal preparation more efficient.
Non-Stick Inner Pot:
- The inner cooking pot is non-stick, ensuring easy cleanup and preventing food from sticking. It is also removable, making it convenient to wash and maintain.
Benefits of Using the Aroma Professional Plus Rice Cooker
- Efficiency: Save time and effort with automated cooking functions and preset modes that handle various types of dishes seamlessly.
- Versatility: Expand your culinary horizons with the ability to cook rice, steam, slow cook, and even bake, all in one appliance.
- Consistency: Achieve perfect results every time with precise temperature control and even heat distribution.
- Convenience: Features like the delay timer and automatic keep-warm function add convenience to your cooking schedule, allowing for better meal planning and flexibility.
- Easy Maintenance: The non-stick inner pot and removable components make cleaning up quick and hassle-free.
The Aroma Professional Plus Rice Cooker is more than just a rice cooker; it’s a multifunctional kitchen companion designed to simplify your cooking experience and enhance your culinary skills. Whether you’re preparing a simple bowl of rice or experimenting with more complex recipes, this appliance offers the tools and flexibility to make every meal a success.
Key features and capabilities
The Aroma Professional Plus Rice Cooker is packed with features and capabilities that make it a versatile and essential appliance for any kitchen. Here’s a detailed look at its key features and what they offer:
Key Features and Capabilities
Multiple Cooking Functions
- White Rice: Optimized for cooking fluffy white rice to perfection.
- Brown Rice: Adjusts cooking time and temperature for the denser, fibrous nature of brown rice, ensuring it’s thoroughly cooked.
- Quick Rice: Cooks rice faster by using a higher temperature setting, perfect for when you’re in a hurry.
- Steam: Allows you to steam vegetables, seafood, and other ingredients using the included steam tray, while rice cooks below.
- Slow Cook: Functions like a traditional slow cooker, ideal for preparing stews, soups, and braised dishes over several hours.
- Sauté-Then-Simmer (STS): Enables you to sauté ingredients at high heat and then automatically switch to a simmer once liquid is added, great for dishes that require initial browning followed by slow cooking.
- Cake: Allows you to bake cakes and other desserts directly in the rice cooker, using precise temperature control.
Digital Controls and Display
- Easy-to-Use Interface: A user-friendly digital control panel with clear, intuitive buttons for selecting cooking functions and adjusting settings.
- LCD Display: Shows the selected cooking mode, remaining cooking time, and countdown timer for precise cooking control.
Large Capacity
- 20-Cup Cooked Rice Capacity: Suitable for cooking large batches of rice, making it ideal for family gatherings, parties, or meal prepping.
Delay Timer
- 15-Hour Delay Timer: Lets you plan meals in advance by setting the cooker to start cooking at a specific time, ensuring your food is ready when you need it.
- Automatic Keep-Warm and Extended Keep-Warm
- Automatic Keep-Warm: After cooking, the rice cooker automatically switches to keep-warm mode to maintain an ideal serving temperature without overcooking.
- Extended Keep-Warm: Keeps food warm for longer periods without drying out, perfect for when you need to keep your meal warm for extended times.
Non-Stick Inner Pot
- Easy Cleanup: The non-stick coating prevents food from sticking, making cleanup simple and quick. The pot is also removable for easy washing.
Steam Tray
- Simultaneous Cooking: The included steam tray allows you to steam vegetables, fish, and other ingredients while cooking rice below, saving time and making meal preparation more efficient.
Sauté-Then-Simmer (STS) Function
- Versatile Cooking: Sauté ingredients at high heat and then automatically switch to a simmer once liquid is added. Ideal for recipes that require browning followed by slow cooking.
Durable Construction
- Quality Build: Sturdy construction ensures long-lasting performance and reliability.
Benefits of the Aroma Professional Plus Rice Cooker
- Efficiency: Automates the cooking process, saving time and effort while delivering consistent results.
- Versatility: Capable of handling a wide range of dishes, from rice and steamed vegetables to slow-cooked meals and baked desserts.
- Convenience: Features like the delay timer and automatic keep-warm function add flexibility to your cooking schedule.
- Easy Maintenance: Non-stick inner pot and removable components make cleaning up quick and hassle-free.
- Capacity: Large enough to cater to small families and large gatherings alike, making it suitable for any occasion.
The Aroma Professional Plus Rice Cooker combines these features and capabilities to provide a comprehensive cooking solution that simplifies meal preparation and enhances your culinary repertoire.
Getting Started
Starting with your Aroma Professional Plus Rice Cooker is straightforward and ensures you get the most out of this versatile appliance. Here’s a detailed guide on unboxing, initial setup, and understanding the components and assembly.
Unboxing and Initial Setup
Unboxing:
- Carefully remove the rice cooker from its packaging.
- Ensure you have all the components: the main cooking unit, inner cooking pot, lid, steam tray, measuring cup, rice paddle, and user manual.
Components:
- Main Cooking Unit: The body of the rice cooker with the digital control panel.
- Inner Cooking Pot: The removable pot where you place the rice and water.
- Lid: The cover that retains steam and heat.
- Steam Tray: Used for steaming vegetables, fish, and other foods.
- Measuring Cup: For accurately measuring rice and water.
- Rice Paddle: For stirring and serving rice.
- User Manual: Contains detailed instructions and recipes.
Initial Cleaning and Assembly
Initial Cleaning:
- Wash the inner cooking pot, steam tray, measuring cup, and rice paddle with warm, soapy water. Rinse thoroughly and dry with a clean towel.
- Wipe the exterior of the main cooking unit and the lid with a damp cloth. Do not immerse the main unit in water.
Assembly:
- Place the clean inner cooking pot into the main cooking unit, ensuring it sits evenly on the heating plate.
- If you’re using the steam tray, position it on top of the inner pot. Make sure it fits securely.
- Close the lid, ensuring it is properly aligned and sealed.
Understanding the Control Panel and Buttons
- Power Button: Turns the rice cooker on and off.
- Menu/Select Button: Cycles through the different cooking modes (White Rice, Brown Rice, Quick Rice, Steam, Slow Cook, Sauté-Then-Simmer, Cake).
- Start/Stop Button: Begins or stops the selected cooking cycle.
- Delay Timer Button: Sets a delayed start time for the cooking cycle.
- Keep-Warm/Cancel Button: Switches to keep-warm mode after cooking or cancels the current cycle.
Initial Setup
- Plug In: Connect the power cord to a suitable outlet. The digital display should light up, indicating that the rice cooker is ready to use.
Basic Operation:
- Add Ingredients: Using the provided measuring cup, add the desired amount of rice to the inner cooking pot. Rinse the rice under cold water until the water runs clear, then drain.
- Add Water: Add the appropriate amount of water for the type of rice you are cooking. Refer to the water-to-rice ratio guidelines in the user manual.
- Select Cooking Mode: Close the lid, press the ‘Menu/Select’ button to choose the desired cooking mode.
- Start Cooking: Press the ‘Start/Stop’ button to begin the cooking cycle. The cooker will automatically adjust the time and temperature based on the selected mode.
Using the Delay Timer:
- Set Timer: After adding ingredients and selecting the cooking mode, press the ‘Delay Timer’ button. Use the ‘+’ and ‘-’ buttons to set the desired delay time.
- Start Cooking: Press the ‘Start/Stop’ button. The cooker will begin cooking after the delay timer reaches zero.
After Cooking:
- The cooker will automatically switch to keep-warm mode once the cooking cycle is complete.
- Allow the rice to rest for a few minutes before opening the lid to let the steam finish the cooking process.
- Fluff the rice with the rice paddle before serving.
By following these steps for unboxing, initial setup, and understanding the components and assembly, you’ll be well on your way to making delicious meals with your Aroma Professional Plus Rice Cooker.
Understanding the Control Panel
Understanding the control panel of your Aroma Professional Plus Rice Cooker is crucial for making the most of its versatile functions. Here’s a detailed explanation of all the buttons and their functions, along with tips on how to navigate the digital display.
Control Panel Buttons and Their Functions
Power Button
- Function: Turns the rice cooker on and off.
- How to Use: Press this button to power the cooker on or off. When the cooker is powered on, the digital display will light up.
Menu/Select Button
- Function: Cycles through the different cooking modes.
- How to Use: Press this button repeatedly to scroll through the available cooking settings, which may include:
- White Rice
- Brown Rice
- Quick Rice
- Steam
- Slow Cook
- Sauté-Then-Simmer (STS)
- Cake
Start/Stop Button
- Function: Begins or stops the selected cooking cycle.
- How to Use: After selecting the desired cooking mode, press this button to start the cooking process. Press it again if you need to stop or cancel the current cycle.
Delay Timer Button
- Function: Sets a delayed start time for the cooking cycle.
- How to Use: After adding the ingredients and selecting the cooking mode, press this button. Use the ‘+’ and ‘-’ buttons to set the desired delay time in hours. The cooking process will start automatically after the set delay time.
Keep-Warm/Cancel Button
- Function: Activates the keep-warm mode or cancels the current operation.
- How to Use: After cooking, the rice cooker automatically switches to keep-warm mode. Press this button to manually activate keep-warm mode or to cancel an ongoing cooking cycle.
+ and – Buttons
- Function: Adjust settings such as time for delay and slow cook modes.
- How to Use: Use these buttons to increase or decrease the time setting when using the delay timer or setting a specific cooking time for slow cook or other programmable functions.
Navigating the Digital Display
Turning On:
- Step: Press the Power button to turn on the rice cooker. The digital display will light up, indicating the cooker is ready for use.
Selecting a Cooking Mode:
- Step: Press the Menu/Select button to cycle through the different cooking modes. The current selection will be highlighted or displayed on the screen.
- Example: If you want to cook white rice, press the Menu/Select button until the ‘White Rice’ setting is highlighted.
Setting the Delay Timer:
- Step: After selecting the cooking mode, press the Delay Timer button.
- Step: Use the + and – buttons to set the desired delay time in hours. The display will show the set delay time.
- Example: If you want the cooking to start in 3 hours, press the Delay Timer button, then press the + button until the display shows ‘3:00’.
Starting the Cooking Cycle:
- Step: Press the Start/Stop button to begin the cooking process. The digital display will show the progress of the cooking cycle, typically counting down the remaining time.
- Step: For some modes like slow cook, you may need to set the specific cooking time using the + and – buttons before pressing Start/Stop.
Using Keep-Warm Mode:
- Automatic Activation: The rice cooker automatically switches to keep-warm mode after the cooking cycle is complete.
- Manual Activation: Press the Keep-Warm/Cancel button to manually switch to keep-warm mode if needed.
- Cancelling Operation: Press the Keep-Warm/Cancel button to cancel the current cooking cycle if necessary.
Tips for Using the Control Panel
- Read the Manual: Always refer to your specific model’s user manual for detailed instructions and recommendations for best results.
- Experiment with Settings: Take time to familiarize yourself with each setting and function. Try cooking different types of rice and other dishes to understand how each mode works.
- Regular Cleaning: Keep the control panel clean and dry. Wipe it with a damp cloth to remove any spills or residues.
By mastering the control panel and understanding the functions of each button, you can fully utilize the capabilities of your Aroma Professional Plus Rice Cooker, making meal preparation efficient and enjoyable.
Basic Operations
Using the Aroma Professional Plus Rice Cooker for the first time is a simple and straightforward process. Here’s a step-by-step guide to help you get started, focusing on the basic rice cooking process.
Step-by-Step Guide to the Basic Rice Cooking Process
1. Initial Setup
Unpack and Inspect:
- Remove the rice cooker and all its components from the packaging.
- Ensure all parts are present: main unit, inner cooking pot, lid, steam tray, measuring cup, rice paddle, and user manual.
Clean the Components:
- Wash the inner cooking pot, steam tray, measuring cup, and rice paddle with warm, soapy water. Rinse and dry thoroughly.
- Wipe the exterior of the main unit and the lid with a damp cloth.
Assemble the Cooker:
- Place the inner cooking pot into the main unit, ensuring it sits evenly on the heating plate.
- If using the steam tray, position it over the inner pot.
Plug In:
- Connect the rice cooker to a suitable power outlet. The digital display will light up, indicating the cooker is ready for use.
2. Measuring and Adding Ingredients
Measure the Rice:
- Use the provided measuring cup to measure the desired amount of rice. A standard ratio is 1 cup of uncooked rice to yield approximately 2 cups of cooked rice.
- Rinse the rice under cold water until the water runs clear. This step helps remove excess starch, preventing the rice from becoming too sticky.
Add the Rice to the Inner Pot:
- Transfer the rinsed rice into the inner cooking pot.
Measure and Add Water:
- Add the appropriate amount of water to the rice. For white rice, use a 1:1.5 ratio (1 cup of rice to 1.5 cups of water). Adjust the water level according to the type of rice and the desired texture.
3. Selecting the Cooking Mode
Close the Lid:
- Ensure the lid is securely closed.
Turn On the Cooker:
- Press the Power button to turn on the rice cooker. The digital display will activate.
Select the Cooking Mode:
- Press the Menu/Select button to cycle through the available cooking modes. For basic white rice, select the ‘White Rice’ setting.
- The selected mode will be highlighted on the digital display.
4. Starting the Cooking Process
Start Cooking:
- Press the Start/Stop button to begin the cooking process. The cooker will automatically adjust the cooking time and temperature.
- The display will show the progress, typically indicating the remaining cooking time.
Cooking Time:
- The cooking process for white rice usually takes around 20-30 minutes, depending on the quantity and specific model.
Automatic Keep-Warm:
- Once the cooking cycle is complete, the rice cooker will automatically switch to keep-warm mode to maintain the rice at an optimal serving temperature.
5. Finishing Up
Resting Period:
- Allow the rice to rest in keep-warm mode for about 10-15 minutes. This helps the rice absorb any remaining moisture and improves texture.
Fluff the Rice:
- Open the lid carefully to avoid steam burns.
- Use the rice paddle to fluff the rice gently, releasing any trapped steam and separating the grains.
Serve:
- Serve the rice directly from the inner pot, or transfer it to a serving dish.
6. Cleaning and Maintenance
Turn Off and Unplug:
- After serving, press the Power button to turn off the rice cooker and unplug it from the outlet.
Clean the Components:
- Allow the inner pot and other components to cool down.
- Wash the inner pot, steam tray, measuring cup, and rice paddle with warm, soapy water. Rinse and dry thoroughly.
- Wipe the exterior of the main unit and the lid with a damp cloth.
By following these steps, you can easily cook perfect rice using your Aroma Professional Plus Rice Cooker. Once you’re comfortable with the basic operation, you can explore the other functions and features to prepare a variety of delicious meals.
Advanced Cooking Functions
The Aroma Professional Plus Rice Cooker is equipped with advanced cooking functions that extend its versatility beyond just cooking rice. Here’s a guide on how to use the multi-cooking options such as slow cooking, steaming, and sautéing, as well as special features like the delay timer and automatic keep-warm.
Using Multi-Cooking Options
1. Slow Cooking
- Function: Ideal for preparing soups, stews, and braised dishes over a longer period.
Steps:
- Prepare Ingredients: Chop and prepare your ingredients as needed.
- Add Ingredients to Pot: Place them in the inner cooking pot. If a recipe requires browning meat or sautéing vegetables, you can do this using the Sauté-Then-Simmer (STS) function before switching to slow cook.
- Close the Lid: Ensure the lid is securely closed.
- Select Slow Cook: Press the ‘Menu/Select’ button until the ‘Slow Cook’ setting is highlighted.
- Set Cooking Time: Use the + and – buttons to set the desired cooking time (e.g., 4 hours).
- Start Cooking: Press the ‘Start/Stop’ button to begin slow cooking.
- Automatic Keep-Warm: The cooker will switch to keep-warm mode once the cooking cycle is complete, maintaining your food at an optimal temperature until you’re ready to serve.
2. Steaming
- Function: Perfect for cooking vegetables, fish, and other delicate foods.
Steps:
- Add Water: Pour the required amount of water into the inner pot (usually about 2 cups).
- Prepare Food: Place your vegetables or fish in the steam tray.
- Position the Steam Tray: Insert the steam tray into the inner pot above the water level.
- Close the Lid: Ensure the lid is securely closed.
- Select Steam: Press the ‘Menu/Select’ button until the ‘Steam’ setting is highlighted.
- Set Steaming Time: Use the + and – buttons to set the steaming time based on the food being steamed (e.g., 10 minutes for vegetables).
- Start Steaming: Press the ‘Start/Stop’ button to begin steaming.
- Monitor: The cooker will notify you when the steaming is complete, and you can serve the food immediately.
3. Sauté-Then-Simmer (STS)
- Function: Allows you to sauté ingredients at high heat and then switch to a simmer for dishes that require browning followed by slow cooking.
Steps:
- Add Ingredients: Add oil and ingredients to be sautéed to the inner pot.
- Select STS: Press the ‘Menu/Select’ button until the ‘Sauté-Then-Simmer’ setting is highlighted.
- Start Sautéing: Press the ‘Start/Stop’ button to begin sautéing. Stir occasionally until the ingredients are browned.
- Add Liquid: Once sautéing is complete, add the necessary liquid (e.g., broth, sauce).
- Simmer: The cooker will automatically switch to simmer mode after adding liquid. Let it simmer for the required time.
- Automatic Keep-Warm: The cooker will switch to keep-warm mode once the simmering cycle is complete.
Special Features
1. Delay Timer
- Function: Allows you to set a delayed start time for the cooking cycle, so your meal is ready when you need it.
Steps:
- Add Ingredients: Add the rice and water or other ingredients to the inner pot.
- Close the Lid: Ensure the lid is securely closed.
- Select Cooking Mode: Choose the desired cooking setting (e.g., ‘White Rice’).
- Set Delay Timer: Press the ‘Delay Timer’ button. Use the + and – buttons to set the desired delay time in hours (e.g., 3 hours).
- Start Delay: Press the ‘Start/Stop’ button. The cooker will start cooking after the set delay time has elapsed.
2. Automatic Keep-Warm
- Function: Keeps your food warm after the cooking cycle is complete without overcooking it.
Steps:
- Automatic Activation: After the cooking cycle ends, the rice cooker will automatically switch to keep-warm mode.
- Manual Activation: To manually activate keep-warm mode, press the ‘Keep-Warm/Cancel’ button.
- Cancel Operation: To cancel keep-warm mode or any ongoing cooking cycle, press the ‘Keep-Warm/Cancel’ button again.
Tips for Advanced Cooking Functions
- Experiment with Recipes: Try different recipes to get comfortable with each function. The more you use these settings, the more intuitive they will become.
- Monitor Cooking Times: While the cooker handles most of the work, keeping an eye on the time can help you better understand how your ingredients cook.
- Clean Regularly: After using functions like sauté or slow cook, ensure the inner pot and other components are cleaned thoroughly to prevent any residue buildup.
By mastering these advanced functions and features, you can maximize the use of your Aroma Professional Plus Rice Cooker, making it an invaluable tool in your kitchen for preparing a wide variety of delicious meals.
Cooking Various Types of Rice
Cooking different types of rice in your Aroma Professional Plus Rice Cooker requires specific instructions and water-to-rice ratios to achieve the best results. Here’s a detailed guide for cooking white rice, brown rice, sushi rice, and other varieties, along with the recommended water-to-rice ratios for each type.
White Rice
- Water-to-Rice Ratio: 1.5 cups of water for every 1 cup of white rice.
Instructions:
- Measure and Rinse: Measure the desired amount of white rice using the provided measuring cup. Rinse the rice under cold water until the water runs clear.
- Add to Pot: Transfer the rinsed rice to the inner cooking pot.
- Add Water: Add 1.5 cups of water for every cup of rice.
- Select White Rice Mode: Close the lid, press the ‘Menu/Select’ button until the ‘White Rice’ setting is highlighted.
- Start Cooking: Press the ‘Start/Stop’ button to begin cooking.
- Rest and Fluff: Once cooking is complete and the cooker switches to keep-warm mode, let the rice rest for 10 minutes. Fluff with the rice paddle before serving.
Brown Rice
- Water-to-Rice Ratio: 2.25 cups of water for every 1 cup of brown rice.
Instructions:
- Measure and Rinse: Measure the brown rice using the provided measuring cup. Rinse the rice under cold water.
- Add to Pot: Transfer the rinsed rice to the inner cooking pot.
- Add Water: Add 2.25 cups of water for every cup of rice.
- Select Brown Rice Mode: Close the lid, press the ‘Menu/Select’ button until the ‘Brown Rice’ setting is highlighted.
- Start Cooking: Press the ‘Start/Stop’ button to begin cooking.
- Rest and Fluff: Let the rice rest for 10-15 minutes after cooking, then fluff with the rice paddle.
Sushi Rice
- Water-to-Rice Ratio: 1.25 cups of water for every 1 cup of sushi rice.
Instructions:
- Measure and Rinse: Measure the sushi rice using the provided measuring cup. Rinse thoroughly under cold water until the water runs clear.
- Add to Pot: Transfer the rinsed rice to the inner cooking pot.
- Add Water: Add 1.25 cups of water for every cup of rice.
- Select White Rice Mode: Close the lid, press the ‘Menu/Select’ button until the ‘White Rice’ setting is highlighted.
- Start Cooking: Press the ‘Start/Stop’ button to begin cooking.
- Rest and Season: Once cooking is complete, let the rice rest for 10 minutes. Season with sushi vinegar (a mixture of rice vinegar, sugar, and salt) before serving or using for sushi rolls.
Basmati Rice
- Water-to-Rice Ratio: 1.5 cups of water for every 1 cup of basmati rice.
Instructions:
- Measure and Rinse: Measure the basmati rice using the provided measuring cup. Rinse under cold water until the water runs clear.
- Soak: Optional, but soaking the rice for 30 minutes can enhance the texture.
- Add to Pot: Transfer the rinsed rice to the inner cooking pot.
- Add Water: Add 1.5 cups of water for every cup of rice.
- Select White Rice Mode: Close the lid, press the ‘Menu/Select’ button until the ‘White Rice’ setting is highlighted.
- Start Cooking: Press the ‘Start/Stop’ button to begin cooking.
- Rest and Fluff: Let the rice rest for 10 minutes after cooking, then fluff with the rice paddle.
Jasmine Rice
- Water-to-Rice Ratio: 1.5 cups of water for every 1 cup of jasmine rice.
Instructions:
- Measure and Rinse: Measure the jasmine rice using the provided measuring cup. Rinse under cold water until the water runs clear.
- Add to Pot: Transfer the rinsed rice to the inner cooking pot.
- Add Water: Add 1.5 cups of water for every cup of rice.
- Select White Rice Mode: Close the lid, press the ‘Menu/Select’ button until the ‘White Rice’ setting is highlighted.
- Start Cooking: Press the ‘Start/Stop’ button to begin cooking.
- Rest and Fluff: Let the rice rest for 10 minutes after cooking, then fluff with the rice paddle.
Wild Rice
- Water-to-Rice Ratio: 3 cups of water for every 1 cup of wild rice.
Instructions:
- Measure and Rinse: Measure the wild rice using the provided measuring cup. Rinse under cold water.
- Add to Pot: Transfer the rinsed rice to the inner cooking pot.
- Add Water: Add 3 cups of water for every cup of rice.
- Select Brown Rice Mode: Close the lid, press the ‘Menu/Select’ button until the ‘Brown Rice’ setting is highlighted.
- Start Cooking: Press the ‘Start/Stop’ button to begin cooking.
- Rest and Fluff: Let the rice rest for 10-15 minutes after cooking, then fluff with the rice paddle.
Tips for Perfect Rice
- Rinse the Rice: Rinsing removes excess starch and helps prevent the rice from becoming too sticky.
- Resting Time: Allowing the rice to rest after cooking helps it absorb any remaining steam, enhancing the texture.
- Adjust Water Levels: Depending on your preference and the specific type of rice, you might need to adjust the water levels slightly.
- Use the Measuring Cup: The measuring cup provided with your rice cooker may differ from standard cups, so always use it to ensure accurate water-to-rice ratios.
By following these specific instructions and recommended water-to-rice ratios, you can achieve perfectly cooked rice of various types using your Aroma Professional Plus Rice Cooker.
Additional Recipes
The Aroma Professional Plus Rice Cooker is incredibly versatile, allowing you to prepare a wide range of dishes beyond just plain rice. Here are some easy recipes to get you started, as well as creative recipes to maximize the use of your rice cooker.
Easy Recipes to Get Started
Basic Steamed Vegetables
- Ingredients: 2 cups of water, a variety of vegetables (broccoli, carrots, cauliflower, etc.)
Instructions:
- Add 2 cups of water to the inner pot.
- Place the vegetables in the steam tray and insert it into the rice cooker.
- Select the ‘Steam’ setting and set the timer for 10-15 minutes, depending on the vegetable.
- Press ‘Start/Stop’ to begin steaming.
- Once the timer goes off, carefully remove the steam tray and serve the vegetables.
Simple Chicken and Rice
- Ingredients: 2 cups of rice, 4 cups of water or chicken broth, 1 lb. boneless, skinless chicken breasts (cubed), salt, pepper, garlic powder, and a pinch of thyme.
Instructions:
- Rinse the rice and add it to the inner pot.
- Add water or chicken broth.
- Place the cubed chicken on top of the rice.
- Season with salt, pepper, garlic powder, and thyme.
- Select the ‘White Rice’ setting and press ‘Start/Stop’.
- Let the cooker switch to keep-warm mode after cooking and let it rest for 10 minutes.
- Fluff the rice and mix the chicken in before serving.
Oatmeal Breakfast
- Ingredients: 1 cup steel-cut oats, 3 cups water or milk, a pinch of salt, optional toppings (honey, fruits, nuts).
Instructions:
- Add oats, water or milk, and salt to the inner pot.
- Select the ‘Slow Cook’ setting and set the timer for 20-30 minutes.
- Press ‘Start/Stop’ to begin cooking.
- Stir occasionally.
- Once cooked, add your favorite toppings and serve.
- Creative Recipes to Maximize the Use of Your Rice Cooker
Quinoa and Vegetable Medley
- Ingredients: 1 cup quinoa, 2 cups vegetable broth, 1 cup mixed vegetables (zucchini, bell peppers, peas), 1 tbsp olive oil, salt, pepper, and a squeeze of lemon juice.
Instructions:
- Rinse quinoa and add it to the inner pot.
- Add vegetable broth and olive oil.
- Add mixed vegetables on top.
- Season with salt and pepper.
- Select the ‘White Rice’ setting and press ‘Start/Stop’.
- Once done, fluff with a fork and add a squeeze of lemon juice before serving.
Beef Stroganoff
- Ingredients: 1 lb. beef sirloin (thinly sliced), 1 onion (chopped), 2 cups beef broth, 1 cup sour cream, 2 tbsp flour, 1 cup mushrooms (sliced), salt, pepper, and egg noodles.
Instructions:
- Use the ‘Sauté-Then-Simmer’ (STS) function to brown the beef slices and chopped onions.
- Add flour and mix well.
- Add mushrooms and beef broth.
- Close the lid and switch to the ‘Slow Cook’ setting, cooking for 2 hours.
- After 2 hours, stir in the sour cream and switch to ‘Keep Warm’ mode.
- Cook egg noodles separately and serve the beef stroganoff over the noodles.
Coconut Milk Rice Pudding
- Ingredients: 1 cup jasmine rice, 2 cups coconut milk, 1 cup water, 1/4 cup sugar, 1 tsp vanilla extract, a pinch of salt, and optional toppings (cinnamon, raisins, nuts).
Instructions:
- Add rice, coconut milk, water, sugar, vanilla extract, and salt to the inner pot.
- Select the ‘White Rice’ setting and press ‘Start/Stop’.
- Once the cycle is complete, let it sit for an additional 10 minutes on keep-warm mode.
- Stir well and serve warm with your favorite toppings.
Lentil Soup
- Ingredients: 1 cup lentils (rinsed), 4 cups vegetable broth, 1 onion (chopped), 2 carrots (diced), 2 celery stalks (chopped), 2 garlic cloves (minced), 1 tsp cumin, salt, and pepper.
Instructions:
- Add all ingredients to the inner pot.
- Select the ‘Slow Cook’ setting and set the timer for 2 hours.
- Press ‘Start/Stop’ to begin cooking.
- Stir occasionally.
- Once done, season with additional salt and pepper if needed, and serve hot.
These recipes showcase the versatility of the Aroma Professional Plus Rice Cooker, from simple and nutritious meals to more creative and flavorful dishes. Experiment with these recipes to get the most out of your rice cooker and enjoy delicious meals with minimal effort.
Cleaning and Maintenance
Proper cleaning and maintenance of your Aroma Professional Plus Rice Cooker are essential to ensure its longevity and optimal performance. Here are some daily and deep cleaning tips, as well as advice on maintaining your cooker for long-term use.
Daily Cleaning Tips
Unplug and Cool Down:
- Always unplug the rice cooker and allow it to cool completely before starting the cleaning process to avoid burns and electrical hazards.
Remove and Clean the Inner Pot:
- Remove the inner cooking pot and wash it with warm, soapy water using a soft sponge or cloth. Avoid using abrasive scrubbers that can damage the non-stick coating.
- Rinse thoroughly and dry completely with a soft towel or air dry.
Clean the Lid and Steam Vent:
- Detach the lid (if your model allows) and wash it with warm, soapy water. Pay special attention to the steam vent, ensuring it is clear of any residue.
- Use a soft brush or toothpick to clean the steam vent if necessary.
Rinse and dry thoroughly.
Wipe the Exterior:
- Use a damp cloth to wipe the exterior of the rice cooker. Avoid getting water into the control panel or any electrical components.
- For stubborn stains, use a mild dish soap on the cloth, then wipe clean with a damp cloth and dry with a soft towel.
Clean the Heating Plate:
- Ensure the heating plate inside the cooker is free of food particles or residue. Wipe it gently with a damp cloth. Avoid using water directly on the heating element.
- Deep Cleaning Tips
Deep Clean the Inner Pot:
- Occasionally, soak the inner pot in warm, soapy water for 15-20 minutes to loosen any stuck-on food.
- Use a non-abrasive sponge to clean the pot thoroughly. Rinse and dry completely.
Descale the Cooker:
- If you live in an area with hard water, mineral deposits can build up over time. To descale, fill the pot with a mixture of water and vinegar (3:1 ratio), let it sit for an hour, then run a cooking cycle. Afterward, wash the pot thoroughly with soapy water, rinse, and dry.
Clean the Seals and Gaskets:
- Remove any rubber seals or gaskets from the lid and wash them separately with warm, soapy water. Rinse and dry completely before reassembling.
Sanitize the Steam Vent:
- Use a mixture of vinegar and water to clean the steam vent thoroughly. Allow the mixture to sit for a few minutes before rinsing and drying.
- Maintenance Tips for Long-Term Use
Regular Inspection:
- Regularly inspect the power cord and plug for any signs of wear or damage. Replace them if necessary to avoid electrical hazards.
Avoid Overfilling:
- Do not overfill the inner pot as this can cause spills and affect the cooker’s performance. Follow the recommended maximum capacity guidelines.
Proper Storage:
- Store your rice cooker in a dry, cool place when not in use. Ensure it is clean and dry before storing to prevent mold or odors.
Use the Right Utensils:
- Always use the provided rice paddle or other non-metallic utensils to avoid scratching the non-stick surface of the inner pot.
Follow Manufacturer’s Instructions:
- Refer to the user manual for specific cleaning and maintenance recommendations from the manufacturer. This can help prevent voiding any warranties and ensure you are taking the best care of your appliance.
Regular Deep Cleaning:
- Perform a deep clean every few months, especially if the rice cooker is used frequently. This will help maintain its efficiency and prevent buildup that could affect performance.
By following these daily and deep cleaning tips and maintaining your Aroma Professional Plus Rice Cooker properly, you can ensure it remains in excellent working condition for many years, providing you with consistently delicious meals.
Troubleshooting
When using the Aroma Professional Plus Rice Cooker, you might encounter some common issues. Here are solutions to these problems, along with answers to frequently asked questions to help you troubleshoot and resolve any concerns.
Common Issues and Solutions
Rice Cooker Not Turning On
Solution:
- Ensure the cooker is properly plugged into a functioning outlet.
- Check the power cord for any visible damage. If the cord is damaged, it may need to be replaced.
- Press the Power button firmly. If the cooker still does not turn on, consult the user manual for additional troubleshooting steps or contact customer support.
- Rice Is Undercooked or Overcooked
Solution:
- Undercooked Rice: Check the water-to-rice ratio. Ensure you are using enough water for the type of rice you are cooking. If needed, add a little more water and cook for an additional few minutes.
- Overcooked Rice: Reduce the amount of water slightly for the next cooking cycle. Ensure you are using the correct cooking mode for the type of rice.
- Stir the rice and let it sit for a few minutes on keep-warm mode before serving to allow it to fully absorb the remaining moisture.
- Rice Sticking to the Bottom
Solution:
- Ensure the inner pot is clean and the non-stick coating is intact. Avoid using metal utensils that can scratch the surface.
- Add a small amount of oil or butter to the pot before adding rice and water to help prevent sticking.
- Rinse the rice thoroughly before cooking to remove excess starch, which can cause sticking.
- Strange Odors or Smoke
Solution:
- Clean the inner pot, lid, and steam vent thoroughly to remove any food residues that may be causing the odor or smoke.
- Ensure the rice cooker is on a stable, heat-resistant surface and not near any flammable materials.
- If the problem persists, unplug the cooker and contact customer support for further assistance.
Keep-Warm Mode Not Working
Solution:
- Check if the keep-warm function was manually turned off. Press the Keep-Warm/Cancel button to reactivate it.
- Ensure the lid is properly closed to maintain the temperature.
- If the issue continues, consult the user manual or contact customer support.
- Frequently Asked Questions
How do I clean the steam vent?
- Remove the steam vent cap and clean it with warm, soapy water. Use a small brush to remove any residue. Rinse thoroughly and dry before reattaching it to the lid.
Can I cook other grains in my rice cooker?
- Yes, the Aroma Professional Plus Rice Cooker can cook various grains such as quinoa, barley, and millet. Use the appropriate water-to-grain ratio and select the ‘White Rice’ or ‘Brown Rice’ setting depending on the grain’s cooking requirements.
How do I use the delay timer?
- After adding your ingredients and selecting the desired cooking mode, press the Delay Timer button. Use the + and – buttons to set the desired delay time in hours. Press the Start/Stop button to activate the delay timer. The cooker will start cooking after the set delay time has elapsed.
Why is my rice cooker beeping?
- The rice cooker may beep to indicate the end of a cooking cycle or an error. Refer to the user manual for the specific meaning of beeps and corresponding actions.
What should I do if the non-stick coating is damaged?
- If the non-stick coating is significantly damaged, it is recommended to replace the inner pot to avoid potential health hazards and ensure proper cooking performance. Contact Aroma customer support for replacement parts.
How can I ensure even cooking when using the slow cook function?
- Stir the ingredients occasionally during the slow cooking process to ensure even cooking. If your recipe requires browning or sautéing ingredients before slow cooking, use the Sauté-Then-Simmer (STS) function first.
Contact Information for Aroma Customer Support
- Phone: You can call Aroma Customer Service at 1-800-276-6286. Their hours are typically Monday through Friday from 8:30 AM to 4:30 PM PST.
- Email: Send an email to support through their official website’s contact form, typically found in the “Support” or “Contact Us” sections.
- Website: Visit the Aroma Housewares website (www.aroma-housewares.com) for FAQs, manuals, and additional resources that might help with your issue.
By addressing these common issues and referring to the frequently asked questions, you can effectively troubleshoot and resolve most problems you might encounter with your Aroma Professional Plus Rice Cooker, ensuring a smooth and efficient cooking experience.
The Secret Ingredients to Perfect Recipes


Frequently Asked Questions (FAQ’s)
Here are some expert-level questions and answers on how to use the Aroma Professional Plus Rice Cooker, which will help you understand and utilize its full potential:
Q: How do I properly measure rice and water for different types of rice in the Aroma Professional Plus Rice Cooker?
A:
White Rice: Use a 1:1.5 ratio (1 cup of rice to 1.5 cups of water).
Brown Rice: Use a 1:2.25 ratio (1 cup of rice to 2.25 cups of water).
Sushi Rice: Use a 1:1.25 ratio (1 cup of rice to 1.25 cups of water).
Basmati Rice: Use a 1:1.5 ratio (1 cup of rice to 1.5 cups of water).
Jasmine Rice: Use a 1:1.5 ratio (1 cup of rice to 1.5 cups of water).
Wild Rice: Use a 1:3 ratio (1 cup of rice to 3 cups of water).
For all types, rinse the rice until the water runs clear to remove excess starch, which helps in achieving a better texture.
Q: How can I use the Delay Timer function to have my meal ready at a specific time?
A:
Add Ingredients: Place the rinsed rice and water (or other ingredients) into the inner pot.
Select Cooking Mode: Choose the appropriate cooking mode (e.g., White Rice, Brown Rice).
Set Delay Time: Press the ‘Delay Timer’ button and use the + and – buttons to set the desired delay time in hours.
Start Cooking: Press the ‘Start/Stop’ button. The cooker will start the cooking process after the delay time has elapsed, ensuring your meal is ready when you need it.
Q: How do I use the Sauté-Then-Simmer (STS) function effectively?
A:
Prepare Ingredients: Add oil and ingredients that need sautéing (e.g., onions, garlic, meat) to the inner pot.
Select STS Mode: Press the ‘Menu/Select’ button until the ‘Sauté-Then-Simmer’ setting is highlighted.
Start Sautéing: Press the ‘Start/Stop’ button and sauté the ingredients until they are browned.
Add Liquid: Once sautéing is complete, add the necessary liquid (e.g., broth, water) and any additional ingredients for simmering.
Simmer: The cooker will automatically switch to simmer mode after adding the liquid. Let it simmer for the required time.
Q: How do I ensure even cooking and avoid undercooked or overcooked rice?
A:
Correct Ratios: Use the correct water-to-rice ratios for the specific type of rice you are cooking.
Rinse Rice: Rinse rice thoroughly before cooking to remove excess starch, which can affect the texture and cooking time.
Proper Settings: Use the appropriate cooking setting for the type of rice (White Rice, Brown Rice, etc.).
Rest Time: Allow the rice to rest in keep-warm mode for 10-15 minutes after cooking to let it absorb any remaining moisture.
Q: What steps should I take if my rice cooker displays an error code?
A:
Refer to the Manual: Check the user manual for the meaning of the specific error code.
Check for Obstructions: Ensure there are no obstructions or debris on the heating plate or inner pot.
Restart the Cooker: Turn off and unplug the cooker, wait a few minutes, and then plug it back in and restart.
Contact Support: If the error persists, contact Aroma customer support for further assistance.
Q: How can I use the Aroma Professional Plus to cook a complete meal, including a main dish and side dishes?
A:
Layer Ingredients: Use the steam tray to cook different components of the meal simultaneously. For example, you can cook rice in the inner pot while steaming vegetables or fish in the steam tray above.
Select Appropriate Settings: Choose the correct settings for each component (e.g., White Rice for the rice and Steam for the vegetables).
Monitor Cooking Times: Ensure that the cooking times align so that all components are ready at the same time. If necessary, start the components with longer cooking times first.
Q: How do I maintain the non-stick coating of the inner pot?
A:
Avoid Metal Utensils: Use the provided rice paddle or other non-metallic utensils to avoid scratching the non-stick surface.
Gentle Cleaning: Wash the inner pot with a soft sponge and mild dish soap. Avoid abrasive scrubbers that can damage the coating.
Dry Thoroughly: Ensure the pot is completely dry before storing to prevent any damage to the coating from residual moisture.
By understanding these expert tips and utilizing the features of your Aroma Professional Plus Rice Cooker, you can enhance your cooking experience and make the most out of this versatile appliance.
Conclusion
In conclusion, mastering the use of your Aroma Professional Plus Rice Cooker opens up a world of culinary possibilities with ease and convenience. From perfectly cooked rice to savory stews and steamed vegetables, this versatile appliance simplifies meal preparation and enhances your cooking experience. By following the detailed instructions and utilizing the advanced features like the delay timer and Sauté-Then-Simmer function, you can effortlessly create a variety of delicious dishes. So, if you’re wondering, “How do I use the Aroma Professional Plus Rice Cooker?” remember that this user-friendly device is designed to make your kitchen adventures enjoyable and successful. Embrace the simplicity and efficiency it offers, and start exploring the many recipes and meals you can create with your Aroma Professional Plus Rice Cooker today!


