As an Amazon Associate I earn from qualifying purchases.
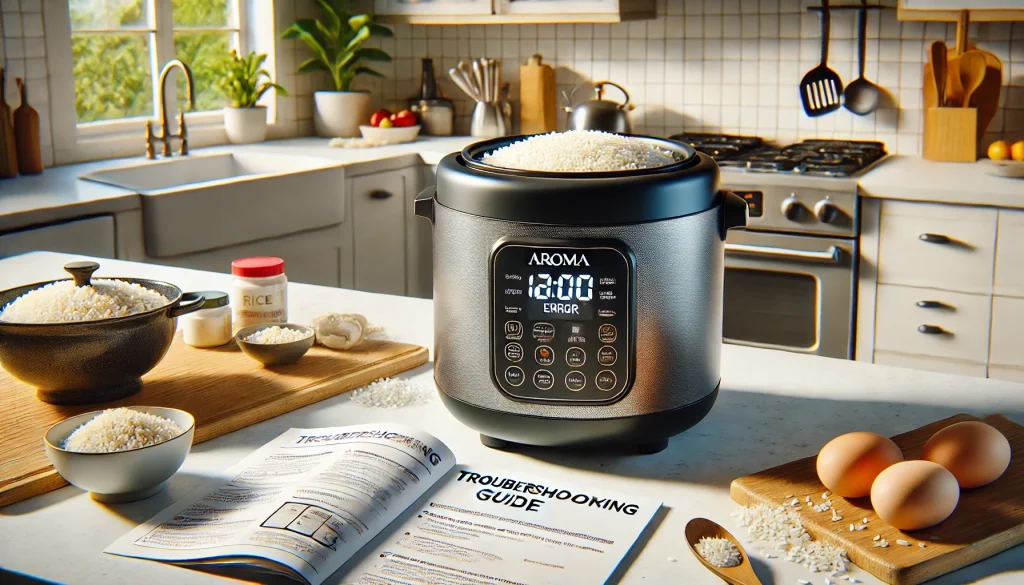
Is your Aroma rice cooker suddenly refusing to work just when you need it most? You’re not alone. Many users experience issues with their rice cookers, but fear not—solving these problems is often simpler than you might think. Whether it’s failing to turn on, not cooking properly, or any other malfunction, we’ve got you covered. In this article, we’ll guide you through common issues, easy troubleshooting steps, and helpful maintenance tips to get your Aroma rice cooker back in action quickly and efficiently. So, let’s dive in and bring your beloved appliance back to life!
Overview of Common Issues with Rice Cookers
Rice cookers are invaluable kitchen appliances, but like any frequently used device, they can encounter a range of issues. Here’s an overview of some common problems:
- Power Issues: One of the most straightforward problems is when the rice cooker won’t turn on. This could be due to a faulty power outlet, a damaged power cord, or internal wiring issues.
- Thermal Fuse Failure: Rice cookers have a thermal fuse designed to blow if the unit overheats, which can prevent the cooker from working. This is a safety feature but requires replacement of the fuse once it activates.
- Faulty Heating Elements: Over time, the heating elements can wear out or fail, preventing the rice cooker from heating up properly. This can result in undercooked rice or the cooker not starting the cooking cycle.
- Issues with the Inner Cooking Pan: Warping or damage to the inner cooking pan can affect how it sits in the cooker. If it doesn’t make proper contact with the heat sensor, the cooker might not start.
- Improper Lid Seal: If the lid doesn’t seal correctly, steam can escape, which affects cooking efficiency and can lead to unevenly cooked rice.
- Control Panel Malfunctions: For digital rice cookers, the control panel is crucial. Malfunctions here can stem from moisture damage, electrical faults, or simply wear and tear, leading to unresponsive or erratic controls.
Sensor Problems: Modern rice cookers use sensors to determine when the rice is cooked. If these sensors malfunction, it can cause the cooker to turn off too soon or cook for too long.
Understanding these common issues can help in troubleshooting and maintaining your rice cooker, ensuring it continues to function efficiently for years to come.
Importance of Troubleshooting Before Seeking Professional Repair
Troubleshooting your rice cooker before seeking professional repair can be highly beneficial for several reasons:
- Cost-Effectiveness: Many issues with rice cookers are minor and can be fixed at home without the need for professional intervention. This saves the expense of a service call or the cost of purchasing a new unit prematurely.
- Convenience: Troubleshooting can often resolve simple problems quickly, getting your appliance back in working order without the downtime associated with taking it to a repair shop or waiting for a service appointment.
- Educational Value: By troubleshooting, you learn more about how your appliance works and its various components. This knowledge can be useful for maintaining the appliance in good condition and preventing future issues.
- Preventive Maintenance: During the troubleshooting process, you might identify other unrelated issues that could cause problems in the future. Addressing these preemptively can extend the life of your rice cooker.
- Environmental Impact: Repairing and maintaining an appliance for longer use reduces waste and the environmental impact associated with manufacturing new products and recycling old ones.
- Empowerment: There’s a sense of achievement and independence in being able to fix your own appliances. It also builds confidence to tackle other DIY repair and maintenance tasks around the home.
By troubleshooting first, you make an informed decision about whether or not a professional repair is necessary, which often leads to more sustainable and economical outcomes.
Identifying Your Problem
When your rice cooker isn’t functioning properly, identifying the issue can sometimes seem daunting. Here’s a step-by-step guide to help you diagnose the specific problem based on common symptoms:
Common Symptoms of a Malfunctioning Rice Cooker
Rice Cooker Won’t Turn On
- Check if the power cord is plugged in securely and inspect for any damage.
- Test the electrical outlet with another device to ensure it’s working.
- Rice is Undercooked or Overcooked
- Ensure that the correct water-to-rice ratio is used.
- Check if the cooking pot is correctly positioned on the heating element.
Rice Cooker Stops Mid-Cycle
- Inspect if the lid is closing properly and sealing the steam inside.
- Look for any signs that the thermal sensor is not functioning correctly.
The Cooker Overheats
- Check if there is excessive scale or dirt on the heating plate which can cause overheating.
- Control Panel is Unresponsive
- Look for any signs of moisture or damage on the control panel.
- Reset the rice cooker if possible (some models have a reset button).
How to Diagnose Your Specific Issue
Step 1: Observe the Symptoms
- Start by noting the specific symptoms: Does the appliance not turn on at all? Does it turn on but fail to cook properly? These observations will guide your troubleshooting.
Step 2: Refer to the Manual
- Check your rice cooker’s manual for troubleshooting tips specific to your model. Manufacturers often provide insights into common issues and their solutions.
Step 3: Perform Basic Checks
- Ensure that all connections are secure, the pot is clean and properly placed, and that there’s no visible damage to any part of the rice cooker.
Step 4: Test Electrical Components
- If comfortable, use a multimeter to test the continuity of the cooker’s fuse and heating element. If there’s no continuity, the part may need replacement.
Step 5: Simulate a Cooking Cycle
- Run a water-only cycle to observe how the cooker behaves without the variable of rice. This can help isolate whether the issue is with the heating mechanism or the control settings.
Step 6: Narrow Down the Issue
- Based on the outcomes from the tests above, you can usually determine whether the problem lies with the power supply, internal electronics, or mechanical components.
By methodically checking each possibility, you can accurately diagnose the problem with your rice cooker. If the issue appears complex or involves electrical components that you are not comfortable handling, it might be time to consider professional help.
Power Issues
When dealing with power issues in appliances like rice cookers, it’s essential to methodically check each component that could be contributing to the problem. Here’s how you can effectively diagnose and resolve power-related issues:
Checking Power Cords and Connections
- Inspect the Power Cord: Start by examining the entire length of the rice cooker’s power cord for any signs of wear, fraying, or damage. Physical damage to the cord could be the reason for the power failure.
- Ensure Firm Connections: Make sure the power cord is firmly connected to both the rice cooker and the power outlet. Loose connections can prevent electricity from reaching the appliance.
- Check for Internal Connections: If possible and safe, check the internal connections where the power cord meets the internal components of the rice cooker. Loose or corroded connections here can also prevent the cooker from powering up.
Testing Electrical Outlets and Circuit Breakers
- Test the Outlet: Plug a different device into the same outlet to see if it works. If the other device also fails to work, there might be an issue with the outlet itself.
- Reset the Circuit Breaker: Sometimes, the problem might not be with the outlet but with a tripped circuit breaker in your home’s electrical panel. Locate your circuit breaker box and look for any switches that have moved to the “off” position. Flip them back to “on” to restore power.
- Use a Voltage Tester or Multimeter: To further test the outlet, use a voltage tester or a multimeter set to measure voltage. Insert the tester’s probes into the outlet slots; a properly functioning outlet should show a standard voltage reading (typically around 120 volts in the US or 230 volts in many other parts of the world).
Additional Tips
- Surge Protector Check: If your rice cooker is connected through a surge protector or power strip, ensure that the device itself is functioning correctly. Test other devices on the same strip or reset any built-in circuit breakers on the power strip.
- Plug Directly Into Wall: If you normally use a power strip, try plugging the rice cooker directly into the wall to eliminate any issues with the strip or extension cord.
By systematically checking each of these areas, you can determine whether the power issue with your rice cooker is due to external electrical problems or something internally within the device. If all external tests pass and the appliance still fails to work, the problem might be internal, requiring further diagnosis or professional repair.
Heating Problems
When your rice cooker isn’t heating properly, the issue often lies with the heating element or associated components. Here’s a guide to troubleshooting and resolving heating problems:
Troubleshooting the Heating Element
- Visual Inspection: First, ensure the rice cooker is unplugged. Then, visually inspect the heating element for any obvious signs of damage like burn marks, corrosion, or distortion.
- Clean the Heating Plate: Sometimes, food residue or mineral buildup can interfere with the heating efficiency. Clean the heating plate thoroughly using a damp cloth and some mild detergent if necessary, then dry it completely.
- Check the Connections: Inspect the connections to the heating element to ensure they are tight and not corroded. Loose or corroded connections can impair the flow of electricity to the heating element.
- Continuity Test: Using a multimeter, perform a continuity test on the heating element. Disconnect the element from the circuit, set the multimeter to the continuity setting, and touch the probes to the element’s terminals. A continuous beep or a zero resistance reading indicates the element is functioning properly; no beep or infinite resistance suggests it needs replacement.
What to Do if Your Rice Cooker Isn’t Heating Properly
- Reset the Device: Some rice cookers come with a reset function. Consult the user manual to see if this is applicable to your model and follow the instructions to reset.
- Test the Thermostat: The thermostat controls the temperature and may shut off the heating element if it malfunctions. Test the thermostat with a multimeter in the same way as the heating element. Replace it if it doesn’t show continuity.
- Inspect the Thermal Fuse: The thermal fuse is a safety device that cuts off power if the rice cooker overheats. Like the heating element and thermostat, you can check the fuse for continuity. If the fuse has blown, it will need to be replaced, but remember, a blown fuse might be a symptom of other issues, like overheating caused by malfunctioning components.
- Ensure Proper Setup: Make sure that the cooking pot is correctly placed within the cooker. Improper placement can prevent the activation of heating mechanisms.
- Use the Correct Amount of Water: Insufficient water can cause the rice cooker to heat up too quickly and trigger safety shut-offs. Ensure you’re using the right water-to-rice ratio.
Professional Help
- Consult a Professional: If you’ve performed all the above checks and your rice cooker still isn’t heating correctly, it might be time to consult a professional. There could be deeper electrical issues within the unit that require expert attention.
Troubleshooting heating problems involves a combination of careful inspection, cleaning, and component testing. By following these steps, you can identify the root cause of the heating issue in your rice cooker and decide whether it’s a problem you can fix yourself or if you need to seek professional repair.
Control Panel Malfunctions
Control panel issues in rice cookers, particularly those that are digital, can cause a lot of frustration because they may prevent the device from functioning correctly or at all. Here are some steps and tips to troubleshoot and resolve malfunctions in the control panel:
Solutions for Non-responsive or Erratic Control Panels
- Check for Loose Connections: Sometimes, the issue may be as simple as a loose connection between the control panel and the rest of the appliance. If you feel comfortable and it’s safe, open the housing of the rice cooker to check all connections to the control panel are secure.
- Clean the Control Panel: Dirt, grease, and moisture can interfere with the functionality of touch-sensitive panels. Gently clean the panel with a soft, dry cloth. If the buttons are mechanical, ensure that no debris is obstructing their movement.
- Dry Out Moisture: Moisture is a common culprit behind erratic controls. If the control panel has been exposed to moisture, leave the rice cooker unplugged in a dry, warm place for several hours or even a day to allow any moisture to evaporate.
- Inspect for Damage: Look for any visible signs of damage such as cracks or burns on the control panel. Damage might be a sign that the panel needs to be professionally repaired or replaced.
Resetting Electronic Controls
- Consult the User Manual: Many rice cookers come with a reset function. The specific steps can usually be found in the user manual. If you don’t have the manual, check the manufacturer’s website for guidance.
- General Reset Steps: If specific instructions aren’t available, a general method to reset digital rice cookers is to unplug the unit for a few minutes and then plug it back in. This can sometimes reboot the system and clear any temporary glitches.
- Use the Built-in Reset Button: Some models include a reset button on the appliance itself, typically located on the bottom or back of the unit. Press and hold this button according to the instructions in the manual.
Additional Tips
- Firmware Updates: For more advanced rice cookers that support it, check if there are any firmware updates available. These updates can sometimes fix bugs and improve the functionality of the control panel.
- Battery Check: If your rice cooker uses a backup battery for its memory settings (like clock or timer functions), replace the battery. A dying battery can sometimes cause erratic behavior.
- Seek Professional Help: If the control panel is still non-responsive or behaving erratically after trying these steps, it might be time to consult a professional repair service. The issue could be electronic in nature, requiring specialized skills and tools.
Addressing control panel issues promptly can help ensure your rice cooker continues to function efficiently, keeping the inconvenience of malfunctions to a minimum.
Issues with Cooking Cycle
Issues with incomplete cooking cycles in rice cookers can lead to frustrating meal preparations, where rice is either undercooked or inconsistently cooked. Here are some strategies to diagnose and resolve these issues, along with adjustments for achieving consistent cooking performance:
Diagnosing Problems with Incomplete Cooking Cycles
- Check the Lid Seal: If the lid of the rice cooker does not seal properly, steam can escape, preventing the rice cooker from reaching the necessary temperatures to complete the cooking cycle. Ensure that the lid fits snugly and replace any worn-out seals.
- Inspect the Cooking Pot: Ensure that the cooking pot is correctly seated in the rice cooker. A misaligned pot can prevent proper contact with the heating element, disrupting the cooking cycle.
- Evaluate the Water Sensor: Some rice cookers are equipped with sensors that detect the amount of water left in the pot to determine when the rice is done. If these sensors are malfunctioning or obstructed by residue, they may incorrectly judge when the cooking should stop.
- Examine the Thermal Fuse and Heating Element: A faulty heating element or a blown thermal fuse can cause the rice cooker to shut off prematurely. Test these components with a multimeter for continuity and replace them if necessary.
Adjustments for Consistent Cooking Performance
- Correct Water-to-Rice Ratio: Make sure you are using the correct water-to-rice ratio. Variations in this ratio can lead to undercooked or overcooked rice. Consult your rice cooker’s manual for the recommended amounts.
- Even Distribution of Rice: Before starting the cooker, spread the rice evenly in the pot. This helps in uniformly distributing heat and water, leading to more consistent cooking.
- Regular Cleaning: Build-up of starch and other residues can affect the performance of your rice cooker. Clean the pot, lid, and steam vent after each use to maintain optimal functioning.
- Pre-soaking Rice: For some types of rice, especially older grains, pre-soaking the rice for 30 minutes to an hour before cooking can help achieve a more consistent texture and ensure complete cooking.
- Use the Correct Settings: If your rice cooker has multiple settings for different types of rice or dishes, make sure you select the appropriate setting for the kind of rice you are cooking.
- Stirring Mid-Cycle: For some rice cookers, gently stirring the rice midway through the cooking process can help achieve more uniform cooking, though this might not be necessary for all models.
When Adjustments Don’t Work
- If after making these adjustments, your rice cooker still fails to complete its cooking cycles correctly, it may be due to more complex mechanical or electrical issues. In such cases, consulting the user manual for troubleshooting tips or seeking professional repair services might be necessary. Ensuring your rice cooker is well-maintained and correctly used can significantly enhance its performance and extend its lifespan.
Maintenance-Related Problems
Inadequate cleaning and maintenance of your rice cooker can lead to a variety of problems that affect both the performance and longevity of the appliance. Regular and thorough cleaning is essential to ensure it operates efficiently and to avoid issues such as inconsistent cooking, electrical malfunctions, or even complete breakdown. Here’s how improper maintenance can impact your rice cooker and the steps you can take to clean and maintain it properly.
Impact of Inadequate Cleaning and Maintenance
- Build-up of Starch and Residues: Over time, starch from the rice can build up on both the heating element and the inner cooking pot. This residue can insulate the heating element, reducing its efficiency and leading to uneven cooking or longer cooking times.
- Corrosion and Wear: Moisture and food residues can lead to corrosion and other wear on the electrical components and connections within the rice cooker. This can cause electrical failures or hazards.
- Mold and Bacterial Growth: If residues and moisture are left uncleaned, they can lead to mold and bacterial growth, which could be harmful to health and could produce unpleasant odors.
- Sensor Malfunction: Many rice cookers use sensors to measure temperature and other cooking parameters. Dirt and grime on these sensors can impair their accuracy, affecting the cooking process.
How to Clean and Maintain Your Rice Cooker
Daily Cleaning Steps:
- Unplug and Cool Down: Always unplug the rice cooker and allow it to cool completely before cleaning.
- Clean the Inner Pot: Remove the inner cooking pot and wash it with warm, soapy water. Use a soft sponge or cloth to avoid scratching the surface. Rinse well and dry completely.
- Wipe the Heating Plate: Using a damp cloth, gently wipe the heating plate and the area around it. Avoid using abrasive cleaners or pads that could damage the surface.
- Clean the Lid and Steam Vent: Detach the lid if possible, and clean it along with the steam vent. These are common areas where starch can accumulate.
Periodic Maintenance Tasks:
- Check Seals and Gaskets: Regularly inspect any rubber seals or gaskets around the lid. Replace them if they become brittle or cracked to ensure a tight seal and proper cooking pressure.
- Inspect and Clean Sensors: Carefully clean any visible sensors with a soft, dry cloth. Avoid using water directly on sensors.
- Deep Clean for Scale: If you live in an area with hard water, descale the heating element and pot periodically. Use a commercial descaling agent or a natural solution like a mix of vinegar and water. Run the rice cooker with this solution, then rinse thoroughly.
- Tighten Connections: Occasionally check for any loose connections or screws and tighten them as needed. Ensure you do this when the appliance is unplugged.
Storage Tips:
- Store your rice cooker in a dry place to avoid moisture buildup.
- Ensure the rice cooker is clean and completely dry before storing.
- If not used frequently, consider covering it to protect against dust.
By following these maintenance and cleaning steps, you can extend the life of your rice cooker, ensure it performs well, and keep it safe and hygienic for daily use. Regular maintenance not only prevents performance issues but also ensures that every batch of rice comes out perfectly cooked.
Component Failures
Identifying and replacing faulty components in a rice cooker, such as thermal fuses and sensors, can be crucial for maintaining its functionality and safety. However, whether to tackle these issues as a DIY project or to call a professional depends on the complexity of the repair and your comfort level with appliance repair. Here’s a guide on how to approach these tasks:
Identifying Faulty Components
Thermal Fuse:
- Symptoms: The rice cooker doesn’t turn on or stops heating suddenly.
- Diagnosis: Check the fuse for continuity with a multimeter. A lack of continuity indicates a blown fuse.
- Replacement: Locate the fuse, usually near the heating element or in the power line inside the appliance. Carefully remove the blown fuse and replace it with one of the exact same rating.
Sensors:
- Symptoms: Rice cooker turns off too soon, doesn’t reach the right temperature, or overcooks the rice.
- Diagnosis: Sensors can be tested with a multimeter for proper operation, although the exact procedure can vary based on the type of sensor.
- Replacement: If a sensor is found to be defective, it usually requires opening the unit and carefully replacing the faulty sensor with a compatible new one.
When to DIY
- Skills and Tools: If you have a basic understanding of electrical components and access to tools like screwdrivers and a multimeter, you might handle simple replacements like a thermal fuse or a straightforward sensor.
- Safety: Ensure the appliance is unplugged and completely cool before attempting any repairs. Be aware of sharp edges and electrical safety.
- Availability of Parts: Replacement parts should be readily available and specific to the model of your rice cooker. Generic parts may not always be suitable or safe.
When to Call a Professional
- Complex Repairs: If the repair involves intricate disassembly or handling of core electrical components, it’s safer and more prudent to call a professional. This is especially true if the wiring, main control board, or heating element are involved.
- Warranty Considerations: DIY repairs might void any existing warranty on the appliance. If your rice cooker is still under warranty, it’s best to contact the manufacturer for service.
- Risk of Further Damage: Incorrect repairs can lead to further damage or create a safety hazard. If you’re unsure about any part of the process, consulting with a professional is advisable.
General Tips
- Documentation: Keep a record of your rice cooker’s model and serial number, as this will be useful in ordering the correct parts or explaining the issue to a technician.
- Consult Manuals: Many manufacturers provide service manuals or online tutorials that can guide specific repairs for your model.
- Safety First: Never attempt a repair that you are not completely comfortable with, especially when it involves electrical appliances.
Properly identifying the issue and understanding the complexity of the repair are key to deciding whether a DIY approach is appropriate or if it’s time to call in a professional. Regular maintenance and timely repairs can help extend the life of your rice cooker, ensuring it remains a reliable part of your kitchen.
Troubleshooting Tips and Tools
Troubleshooting common problems with your rice cooker can be straightforward if you have the right tools and follow a methodical approach. Here’s a guide detailing the essential tools and resources you might need, along with a step-by-step troubleshooting guide to fix typical issues.
Essential Tools and Resources
- Multimeter: This is crucial for testing electrical components such as fuses, sensors, and heating elements for continuity and proper functionality.
- Screwdrivers: A set of screwdrivers (both Phillips and flat-head) will be needed to open the housing of the rice cooker to access internal components.
- User Manual: This is an invaluable resource for specific troubleshooting steps, part numbers, and diagrams for your particular model.
- Replacement Parts: Identify a reliable source for purchasing replacement components specific to your rice cooker’s brand and model.
- Protective Gear: Always use safety gloves and goggles when dealing with electrical components to protect against accidental shocks or sharp edges.
- Cleaning Supplies: Have on hand a soft cloth, mild detergent, and a non-abrasive scrubber for cleaning various parts of the rice cooker without damaging them.
Step-by-Step Troubleshooting Guide
Step 1: Identify the Symptom
- Start by clearly identifying the problem with your rice cooker (e.g., won’t turn on, doesn’t heat, stops mid-cycle).
Step 2: Check External Factors
- Power Supply: Ensure the rice cooker is plugged into a working outlet. Check the cord and plug for any visible damage.
- Water and Ingredients: Verify that you’re using the correct water-to-rice ratio and that nothing is obstructing the lid or steam vent.
Step 3: Visual Inspection
- Open the Housing: Carefully remove the outer housing of the rice cooker using a screwdriver.
- Inspect for Visible Signs of Damage: Look for burnt areas, melted wires, and damaged components.
Step 4: Test Electrical Components
- Thermal Fuse: Use a multimeter to check for continuity. Replace the fuse if there is no continuity.
- Heating Element: Check the element similarly for continuity. No continuity suggests it needs replacement.
- Sensors: Test sensors for proper operation according to the user manual’s specifications.
Step 5: Clean and Assemble
- Clean Any Residue: Clean all accessible parts, especially the heating element and inner cooking pot, to remove any buildup.
- Reassemble the Cooker: Put everything back together carefully. Ensure all connections are secure.
Step 6: Function Test
- Run a Water Test: Fill the cooker with water and run a standard cycle to check functionality. This will help determine if the issue is resolved without wasting food.
Step 7: Observe and Adjust
- If the problem persists, recheck all components. If everything seems in order but the issue remains, it may be time to consult a professional.
Additional Resources
- Manufacturer’s Website: Often contains FAQs and troubleshooting sections specifically for your model.
- Online Forums: Communities like Reddit or specialized appliance repair forums can offer advice and insights from other users with similar issues.
By following these steps and utilizing the right tools, you can effectively diagnose and resolve many common issues with your rice cooker, saving time and avoiding the cost of unnecessary replacements or professional repairs.
Preventive Measures and Best Practices
Maintaining your Aroma rice cooker in peak condition and preventing future problems involves a series of routine checks and adopting best practices in its use and care. Here’s a comprehensive guide on preventive measures and the best practices you should follow:
Preventive Measures
- Read the User Manual: Understanding the specific instructions for your model is crucial. The manual will provide tailored advice on care, usage, and troubleshooting.
- Use the Right Ingredients: Always use the correct water-to-rice ratio and avoid overfilling the cooker. Excess ingredients can cause overflow, which may damage the cooker’s components.
- Regular Cleaning: After each use, ensure the rice cooker is cleaned properly. This includes washing the inner pot, lid, and steam vent to remove starch and residue. Make sure these parts are dry before reassembling.
- Handle with Care: Be gentle when inserting and removing the inner cooking pot. Rough handling can damage the heating element or the pot itself.
Routine Checks and Maintenance Schedules
- Daily Checks: After each use, inspect for any unusual signs of wear or residue build-up. Ensure the power cord is undamaged and the plug is clean and dry.
- Weekly Checks: Check the integrity of the lid seal and ensure the steam vent is clear of any blockage. A blocked vent can lead to increased pressure and may cause the cooker to malfunction.
Monthly Checks:
- Inspect Electrical Components: Check for any loose or frayed wires. If you notice any, refrain from using the cooker until these have been addressed by a professional.
- Test the Heating Function: Run the cooker empty on a heating cycle to ensure it heats up and shuts off as expected. This can help catch issues before they lead to a breakdown during cooking.
Bi-Annual Checks:
- Deep Clean: Besides regular cleaning, give your rice cooker a deep clean every six months. This involves a thorough cleaning of all parts and possibly descaling the heating element if you live in a hard water area.
- Check for Wear and Tear: Look for any signs of wear on components like the inner pot and replace them if they are worn out.
Best Practices for Longevity
- Store Properly: When not in use, store your rice cooker in a dry, cool place. If storing for an extended period, ensure it is thoroughly cleaned and dry.
- Use for Intended Purpose: Only use your rice cooker for its intended purpose as outlined by the manufacturer. Avoid using it for cooking other foods that might cause damage or undue stress on the appliance.
- Surge Protection: Use a surge protector to plug in your rice cooker to protect it from potential damage from power surges.
- Professional Servicing: If you notice any operational issues that basic troubleshooting doesn’t resolve, consider having the appliance professionally serviced to prevent more significant problems down the line.
By following these preventive measures and maintaining a regular maintenance schedule, you can significantly extend the life of your Aroma rice cooker and ensure it continues to perform at its best, providing perfectly cooked rice every time.
When to Replace Your Rice Cooker
Knowing when to replace your rice cooker can help you avoid frustration and ensure you always have a reliable appliance for your cooking needs. Here are key signs that it might be time to consider replacing your rice cooker, along with some recommendations for upgrading or replacing your appliance.
Signs That It’s Time for a New Rice Cooker
- Frequent Malfunctions: If your rice cooker frequently stops working, fails to heat up properly, or shuts off unexpectedly, it may be a sign that the internal components are worn out.
- Non-Repairable Parts: When critical components like the heating element or internal circuitry are damaged beyond repair, replacement is often more cost-effective than attempting repairs.
- Consistent Performance Issues: If the rice cooker consistently produces undercooked or overcooked rice despite proper use and maintenance, it could indicate a decline in appliance efficiency.
- Physical Damage: Signs of rusting, corrosion, or other physical damage to the body or wiring of the rice cooker can pose safety risks and impair functionality.
- Outdated Technology: If your rice cooker lacks features that newer models have, such as programmable settings, advanced sensors, or energy efficiency, upgrading could enhance your cooking experience.
- Insufficient Capacity: If changes in your household or eating habits mean that your current rice cooker is too small, it might be time to upgrade to a model with a larger capacity.
Recommendations for Upgrading or Replacing Your Rice Cooker
Upgrading Your Appliance:
- Look for Modern Features: Consider models with advanced features like fuzzy logic, which adjusts cooking times and temperatures based on the type of rice and moisture levels. Other desirable features might include settings for different grains, a delay timer, and quick cook functions.
- Energy Efficiency: Newer models are often more energy-efficient. Look for energy-saving settings that reduce power consumption without sacrificing performance.
- Ease of Cleaning: Models with a non-stick inner pot and dishwasher-safe parts can make cleanup much easier.
Choosing a New Rice Cooker:
- Size and Capacity: Determine the appropriate size based on your typical rice cooking needs. Rice cookers can range from small (3 cups) to large (10 cups or more).
- Brand Reliability: Choose brands known for durability and customer service. Research online reviews and product comparisons to find a reliable model.
- Budget: Set a budget based on how frequently you use the rice cooker. Investing in a higher-quality model might be worthwhile if you use it regularly.
Where to Buy:
- Retail Stores: Visiting a physical store allows you to see the models available and possibly get a demonstration.
- Online Retailers: Online shopping can offer more variety and often better prices, but make sure to purchase from reputable sites with good return policies.
Disposal of Old Rice Cooker:
- Recycle: Look for electronic waste recycling programs in your area to dispose of your old rice cooker responsibly.
- Donate: If the old rice cooker is still working but no longer meets your needs, consider donating it to a charity or giving it to someone who could use it.
By considering these factors and recognizing the signs that it’s time to replace your rice cooker, you can make an informed decision that enhances your cooking efficiency and enjoyment.
Frequently Asked Questions (FAQ’s)
Here are some expert-level questions and answers about issues with an Aroma rice cooker not working:
Q: Why won’t my Aroma rice cooker turn on?
A: If your Aroma rice cooker won’t turn on, start by checking the basics:
Power Source: Ensure the cooker is plugged into a working outlet. Test the outlet with another device to verify it has power.
Cord and Plug: Inspect the power cord and plug for any damage or signs of wear.
Internal Fuse: The rice cooker has a thermal fuse that might have blown due to overheating or an electrical surge. This fuse is not resettable and would need replacement.
Q: What should I do if my rice cooker turns on but doesn’t heat up?
A: If the rice cooker turns on but doesn’t heat up:
Heating Element: Check the continuity of the heating element using a multimeter. A broken element will need replacement.
Thermal Sensor: The thermal sensor, which regulates the temperature, might be faulty or misaligned.
Control Board: In some cases, the issue might lie with the control board. This is typically more complex and may require professional service.
Q: My rice cooker starts its cycle but stops mid-way. What could be causing this?
A: Several issues could cause a rice cooker to stop mid-cycle:
Lid Sensor: Some models have a sensor that detects if the lid is closed. Make sure the lid is properly secured.
Overheating: If the cooker is overheating, it may automatically shut off to prevent damage. Ensure it’s not placed near heat sources and that vents are not obstructed.
Faulty Wiring: Check for any loose or damaged wires within the unit.
Q: Why is my rice cooker making unusual noises?
A: Unusual noises can be attributed to:
Water Scale Build-Up: Hard water can lead to mineral buildup on the heating element, which makes popping or cracking sounds as the cooker heats.
Lid Seal: If the seal isn’t tight, steam can escape rapidly, creating a rattling sound.
Component Looseness: Check for any loose components that might rattle during operation.
Q: How can I test and replace the thermal fuse in my Aroma rice cooker?
A: To test and replace the thermal fuse:
Locate the Fuse: Refer to the user manual to find the fuse’s location. It’s typically near the base or in the heating element’s circuit.
Test for Continuity: Disconnect the fuse and test it with a multimeter set to measure continuity. If there’s no continuity, the fuse needs replacing.
Replacement: Purchase a compatible thermal fuse (check the temperature and electrical ratings) and install it. Ensure all connections are secure and isolated before testing the cooker.
Q: What regular maintenance should I perform to prevent my Aroma rice cooker from malfunctioning?
A: Regular maintenance includes:
Cleaning: Regularly clean the inner pot, lid, and steam vent to prevent residue build-up.
Inspections: Periodically inspect electrical cords and plugs for damage and check for loose internal connections.
Avoid Overfilling: Always adhere to the maximum capacity guidelines to prevent overflows and internal damage.
These expert questions and answers cover a broad spectrum of potential issues and solutions related to Aroma rice cookers, helping users troubleshoot and maintain their appliances effectively.
Conclusion
As we’ve explored, encountering issues with your Aroma rice cooker not working can be a frustrating experience, but it’s often one that can be resolved with some basic troubleshooting. By methodically checking power connections, examining key components like the heating element and thermal fuse, and ensuring proper maintenance routines, you can usually pinpoint the problem and get your appliance back to its best. Remember, regular care and immediate attention to small issues will keep your Aroma rice cooker running efficiently for years. Should the problem persist despite your best efforts, it may be time to consult a professional or consider a replacement. Either way, you’re now equipped with the knowledge to handle these challenges swiftly and effectively, ensuring your rice cooker remains a reliable partner in your culinary adventures.