

As an Amazon Associate I earn from qualifying purchases.
Are you looking to perfect your rice cooking skills using your Aroma rice cooker? Whether you’re prepping a family meal or planning for meal prep throughout the week, understanding how to precisely cook 4 cups of rice can streamline your kitchen efforts. This guide offers detailed aroma rice cooker instructions 4 cup, ensuring your rice is perfectly fluffy and ready to complement any dish. Let’s dive into the simple steps and tips that will turn you into a rice cooking expert, making every batch as effortless as it is delicious.
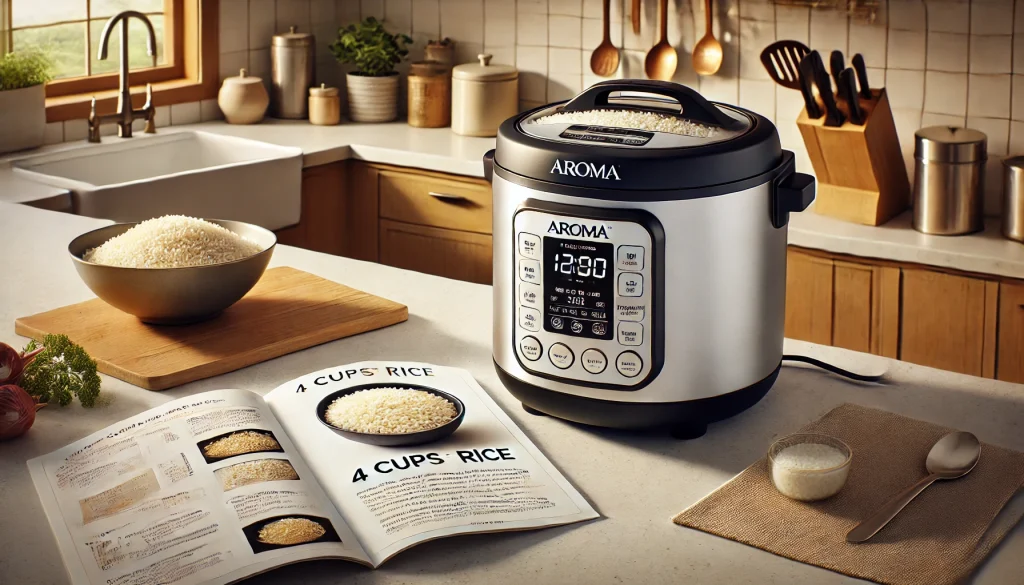
Introduction to Aroma rice cookers and their versatility
Aroma rice cookers are celebrated for their remarkable versatility and ease of use, making them a staple in kitchens around the globe. These appliances do much more than just cook rice; they are designed to assist with a whole range of cooking tasks, making meal preparation simpler and more efficient.
At their core, Aroma rice cookers excel in cooking a wide variety of rice, from the everyday white and brown rice to more specialized types like jasmine, basmati, and even sushi rice. Each model is equipped with tailored settings that adjust cooking times and temperatures to suit the specific type of rice, ensuring perfect results every time.
Beyond rice, these cookers can steam vegetables and proteins, making healthy meals accessible on a busy schedule. The built-in steamer function allows for the simultaneous cooking of rice and steam-cooking of vegetables or fish, optimizing nutrient retention and flavor.
More advanced models include features such as slow cooking, which expands their use to stews, soups, and other one-pot dishes. Some even offer options for baking cakes or making yogurt, showcasing their role as multifunctional cookers that can replace several kitchen appliances.
The Aroma rice cooker’s user-friendly design typically includes digital controls, automatic keep-warm settings, and delay timers, providing convenience and adaptability to any cooking routine. Whether you are a beginner looking to make your first pot of rice or a seasoned chef aiming for the perfect pilaf, an Aroma rice cooker offers the reliability and versatility needed to elevate your culinary creations.
Benefits of cooking larger quantities like 4 cups of rice
Cooking larger quantities of rice, such as 4 cups, in your Aroma rice cooker offers several practical benefits, making it an efficient choice for both daily meals and special occasions. Here’s why cooking in bulk can be advantageous:
1. Time and Energy Efficiency
Cooking a larger batch of rice at one time saves energy compared to cooking several smaller batches. It’s also a more efficient use of time, as you only need to set up and clean up once. This is especially beneficial when you have a busy schedule.
2. Consistency in Quality
When you cook a larger amount of rice at once, you ensure that every serving is cooked under the same conditions, resulting in consistent texture and flavor across the entire batch. This consistency is important when serving rice as a side dish or as part of a larger meal to multiple people.
3. Meal Prep Convenience
Having 4 cups of cooked rice ready at your disposal can be a significant convenience for meal planning. Cooked rice can be stored in the refrigerator for up to a week and still retain its taste and texture, making it easy to use as a base for quick meals throughout the week, such as fried rice, salads, or as a complement to proteins.
4. Versatility for Recipes
Cooking larger quantities provides the flexibility to experiment with different recipes during the week. You can use some of the cooked rice for a side dish one night, turn some into a casserole the next, and use what’s left for a stir-fry or soup. This versatility helps keep meals interesting and allows you to easily adjust your dining options.
5. Cost-Effective
Buying and cooking rice in bulk is often more cost-effective. The per-serving cost of rice decreases when prepared in larger quantities, which can be particularly beneficial for families or those on a budget.
6. Social Gatherings
When hosting guests or family dinners, having a larger quantity of rice ensures there is enough to go around. This makes it easier to cater to larger groups without the need for multiple cooking sessions.
7. Reduced Waste
By cooking exactly the amount needed for several meals, you can reduce food waste. Properly storing and reheating rice ensures that none of it goes to waste, contributing to more sustainable eating habits.
In summary, cooking 4 cups of rice in your Aroma rice cooker can streamline your meal preparation, ensure consistency and quality, save time and money, and provide ample opportunities for creative meal planning. It’s a simple strategy that can have a significant impact on your culinary routine.
Understanding Rice Measurements
Understanding rice measurements, particularly the difference between the rice cooker cup and a standard measuring cup, is crucial for achieving optimal results when using your Aroma rice cooker. Here’s a detailed explanation and why precision matters:
Difference Between Rice Cooker Cup and Standard Measuring Cup
Rice Cooker Cup:
- A rice cooker cup typically holds about 180 milliliters (about 6 fluid ounces).
- It is specifically designed for measuring rice and water ratios in rice cookers and usually comes included with your rice cooker.
Standard Measuring Cup:
- A standard U.S. measuring cup used in cooking holds 240 milliliters (about 8 fluid ounces).
- This is larger than the rice cooker cup and is generally used in most baking and cooking recipes beyond the rice cooker.
Importance of Using the Rice Cooker Cup
- Accuracy in Water-to-Rice Ratio: Using the rice cooker cup ensures that you achieve the correct water-to-rice ratio that your rice cooker is calibrated to handle. This ratio is crucial because it directly affects the texture, fluffiness, and overall quality of the cooked rice.
- Consistency: Consistent use of the rice cooker cup for both rice and water measurements ensures that you get consistent results every time you cook. This consistency is important for reliability, especially if you are cooking rice as part of a larger meal where the outcome impacts other dishes.
- Optimal Performance of Rice Cooker: Rice cookers are designed with specific measurements in mind. Using the correct cup ensures that the cooking times and temperatures programmed into your device work as intended.
Importance of Precise Measurements
- Texture and Cook Quality: The right amount of water affects the grain’s final texture. Too much water can make rice mushy, while too little can make it too firm or even burn it.
- Cooking Efficiency: Precise measurements help your rice cooker operate efficiently. Discrepancies in water and rice levels can lead to longer cooking times or incomplete cooking, which can waste energy and affect the durability of the cooker.
- Avoiding Waste: Accurate measurements also help in minimizing food waste. Cooking the right amount of rice and achieving the desired quality means that the rice is more likely to be eaten and enjoyed rather than thrown away.
By understanding these measurement distinctions and adhering to precise measurements with the appropriate cup, you ensure the best cooking results with your Aroma rice cooker. This not only enhances your meals but also maximizes the effectiveness and lifespan of your appliance.
Preparation of Rice
Preparing rice correctly before cooking is crucial for achieving the best texture and flavor, especially when cooking larger quantities like 4 cups. Here’s a step-by-step guide on how to wash and prepare rice, as well as insights into when and why soaking might be necessary.
Washing Rice
Steps for Washing 4 Cups of Rice:
- Measure the Rice: Use the rice cooker cup to measure out 4 cups of rice. Pour these into the inner cooking pot of your Aroma rice cooker or a separate large bowl.
- Rinse the Rice: Fill the pot or bowl with cold water so that it covers the rice. Swirl the rice gently with your hand or a spoon to release the excess starch.
- Drain the Water: Carefully pour off the cloudy water, taking care not to let the rice escape. You can use a fine mesh strainer or hold the lid slightly ajar to keep the rice inside while allowing the water to drain.
- Repeat: Refill the pot with fresh cold water and repeat the swirling and draining process 2-3 times until the water runs mostly clear. This indicates that most of the excess starch has been removed.
- Final Rinse: Give the rice one last quick rinse and drain thoroughly.
Importance of Washing Rice:
- Washing rice removes excess starch that can make cooked rice gummy or clumpy.
- It also cleans away any impurities or dust that might have settled on the rice during packaging and shipping.
Soaking Rice
When and Why to Soak Rice:
- Brown Rice: Soak brown rice for about 30 minutes to 2 hours before cooking. Brown rice has a tougher bran layer than white rice; soaking helps soften this layer, leading to quicker and more even cooking.
- Basmati and Jasmine Rice: Soaking these types of rice for 30 minutes before cooking helps the grains expand to their full length and cook more evenly, enhancing the texture and aromatic qualities.
- Sushi Rice: Soak sushi rice for about 30 minutes to allow the grains to absorb water evenly before cooking. This step is crucial for achieving the right texture for sushi — firm yet tender.
Steps for Soaking Rice:
- After washing the rice, fill the pot with fresh water so that it covers the rice by an inch.
- Let the rice sit in the water for the recommended soaking time depending on the type of rice.
- Drain the rice thoroughly after soaking. This ensures that you don’t use too much water during the actual cooking, which is calibrated based on specific water-to-rice ratios.
Benefits of Soaking Rice:
- Soaking can enhance the texture and appearance of the cooked rice.
- It can reduce cooking time and save energy.
- Soaking improves digestibility by starting the breakdown of complex carbohydrates.
By following these detailed steps for washing and soaking your rice, you can greatly improve the quality and texture of your final dish. This preparation ensures that your Aroma rice cooker performs at its best, delivering perfectly cooked rice every time.
Setting Up the Aroma Rice Cooker
Setting up your Aroma rice cooker properly is crucial for its efficient operation and longevity. Here’s an overview of the essential components of the rice cooker, their functions, and step-by-step instructions on how to prepare it for use.
Overview of Essential Components and Their Functions
Main Body/Heating Element:
- Houses the internal cooking components and contains the primary heating element that cooks the food.
Inner Cooking Pot:
- A removable pot where the rice and other ingredients are placed. It’s usually coated with a non-stick material to prevent sticking and ensure easy cleanup.
Lid:
- Keeps steam and heat contained within the cooker for efficient cooking. It may be hinged or fully detachable depending on the model.
- Often features a vent to release excess steam and prevent overflow.
Control Panel:
- Includes buttons and sometimes a digital display to select cooking modes and functions. Common settings include white rice, brown rice, steam, and keep warm.
Measuring Cup:
- Comes with the rice cooker for measuring rice and water. It is typically smaller than a standard U.S. measuring cup, holding about 180 milliliters.
Rice Paddle:
- A plastic or wooden utensil used to stir and serve rice without scratching the non-stick surface of the inner pot.
Steam Tray:
- An optional component used for steaming vegetables, fish, or dumplings above the rice. It allows for simultaneous cooking of multiple items.
Instructions for Preparing the Rice Cooker for Use
Unpack and Inspect:
- Remove all packaging materials and inspect the rice cooker for any shipping damage. Ensure all parts are included according to the manual.
Clean Before First Use:
- Wash the inner cooking pot, rice paddle, measuring cup, and steam tray (if included) with warm soapy water. Rinse and dry thoroughly to remove any residues from manufacturing.
- Wipe the main body and lid with a damp cloth. Be careful not to let water enter the heating element.
Assemble the Cooker:
- Place the inner cooking pot inside the main body of the rice cooker. Ensure it sits evenly on the heating element.
- If using the steam tray, check the instructions for how to properly place it above the inner pot.
Connect to Power:
- Plug the power cord into a suitable outlet. Avoid using an extension cord unless necessary, as this could pose a safety hazard.
Test Run:
- It’s a good idea to do a test run with just water. Fill the pot with water using the measuring cup, select a basic cooking setting, and let the cooker complete a cycle. This helps ensure everything is working correctly and removes any leftover residues.
Familiarize with Controls:
- Review the control panel and familiarize yourself with different settings and functions. Try selecting different modes to see how they are displayed and confirmed.
By following these steps, your Aroma rice cooker will be set up properly and ready for its first real cooking task. Proper setup not only ensures safety but also enhances the performance of your rice cooker, allowing you to enjoy perfectly cooked rice and other dishes with minimal effort.
Step-by-Step Cooking Instructions
Cooking the perfect rice in your Aroma rice cooker involves accurate measuring of both rice and water, as well as selecting the right settings for different types of rice. Here’s a step-by-step guide to help you through the process:
Step 1: Measuring and Adding 4 Cups of Rice
- Measure the Rice: Use the measuring cup that came with your Aroma rice cooker. Each cup typically equals about 180 milliliters, smaller than a standard U.S. measuring cup. Measure out 4 cups of rice.
- Wash the Rice: Before cooking, rinse the rice to remove excess starch which helps prevent clumping and improves texture. Place the rice in the inner cooking pot or a separate bowl, cover with cold water, gently swirl the rice, then drain. Repeat this process 2-3 times until the water runs clearer.
- Add Rice to the Cooker: Place the washed and drained rice back into the inner cooking pot of your rice cooker.
Step 2: Adding the Right Amount of Water
- White Rice: Generally, the water ratio for white rice is about 1:1.5. For 4 cups of rice, add 6 cups of water.
- Brown Rice: Brown rice needs more water due to its denser nature. Use a 1:2 ratio. For 4 cups of rice, add 8 cups of water.
- Basmati Rice: Basmati does well with a 1:1.5 ratio as it needs less water to preserve its delicate structure. For 4 cups of basmati, add 6 cups of water.
- Sushi Rice: For sushi rice, use a slightly lower water ratio to achieve firmer grains suitable for sushi. Use a 1:1.25 ratio. For 4 cups of rice, add 5 cups of water.
Step 3: Selecting the Correct Cooking Settings
- White Rice Setting: Most basic for cooking standard white rice. This setting adjusts the cooking time and temperature to produce fluffy, soft white rice.
- Brown Rice Setting: Uses a longer cooking time to accommodate the tougher bran layer found on brown rice.
- Quick Cook or Turbo Setting: If you’re in a hurry, this setting cooks rice faster by increasing the cooking temperature.
- Specific Grain Settings: Some advanced models may have settings tailored for basmati or sushi rice. Use these if available for best results.
Understanding the Controls
- Start Cooking: Once you’ve added your rice and water and selected the setting, close the lid securely. Press the start button to begin cooking. The rice cooker will automatically adjust the cooking time based on the amount of water and rice.
- Keep Warm: After the rice is cooked, the rice cooker will typically switch to a ‘keep warm’ mode automatically, keeping your rice at an ideal temperature for serving without overcooking it.
By following these steps, you can ensure your Aroma rice cooker yields perfectly cooked rice every time, whether you’re preparing a meal for a family dinner or setting the base for a gourmet dish. Remember, the key to perfect rice lies in the precise ratio of water to rice and selecting the appropriate cooking setting for the type of rice you are preparing.
Monitoring the Cooking Process
Monitoring the cooking process in your Aroma rice cooker can help you understand what’s happening inside the cooker and ensure that your rice turns out as desired. Here’s what to expect during the cooking cycle and some tips on how to check the progress without interrupting the cooking.
What to Expect During the Cooking Cycle
- Heating Phase: Initially, the rice cooker will heat the water to a boil. During this phase, you will hear bubbling sounds, and you might see steam escaping through the vent.
- Absorption Phase: Once the water reaches boiling point, the rice begins to absorb the water. The cooker will reduce its temperature slightly to maintain a simmer. This phase is quieter, as the boiling becomes less vigorous.
- Steaming Phase: After the rice has absorbed most of the water, the temperature inside the cooker begins to rise, triggering the cooker to enter a steaming phase. This is crucial for completing the cooking process and helps the rice to become fluffy.
- Completion: Most Aroma rice cookers will automatically switch to a “keep warm” mode once the rice is cooked. This change is often indicated by a click sound and a change in the light or display on the control panel.
Tips on How to Check Progress Without Interrupting the Cooking
- Resist the Urge to Open the Lid: Every time you open the lid, steam and heat escape, which can affect the cooking time and the quality of the rice. It’s important to trust the process and let the rice cooker do its job.
- Use the Clear Lid (if available): Some models come with a clear lid that allows you to watch the progress without opening the cooker.
- Listen for Sounds: Listening to the sounds of the cooker can give you clues about which stage of the cooking process the rice is in. The change from boiling to simmering to the click of the “keep warm” function can tell you a lot about the progress.
- Check the Light or Display: Most rice cookers have indicator lights or displays that show when the rice is cooking and when it has switched to “keep warm.” This is a non-intrusive way to monitor the progress.
- Smell: As the rice nears completion, you’ll begin to smell the subtle, nutty aroma of cooked rice if the lid is close to sealing perfectly. This is often a good indicator that your rice is nearly or completely done.
- Timed Checks: If you are really unsure, time your checks. Most white rice takes about 18-20 minutes to cook. You can safely take a quick peek closer to the end of the expected cooking time.
By understanding what to expect during each phase of the cooking process and utilizing these tips for checking progress, you can ensure that your rice cooks perfectly every time without needing to interrupt the cycle. This way, you maintain the integrity of the cooking environment inside your Aroma rice cooker for the best results.
Finishing and Serving
Once your rice is cooked in the Aroma rice cooker, a few final steps will ensure that it has the best possible texture and flavor when served. Here’s how to finish and serve your rice effectively:
Steps to Follow Once Cooking is Complete
- Automatic Switch to ‘Keep Warm’: Most Aroma rice cookers automatically switch to a “Keep Warm” mode once the cooking process is finished. This helps keep the rice at an ideal serving temperature without overcooking it.
- Let the Rice Stand: Before you fluff and serve the rice, it’s important to let it stand for a few minutes. This standing time allows the temperatures within the rice to equalize and the remaining moisture to be absorbed, which helps prevent the rice from being wet or mushy.
- White Rice: Let it stand for about 10 minutes.
- Brown Rice: It benefits from a slightly longer standing time, about 15 minutes, due to its denser nature.
Best Practices for Fluffing Rice Before Serving
- Use the Right Tool: Use the rice paddle that came with your cooker or a wooden spoon to fluff the rice. These tools are gentle on the rice and prevent the grains from breaking.
Fluffing Technique:
- Open the lid after the standing period and insert the paddle vertically into the rice.
- Gently fluff the rice by turning it over from bottom to top. This helps separate any clumps and distributes moisture evenly.
- Work your way around the pot to evenly fluff all the rice.
- Avoid Over-Stirring: While it’s important to fluff the rice to break up clumps and release steam, over-stirring can make the rice gummy. Be gentle and quick.
- Incorporate Seasonings or Additional Ingredients: If you plan to add seasonings, like herbs, butter, or a splash of soy sauce, do so during the fluffing process. This ensures that the additions are evenly distributed throughout the rice.
- Rest Briefly After Fluffing: Once fluffed, let the rice sit uncovered for a minute or two before serving. This brief rest allows the surface moisture to evaporate, which enhances the texture.
- Serve Warm: Serve the rice while it’s still warm for the best taste and texture. If you need to keep the rice warm for a longer period, leave it in the “Keep Warm” mode, but try to avoid leaving it for more than an hour or two, as it might start to dry out.
By following these steps and best practices, you’ll ensure that your rice is fluffy, evenly cooked, and deliciously prepared for any meal. This careful finishing process can make all the difference in the presentation and enjoyment of your rice dishes.
Troubleshooting Common Issues
Cooking larger quantities of rice in your Aroma rice cooker can sometimes present challenges, leading to issues like undercooked or overcooked rice. Here are strategies for identifying common cooking errors and adjusting your cooking settings to achieve consistent, delicious results every time.
Troubleshooting Common Issues
Undercooked Rice:
- Symptoms: The rice is hard in the middle or unevenly cooked.
- Possible Causes: Insufficient water, the lid was not sealed properly, or the rice wasn’t washed thoroughly.
Solutions:
- Increase Water: Adjust the water ratio slightly, especially for larger batches. For example, add an extra ¼ to ½ cup of water.
- Ensure Lid Seal: Make sure the lid is properly closed and sealed to prevent steam from escaping.
- Even Distribution: After adding water and rice, stir to ensure the rice is evenly distributed and fully submerged.
Overcooked or Mushy Rice:
- Symptoms: Rice is too soft, sticky, or water remains at the end of the cycle.
- Possible Causes: Too much water or the cooker was left on ‘Keep Warm’ for too long.
Solutions:
- Reduce Water: Decrease the water slightly. Experiment with reducing by ¼ cup increments until you find the right balance.
- Monitor ‘Keep Warm’ Time: Avoid leaving the rice on ‘Keep Warm’ for extended periods as it can continue to cook the rice. If possible, transfer the rice to another container once it’s cooked.
Adjusting Cooking Settings for Consistent Results
Calibrate Water-to-Rice Ratios:
- Experiment with slightly adjusting the water-to-rice ratio to accommodate your specific Aroma model and the type of rice you are using. Different models might heat differently, and rice types (like basmati vs. short grain) absorb water at different rates.
Use Specific Settings for Different Rice Types:
- Utilize specialized settings if your cooker has them. For example, use the ‘Brown Rice’ setting for brown rice, which adjusts cooking times and temperatures to handle its tougher texture.
- For white rice and basmati, the standard settings usually suffice, but adjustments in water might still be needed.
Experiment with Soaking:
- For tougher grains like brown or wild rice, consider soaking the rice before cooking. This can reduce cooking time and result in a better texture.
Consistent Measurement:
- Always use the measuring cup provided with your rice cooker for both rice and water. Consistency in measurement is key to consistent results.
Regular Maintenance:
- Keep your rice cooker clean, including the inner pot, lid, and steam vent. Build-ups can affect cooking performance.
- Ensure that the heating element is not obstructed and that the inner pot makes good contact with it.
By understanding and addressing these common issues, and adjusting your cooking approach accordingly, you can master the art of cooking larger rice quantities in your Aroma rice cooker. This will ensure that each batch of rice turns out perfectly, enhancing both everyday meals and special gatherings.
Cleaning and Maintenance
Proper cleaning and maintenance of your Aroma rice cooker are key to ensuring its longevity and optimal performance. Here’s how you should clean your cooker after use and maintain it over time.
Cleaning Methods Post-Cooking
- Allow to Cool: Always let your rice cooker cool down completely before starting any cleaning to avoid burns and thermal shock to the components.
Inner Cooking Pot:
- Remove the inner pot from the rice cooker.
- Wash it with warm soapy water using a soft sponge or cloth. Avoid using abrasive scrubbers, which can damage non-stick surfaces.
- Rinse thoroughly with clean water and dry before replacing it in the cooker.
Lid and Steam Vent:
- If the lid is removable, take it off and wash it under warm soapy water. Be gentle with any vent or valve components to ensure they do not get damaged.
- Use a soft brush or cloth to clean any hard-to-reach areas around the steam vent.
Heating Element and Interior:
- Wipe the heating element and the interior of the cooker with a damp cloth. Make sure the cloth is not too wet, as excess water can damage the electrical components.
- Ensure that no food particles or residue remain, as these can cause smoke or burning smells during cooking.
Exterior and Control Panel:
- Clean the exterior of the rice cooker with a soft, damp cloth. You can use a mild detergent if necessary.
- Avoid using harsh chemicals or abrasive materials on the control panel, as this can wear off labels and affect functionality.
Tips for Maintaining the Aroma Rice Cooker
Regular Inspection:
- Regularly inspect the power cord and plug for any signs of wear or damage. If you notice any fraying or exposed wires, do not use the cooker and consider having it repaired or replaced.
Avoid Moisture in Electronics:
- Be cautious not to allow water or any other liquids to enter the electrical components of the cooker, including the base unit and control panel.
Storage:
- Store the rice cooker in a dry place when not in use. If storing for a long period, ensure it is completely clean and dry to prevent mold and odors.
- Do not store the rice cooker with the lid tightly closed as this can trap odors. Leave it slightly ajar or store the lid separately.
Descale for Hard Water Users:
- If you live in an area with hard water, descale the pot periodically. Fill the pot with a mixture of equal parts water and vinegar, let it sit for an hour, then run a normal cooking cycle without rice, followed by thorough rinsing.
Handle Non-Stick with Care:
- Use wooden or plastic utensils instead of metal to avoid scratching the non-stick surface of the inner pot.
- If the non-stick coating starts to wear off or becomes damaged, consider replacing the pot to ensure food safety and optimal cooking results.
By following these cleaning and maintenance guidelines, you can help ensure that your Aroma rice cooker remains a reliable and efficient kitchen appliance for years to come. Proper care not only extends the life of your rice cooker but also ensures that it continues to produce perfectly cooked rice every time.
Advanced Tips and Recipe Ideas
Utilizing 4 cups of cooked rice from your Aroma rice cooker can open up a myriad of creative culinary possibilities. Here are some innovative recipe ideas and expert tips to enhance the flavor and texture of your dishes.
Creative Recipes Using 4 Cups of Cooked Rice
Rice Cooker Spanish Paella
- Ingredients: 4 cups cooked rice, saffron threads, chicken broth, olive oil, 1 chopped onion, 2 minced garlic cloves, 1 diced red bell pepper, diced tomatoes, peas, a mix of seafood (shrimp, mussels, clams), chorizo slices, lemon wedges.
- Preparation: Use the sauté function on your cooker for onions, garlic, and bell peppers until soft. Add tomatoes, peas, seafood, and chorizo. Stir in saffron-infused chicken broth, then the cooked rice. Cook until all flavors meld together.
- Serving: Garnish with fresh parsley and lemon wedges.
Coconut Lime Rice with Mango
- Ingredients: 4 cups cooked rice, 1 can coconut milk, zest and juice of 1 lime, 1 diced mango, fresh cilantro, toasted coconut flakes, salt.
- Preparation: Mix cooked rice with coconut milk, lime zest, and juice. Warm through if necessary. Stir in mango pieces and cilantro just before serving.
- Serving: Top with toasted coconut flakes and additional lime wedges.
Cajun Jambalaya in Rice Cooker
- Ingredients: 4 cups cooked rice, olive oil, 1 diced onion, 1 diced bell pepper, celery sticks chopped, garlic cloves minced, chopped Andouille sausages, chicken pieces, Cajun seasoning, diced tomatoes, chicken broth.
- Preparation: Use the sauté function for onions, bell peppers, celery, and garlic. Add sausages, chicken, and Cajun seasoning, cooking until brown. Mix in tomatoes and broth, then add the cooked rice. Cook until everything is heated through.
- Serving: Serve hot, garnished with sliced green onions.
Fried Rice with Egg and Vegetables
- Ingredients: 4 cups cooked rice, soy sauce, sesame oil, mixed vegetables (carrots, peas, corn), eggs, chopped green onions.
- Preparation: Heat sesame oil, scramble eggs directly in the cooker. Add vegetables and stir until cooked. Mix in the rice and soy sauce, ensuring everything is well combined.
- Serving: Garnish with green onions and a drizzle of additional sesame oil.
Expert Tips for Enhancing Flavor and Texture
- Season While Cooking: Adding broth, coconut milk, or seasoned water to cook the rice instead of plain water can greatly enhance the flavor from the inside out.
- Incorporate Fresh Herbs and Aromatics: Adding fresh herbs and aromatics like garlic, ginger, or lime zest towards the end of the cooking process retains their potent flavors and fragrances.
- Use Toasting Techniques: Before cooking, lightly toast the rice in a bit of oil or butter directly in the rice cooker until golden. This adds a nutty flavor and separates the grains beautifully.
- Rest and Fluff: Always allow your cooked rice to rest covered for 10 minutes after cooking. Then, fluff with a fork to separate grains and release any excess steam, which prevents the rice from becoming mushy.
- Add Crunch and Color: Just before serving, add ingredients that provide a textural contrast, such as nuts, seeds, or crisp vegetables, to enhance the eating experience.
By utilizing these creative recipes and expert tips, you can transform 4 cups of cooked rice into a spectacular meal that delights with every bite. Whether you’re making a comforting bowl of jambalaya or a refreshing coconut lime rice, these ideas will help you make the most of your Aroma rice cooker.
Frequently Asked Questions (FAQ’s)
Here are some expert-level questions and answers focused on using an Aroma rice cooker for cooking 4 cups of rice, tailored for different rice types and cooking considerations.
Q: What is the optimal water-to-rice ratio for cooking 4 cups of white rice in an Aroma rice cooker?
A: For cooking 4 cups of white rice in an Aroma rice cooker, the optimal water-to-rice ratio is typically 1:1.5. This means you would use 6 cups of water for 4 cups of rice. This ratio ensures that the rice is fluffy and not too moist.
Q: How should I adjust the water ratio for cooking 4 cups of brown rice in my Aroma rice cooker?
A: Brown rice requires more water than white rice. A good rule of thumb is a 1:2 ratio of rice to water. For 4 cups of brown rice, you would therefore use 8 cups of water. The additional water compensates for the tougher bran layer that brown rice has, which absorbs more water during cooking.
Q: Can I cook different types of rice together, such as mixing white and brown rice, in the rice cooker? If so, how should I adjust the settings and water ratios for 4 cups?
A: Cooking different types of rice together is not recommended as they have different cooking times and water requirements. White rice cooks faster and requires less water compared to brown rice, which needs more water and a longer cooking time. Mixing them could result in unevenly cooked rice, where some grains are overcooked and others are undercooked.
Q: What is the best way to add flavor to 4 cups of rice cooked in an Aroma rice cooker?
A: To enhance the flavor of 4 cups of rice, consider cooking the rice in chicken, beef, or vegetable broth instead of water. You can also add seasonings such as garlic powder, onion powder, or herbs like rosemary and thyme to the water before cooking. Another method is to sauté onions, garlic, or spices in the rice cooker if it has a sauté function before adding the rice and water.
Q: How can I use the ‘Delay Timer’ feature for cooking 4 cups of rice, and what are the benefits?
A: The ‘Delay Timer’ feature is particularly useful for having rice ready at a specific time without needing to start the cooker manually. For 4 cups of rice, add the rice and the appropriate amount of water to the cooker, then set the delay timer to finish cooking when you need it. This is great for meal planning, ensuring you have freshly cooked rice ready for dinner right when you get home.
Q: What should I do if my rice is consistently undercooked or overcooked when I attempt to cook 4 cups in my Aroma rice cooker?
A: If your rice is consistently undercooked, it may indicate not enough water or too short a cooking time. Try increasing the water slightly or using a longer cooking cycle. If the rice is overcooked, try reducing the amount of water or selecting a shorter cooking program. Also, ensure that the sealing lid is tight and intact, as steam escaping can affect cooking performance.
By understanding these details and adjusting your methods accordingly, you can master cooking various types of rice in your Aroma rice cooker, ensuring perfect results every time.
Conclusion
In conclusion, mastering the Aroma rice cooker instructions for 4 cups of rice is essential for anyone looking to simplify their cooking process while ensuring consistent results. Whether you’re preparing a daily family meal or planning a special gathering, understanding the correct water-to-rice ratios, adjusting settings for different types of rice, and using features like the ‘Delay Timer’ can transform your rice dishes into delightful culinary creations. Embrace the versatility and convenience of your Aroma rice cooker, and let it help you achieve perfectly cooked rice every time, making mealtime both enjoyable and effortless.


